Pass › Pass Teacher/Staff Guide
Setting up a Kiosk
Kiosk location availability
No. You cannot limit which destination locations are available on an individual Kiosk. All eligible kiosk destinations are shown. Limit Location Availability restricts destinations for selected students—not for a Kiosk or departure location.
If you are searching for how to limit locations on a kiosk, configure kiosk destinations, or restrict kiosk locations, per-Kiosk destination restrictions are not supported.
Teacher Pass availability
Teacher Passes cannot be created from Kiosk mode. Only students can create a kiosk pass.
A Kiosk allows students to create passes from a single device in situations where they might not have access to their own.
There are several different ways to set up a Kiosk. First, you need to choose whether you want the Kiosk to be set up under your name or a location with which you are associated.
REMEMBER:
If you want the Kiosk to mirror your Auto Pass settings, it will need to be set up under your name.
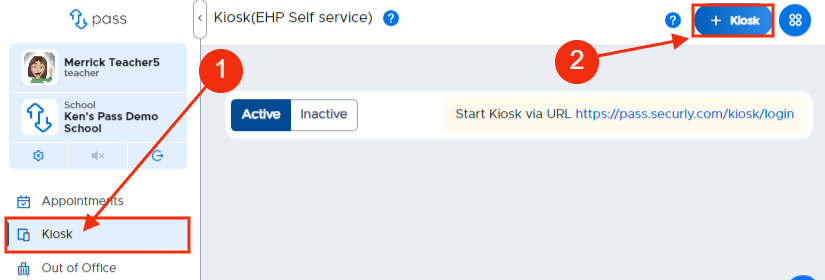
Once you have made your selection, you will need to click Kiosk from the menu (1) and then click
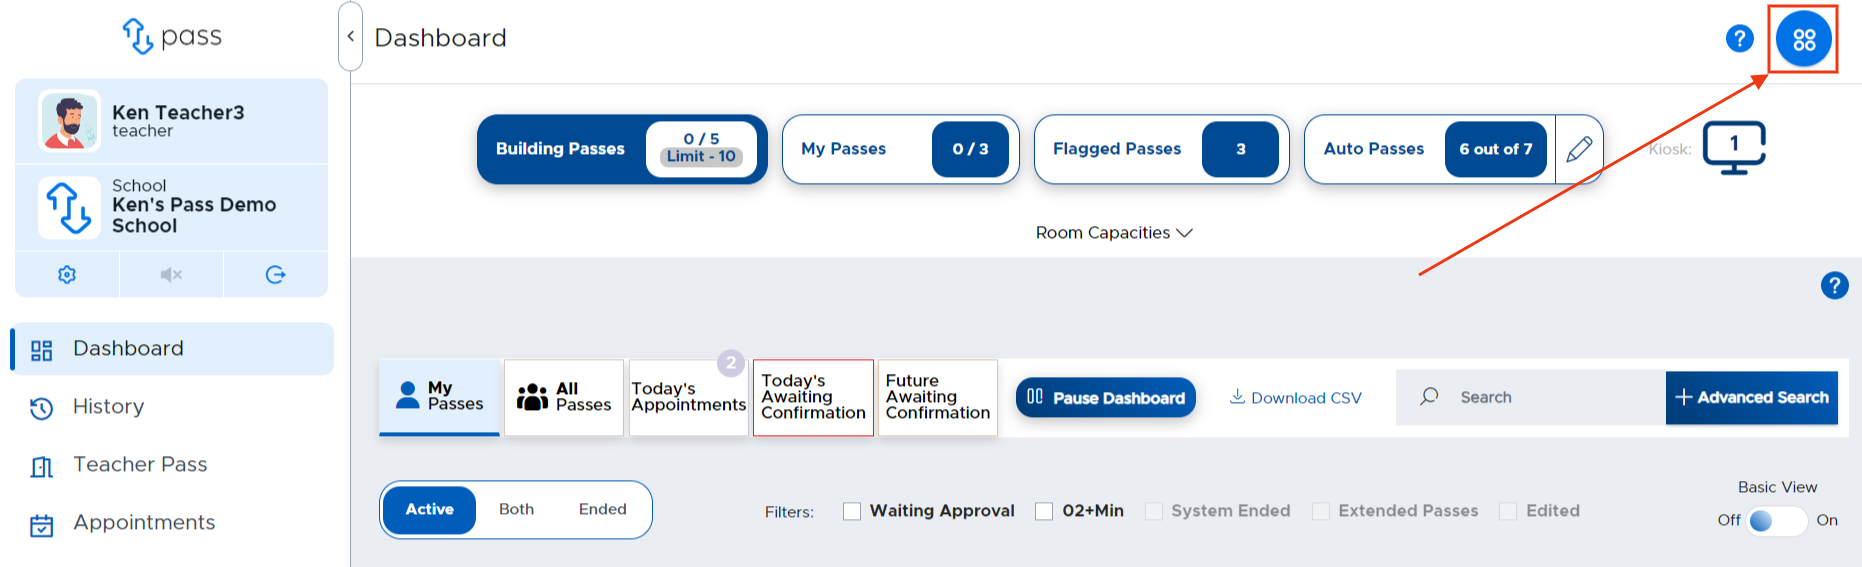
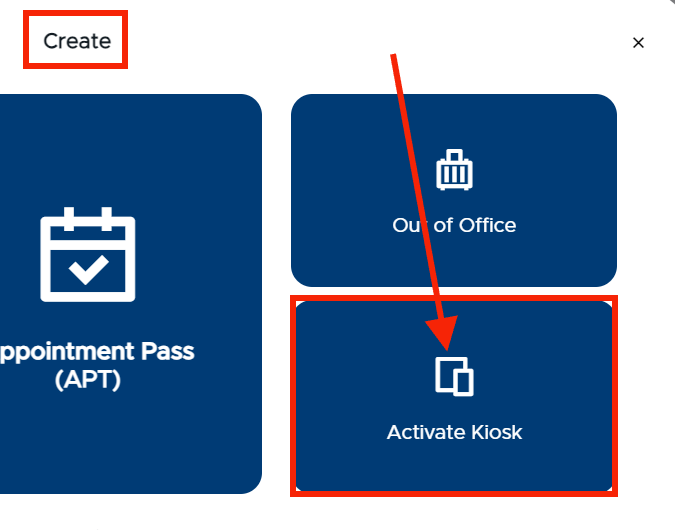
+ Kiosk (2) to create the Kiosk; or click on the Create icon in the upper right corner, click the blue Activate Kiosk tile, and then click on the + Kiosk button
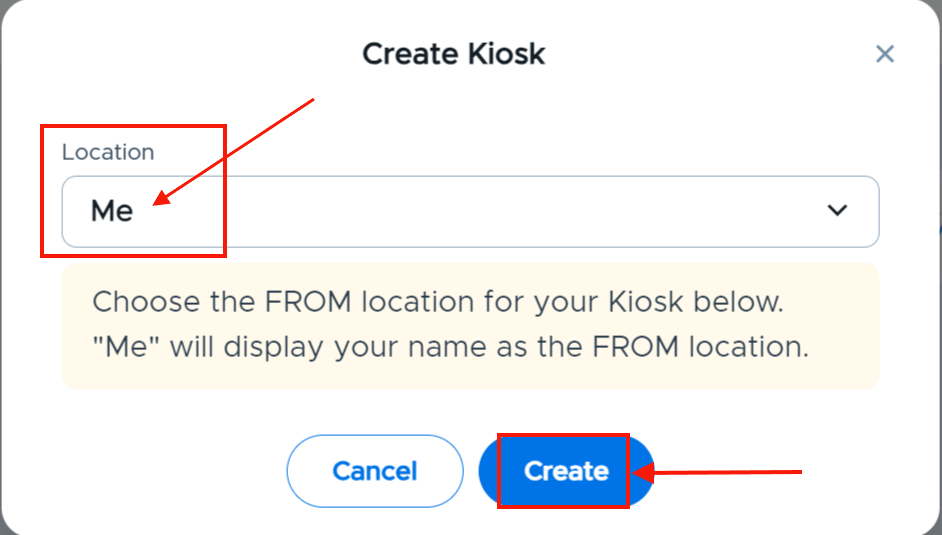
On the popup screen, select yourself or the location from which the passes will originate.
IMPORTANT NOTE:
If you launch a Kiosk from you (“Me”), your Auto Pass locations that you selected will also work on the Kiosk.
If you launch a Kiosk from a location, your Auto Pass locations that you selected will NOT function as Auto Passes. Students can select those locations, but you will need to approve the pass from the Kiosk.
After the Kiosk has been created, you have two options to launch the Kiosk:
Option 1 - Launch directly from your device
Option 2 - Start Kiosk via URL (https://pass.securly.com/kiosk/login)
Option 1 - Launch directly from your device
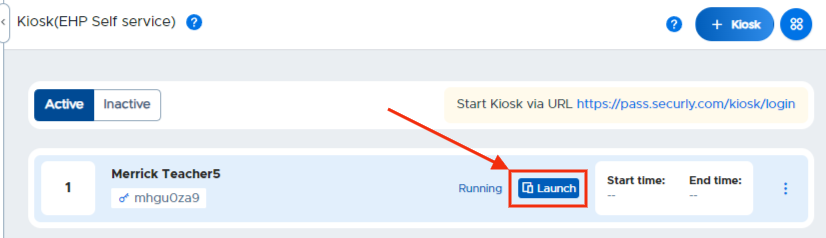
Click on the blue “Launch” button on the Kiosk screen. (Doing so will turn your laptop into a Kiosk.)
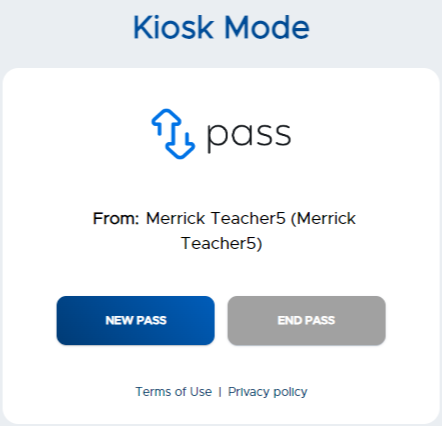
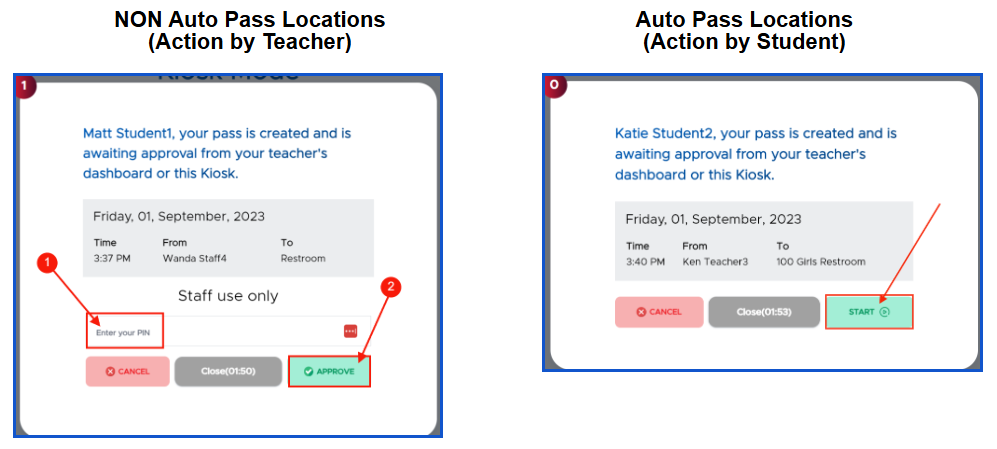
Students can then use the Kiosk to create a pass to another location in the building. For non-Auto Pass locations, you will need to enter your PIN to approve the pass from the Kiosk or approve the pass from your Dashboard. For Auto Pass locations, the student can click on the “Play” button to start the pass.
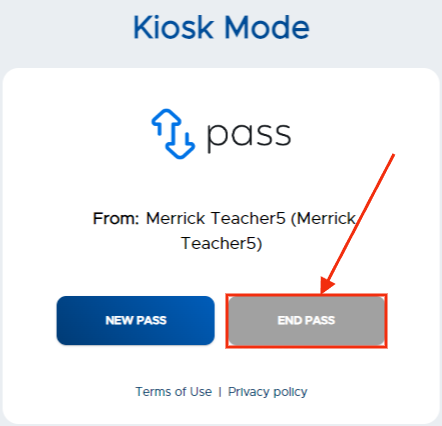
When a student returns to class, the student simply clicks on END PASS, enters the appropriate information, and clicks END PASS again.
Option 2 - Start Kiosk via URL (https://pass.securly.com/kiosk/login)
This option allows you to launch a Kiosk from a shared device so that you still have access to your laptop.
On the shared device, use this URL (https://pass.securly.com/kiosk/login) to launch your Kiosk. You will be prompted to enter your Kiosk code from your Pass Kiosk screen. Click on Submit to start the Kiosk.
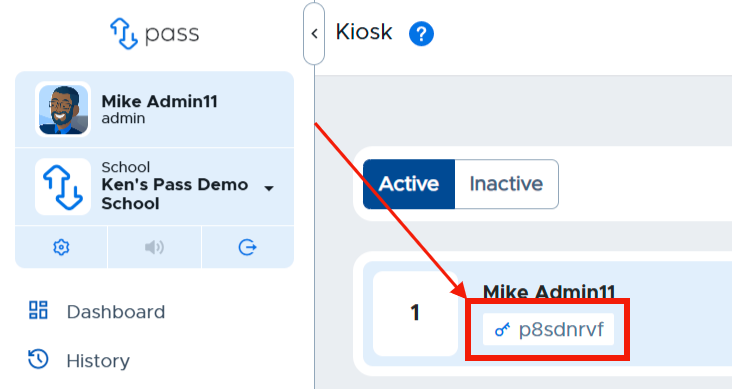
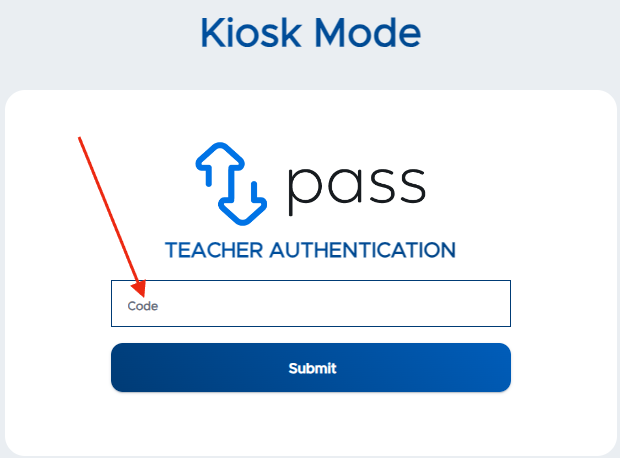
Once started, the Kiosk will function the same way that is described above.
(After you have created a Kiosk session, that session will remain on the Kiosk screen. You can then adjust that session by clicking the three dots to “Send” the code, “Regenerate” a new code, or “End” the current Kiosk.)

Once generated, your Kiosk will remain active for at least 10 days. When it times out, simply click on Kiosk on the side menu and click on the + Kiosk button; or click on the Create icon in the upper right corner, click the blue Activate Kiosk tile, and then click on the + Kiosk button and follow the steps outlined above.
Kiosk and student pass limits
A Kiosk changes where a student creates a pass; it does not change whether student pass limits apply. Student-created passes, including Auto Passes created through a Kiosk, count toward the student’s configured daily, weekly, and monthly limits. Auto Pass does not override or bypass those limits.
Teacher-created passes and appointment passes remain excluded. If a student creates more Auto Passes than their configured limit permits, submit a Zendesk Support ticket for investigation.
For configuration details, see Limit Student Pass.