Pass › Pass Teacher/Staff Guide
Queue Management and Kiosks
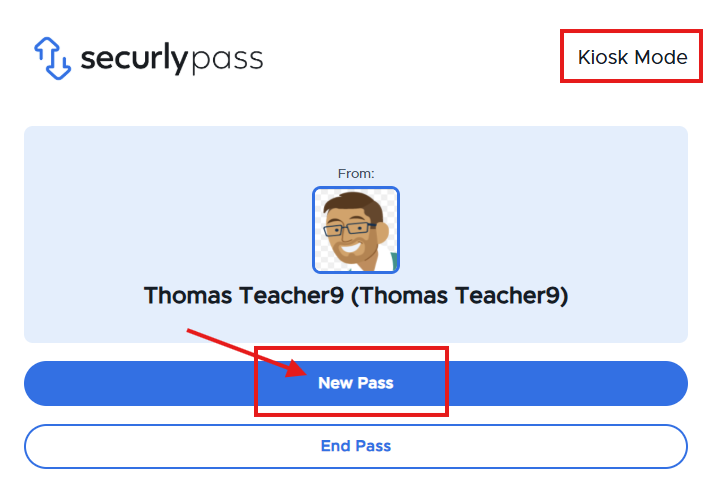
Using a kiosk, the student clicks New Pass.
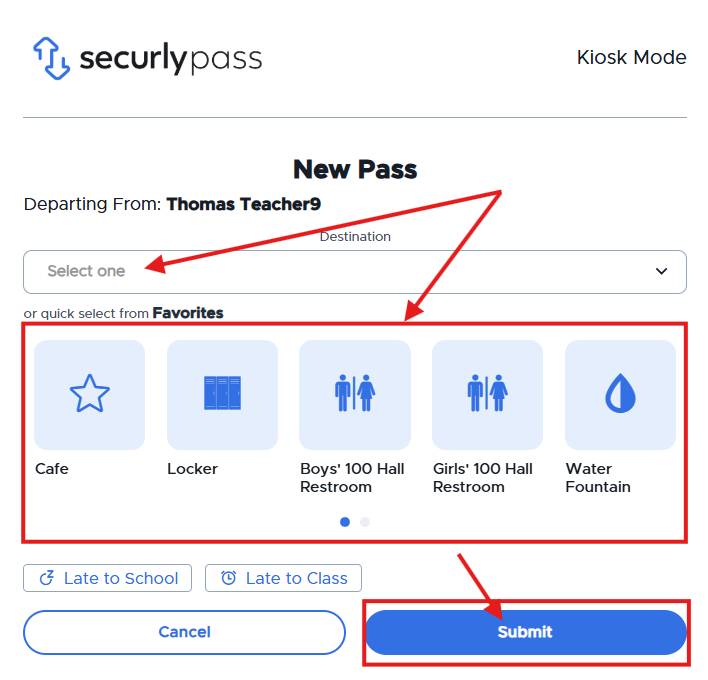
On the next screen, the student chooses the destination location from the list of favorites or types the name of the location and clicks Submit.
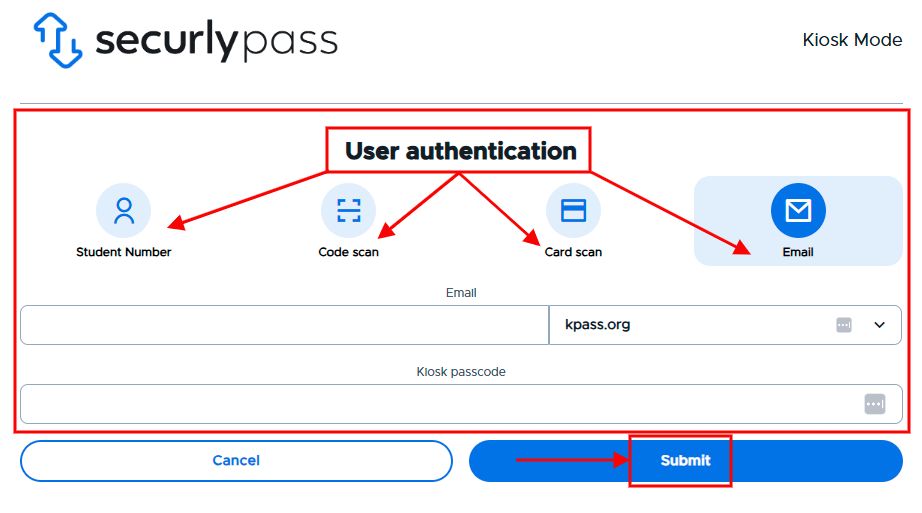
On the next screen, the student will choose the method of authentication and enter the appropriate information and click Submit.
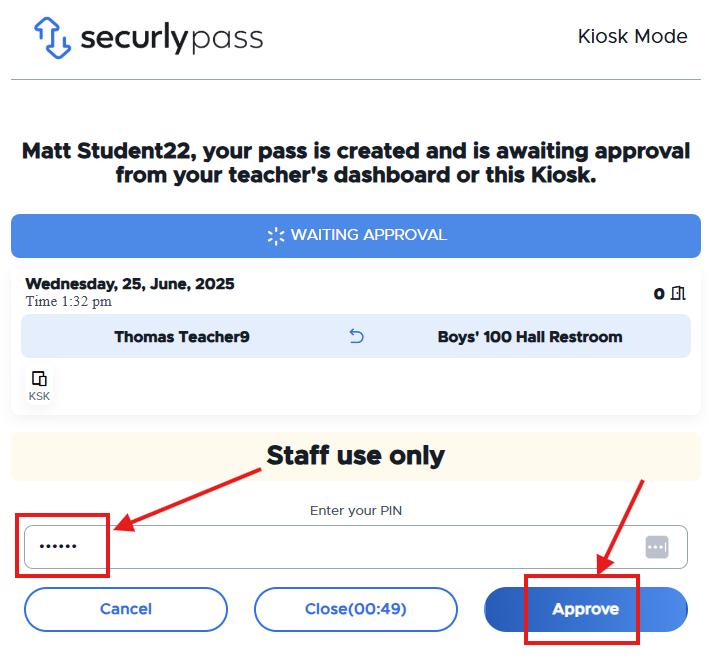
The adult will then enter their PIN and click Approve.
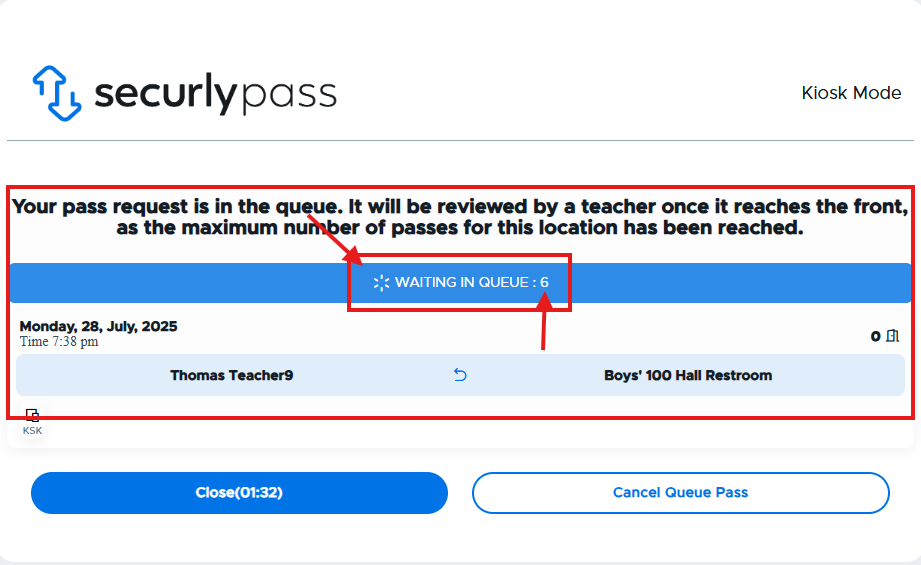
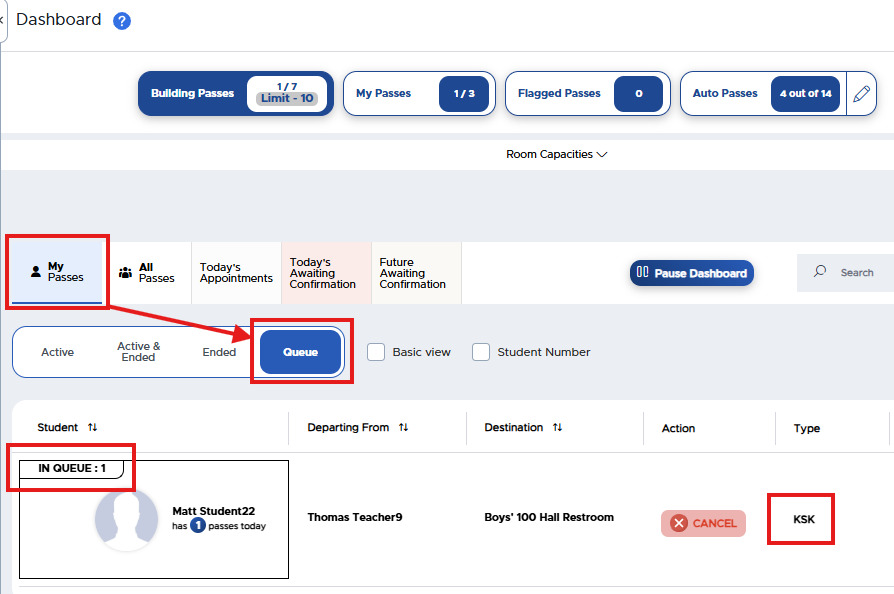
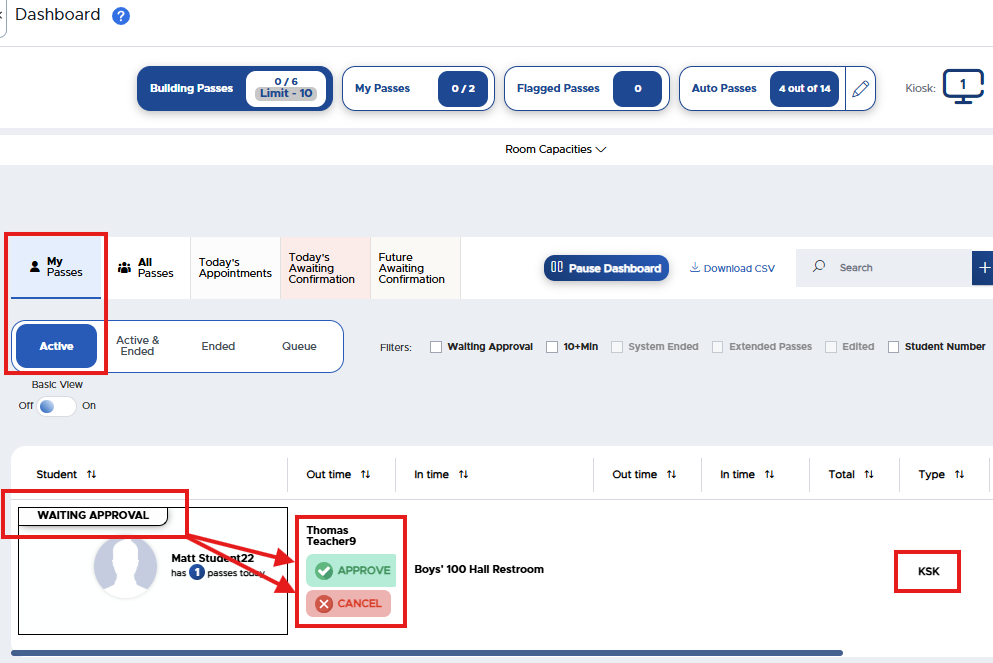
The student’s pass goes to the Queue, and the Queue position is identified. The teacher can click on Queue on the Dashboard to see that student’s pass. Once that location is available, the pass in the Queue will move to the Dashboard as a Waiting Approval pass. The teacher can then act (APPROVE or CANCEL) on that pass.
Additional Info:
Kiosk Auto Pass Locations and Queues - Once a student creates a kiosk pass to an Auto Pass location and is placed in the queue, the teacher will then need to approve the pass from the Dashboard once that location becomes available to that student.
Kiosk Message to Student
Teacher’s View - IN QUEUE
Teacher’s View - WAITING APPROVAL
Additional Info:
Students who create passes to Auto Pass locations that are currently full are placed in the queue and will need to have their passes approved by the teacher.