Pass › Pass Teacher/Staff Guide
Understanding the dashboard
The Dashboard allows the adult user to see what is happening in the hallways of their school. The screenshot below illustrates the different information found on the Dashboard.
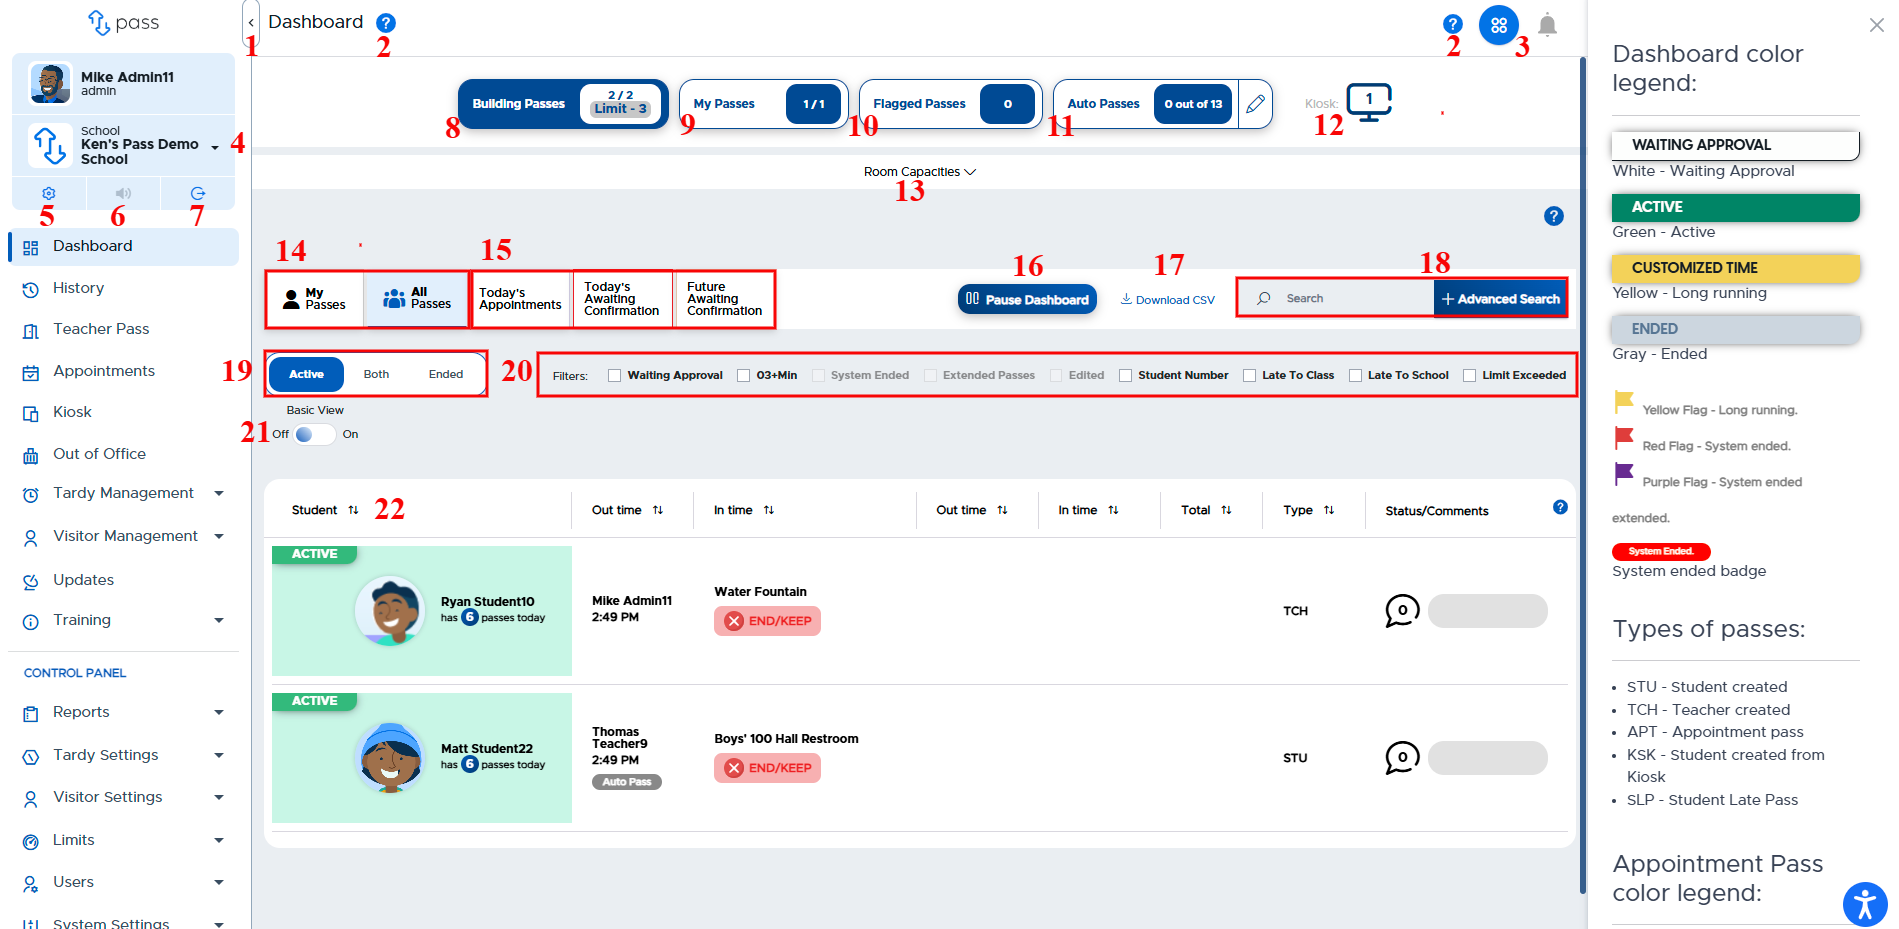
Menu Collapse - Click on the “<” next to “Dashboard” to collapse the side menu and the “>” to make the menu reappear.
Question Mark - Opens a window on the right side of the screen with additional information about this page.
Create - Provides quick access to action buttons for launching key functionality in the system, such as Teacher Pass, Appointment Pass, etc.
User in Multiple Schools - Click the “🞃” to the right of the name of your school to access other schools in which you are a user.
Gear Icon - Access your Profile Settings (My profile and My locations). If you make any changes, remember to click “Save changes” before leaving the page.
Megaphone Icon - Allows control of your sound notifications. When there is an “X” beside the megaphone, the audible ding is turned off. To turn sound notifications on, click on the megaphone icon. An audible “ding” will sound when a pass appears on your Dashboard.
Log out Icon - Click the “Log out” icon to exit the system.
Building Passes - Shows the number of current active passes and the total number of passes in the building for that day. The school’s building active pass limit is also displayed here (if your admin has set an active pass limit)..
My Passes - Shows the number of current active passes and the total number of passes the teacher has approved that day.
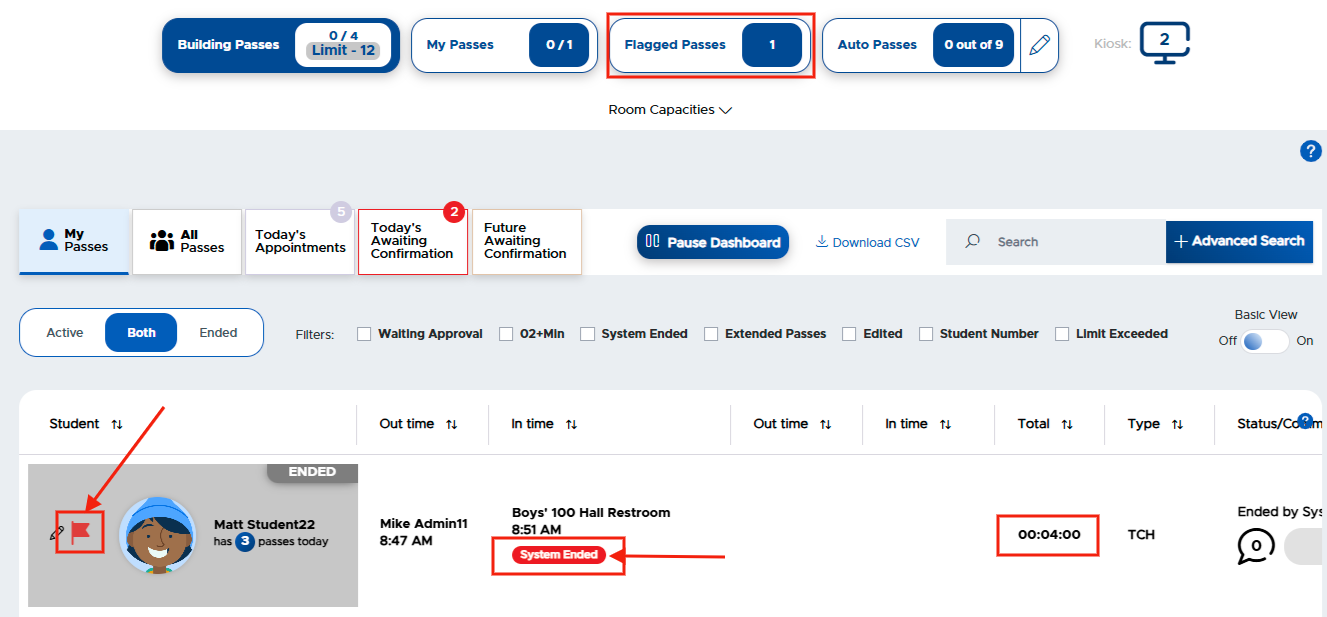
Flagged Passes - Shows the teacher if they have any long running passes or system ended passes for that day.
Auto Passes - Displays how many rooms the adult user has set up for Auto Pass (if enabled by admin) and provides access for the teacher to set up and/or edit their Auto Pass settings.
Kiosk - Displays how many active kiosks the teacher has set up (if using Kiosk).
Room Capacities - Will appear if a Teacher, Staff, or Admin user has associated themselves with a location in the Profile settings. When expanded, a user can manage the room limits for these locations from their Dashboard by clicking on the dark circle and changing a room limit. To minimize this feature, simply click on the “^”.
My Passes / All Passes - The teacher can select to view today’s passes on the dashboard by focusing on only “My Passes” (only passes with which you are involved) or viewing “All Passes” (all passes in the building).
Today’s Appointments - This is an Appointment Pass tab, which shows today’s appointment passes that the teacher is involved in. (The additional ‘confirmation’ tabs will only appear if the school is using Student Appointment Request functionality. These tabs show the student requests that need to be confirmed by the teacher.)
Pause Dashboard - This is a toggle button that allows the teacher to pause the dynamic updating of the active dashboard.
Download CSV - This option provides the teacher with the ability to download the current dashboard data into a csv file.
Search / Advanced Search - Provides teachers with a quick way to search the current day pass data on the dashboard. The Advanced Search option expands to search by student(s), teacher(s), and/or room(s). Dashboard settings/filters apply to this search.
Active / Both / Ended - This area gives the teacher the option to view passes by limiting the dashboard view to active passes and/or ended passes only.
Filters - Additional filters are available to be selected to display desired passes on the dashboard. This is in addition to the options in #14 & #19.
Basic View - This is a toggle that provides a more compact view of the passes on the dashboard.
Passes on the Dashboard - Main dashboard for monitoring, approving, and searching active and ended passes for the current day.
Dashboard Pass Filters
The following filters can be used to find specific passes on the Dashboard. Multiple filters can be selected at the same time.
Waiting Approval - Passes that are waiting for an adult’s approval
10+Min - Passes that have exceeded the Long Running pass time set by admin (varies from school to school)
System Ended - Passes that have been ended by the system (based on Pass Time Settings)
Extended Passes - Passes that have been ended by the system for locations that have been designated as Extended Pass Locations.
Edited - Passes that have been edited by an adult (EDITED label)
Student Number - SN will be added to the passes displayed on the Dashboard
Late to Class - Passes where students were marked Late to Class
Late to School - Passes where students were marked Late to School
Limit Exceeded - Passes where a limit has been exceeded
Hallway - Only students who should be actively in the hallway. Includes the following:
Pass approved with the student headed to the destination
Active pass marked “In/Out”
Active pass marked “Returning”
Roundtrip passes until marked “Ended”
One Way passes until marked “Ended”
If a Layover pass has been marked “Arrived”, it will not display in this view until the adult selects “Returning” (because the student is out of the hallway during that portion of the pass).
Additional Info: Uncheck the filter to allow the Dashboard to resume normal functionality.
Dashboard Notifications
On the tab of your web browser you will see 0l0. The first number represents how many passes on your Dashboard are awaiting approval. The second number represents how many students have left your classroom and are out on an active pass.

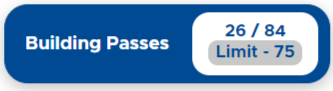
Building Passes - The first number illustrates the number of ACTIVE passes that are currently in your building. The second number shows the TOTAL number of passes for your building today. You can also see the Active Pass Limit that has been set by your admin team and click on Limit to see the settings that your admin has set regarding this limit.
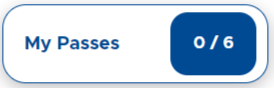
My Passes - The first number illustrates the number of ACTIVE passes that are currently in your classroom. The second number shows the TOTAL number of passes that you’ve APPROVED today.
Flagged Passes are noted in the top middle of your Dashboard. They draw your attention to passes that have exceeded time restrictions set by your administration and may need your attention.
Banner Notifications enable you to see notifications related to school-wide Pass Blocks and their own Out of Office instances below the statistical boxes on their Dashboard.
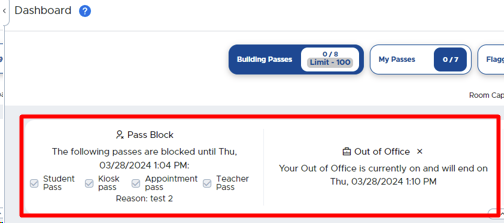
To end an Out of Office instance early, click on the Out of Office tab on the left hand menu, click on the three (3) dots to the right of that instance, and click End OR click on the “X” to the right of the Out of Office instance on the Dashboard.
Auto Passes allow you to select locations that have been approved by your admin team as Auto Pass Locations so that students can START/STOP or START their own passes. (This is an optional feature that is controlled by your admin team. If you do not see the Auto Passes tile on your screen, your admin team has not activated this functionality.) Click here to learn how to set up your auto pass locations.