Pass › Pass Admin Guide
Auto Pass
Auto Pass is an optional feature that allows schools to make certain types of passes available for students to start and stop, start only or stop only without requiring a teacher’s digital approval.
Remember:
Auto Pass availability is associated with the adult’s account. Auto Pass functionality will only work when the “from” field is a person. It will not work from a location.
Creating an Auto Pass
Auto Pass involves a 2-step process.
Step 1 - You choose the locations in the building that can be utilized as auto pass locations.
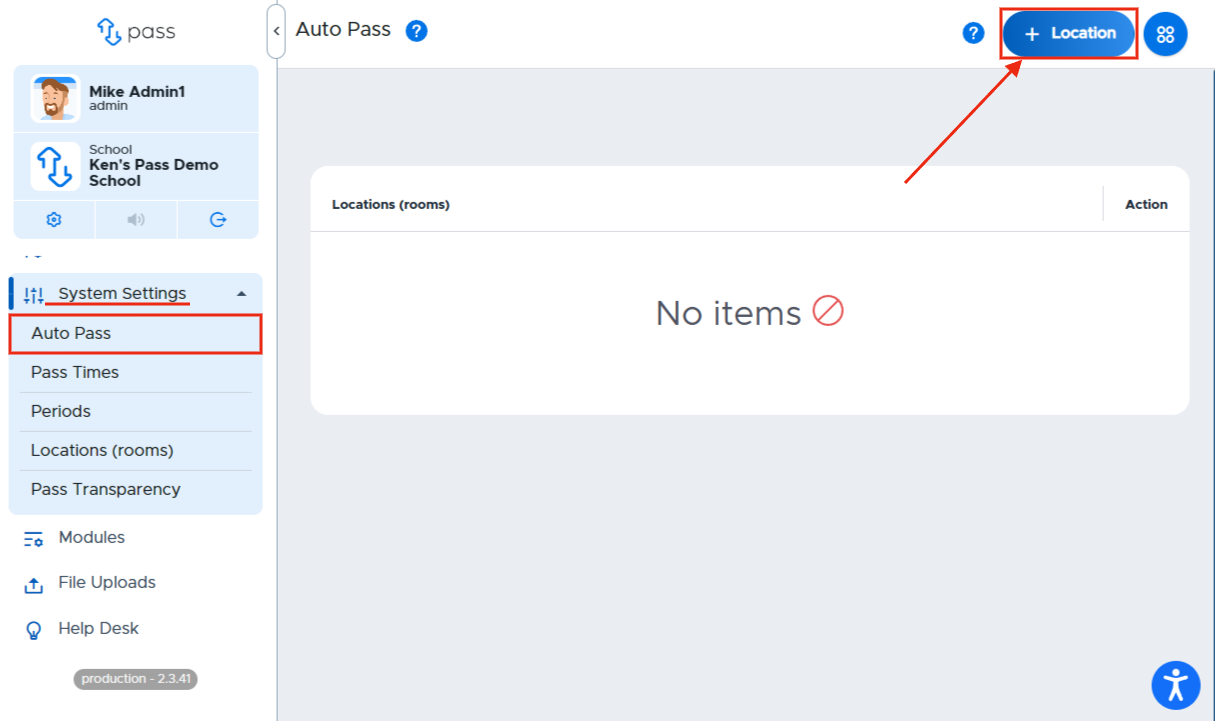
From the Control Panel menu, click on System Settings → Auto Pass.
To add Auto Pass locations:
Click the + Location button in the top right corner.
Click Select locations.
Use the multi-select dropdown to select one or more locations at a time:
Click the +Location button in the top right corner
Click in the Select locations field.
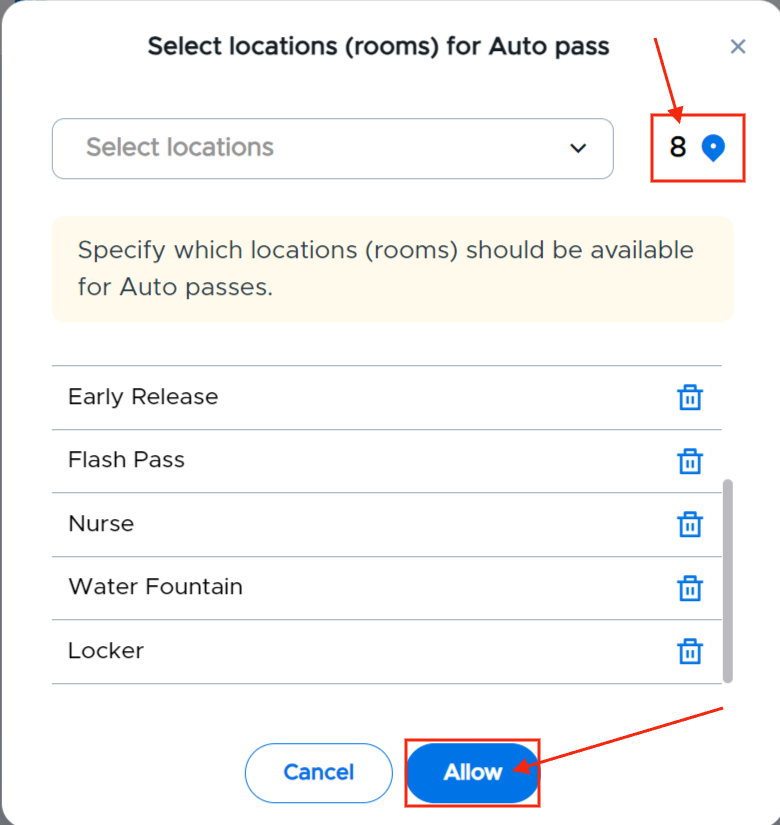
Type the name, or scroll for the name of that location and click on that location.
Repeat the typing/searching and clicking for any other locations needed.
When finished, click Allow.
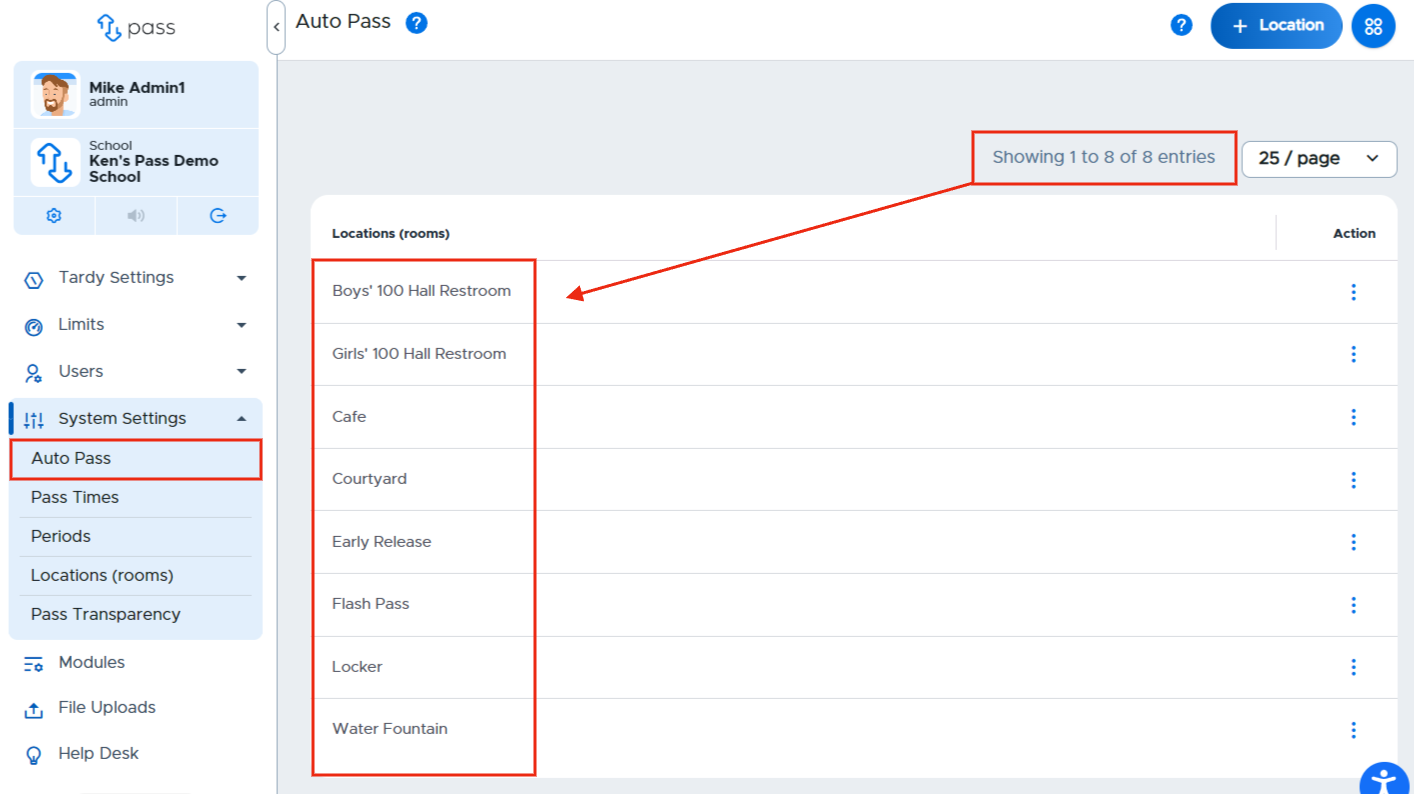
Once your locations have been selected, they will appear on the Auto Pass page.
To remove a location from the Auto Pass location list:
Click on the three(3) dots under the Action column on the right side of the screen for that location and click Delete.
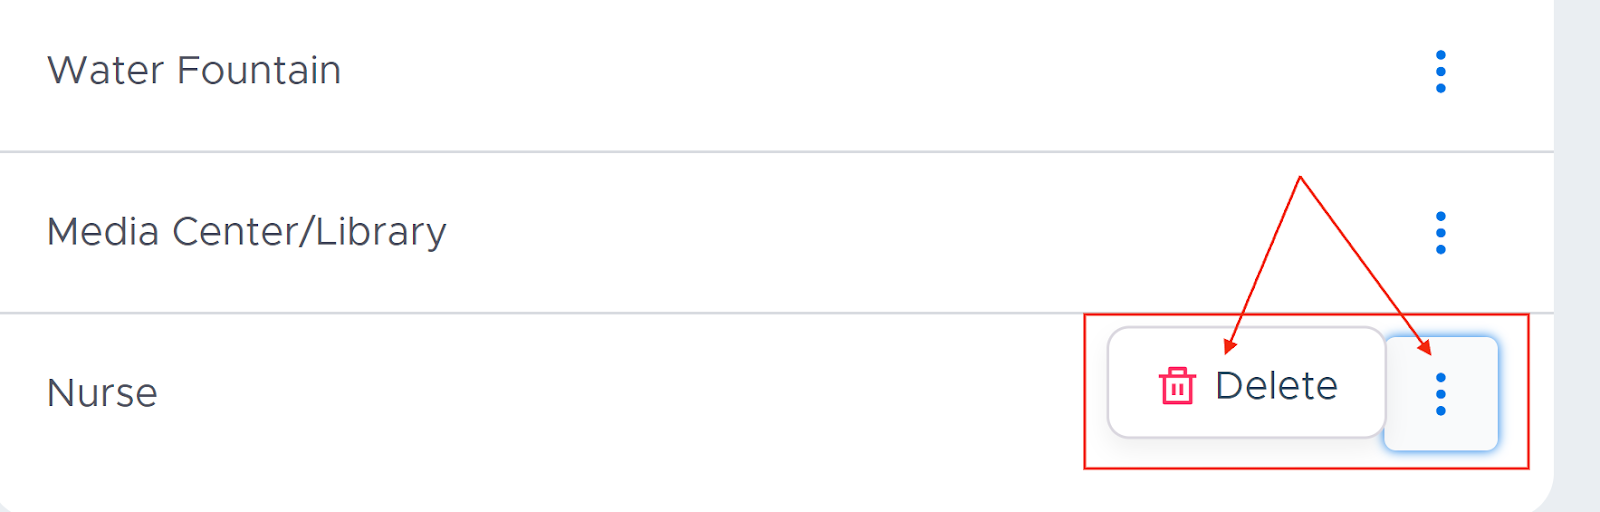
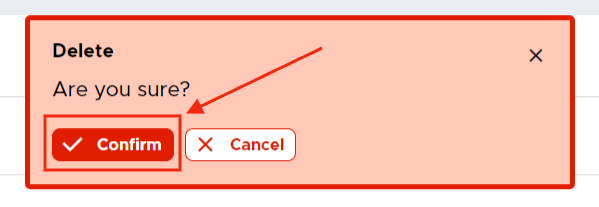
On the popup window, click Confirm, which will then remove the location from your list.
Step 2 - Teachers can choose which locations to use as auto pass locations for their classroom from their own Dashboard.
Once this feature is activated, the “Auto Passes” tile will appear on the dashboard. Click on the edit pencil icon to select the Auto Pass locations and any limits that you would like to apply.

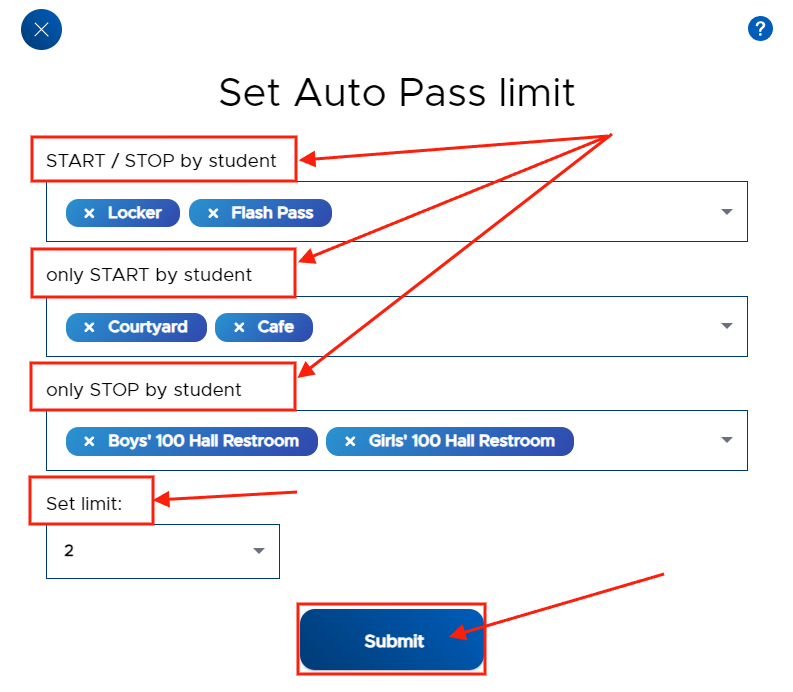
When choosing those locations, adult users can choose to have the students do the following:
START/STOP their own passes
START their own passes
STOP their own passes.
Users can also limit the number of students who are out of their classroom on an Auto Pass at any given time.
Remember
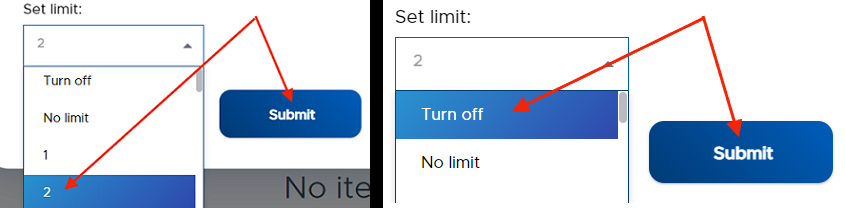
Limits can be adjusted throughout the day to meet the needs of certain classes. Users can “Turn off” the Auto Pass functionality for one class and then reset the limit for another class, both with just a few clicks. Remember to click Submit any time you make a change to this screen.
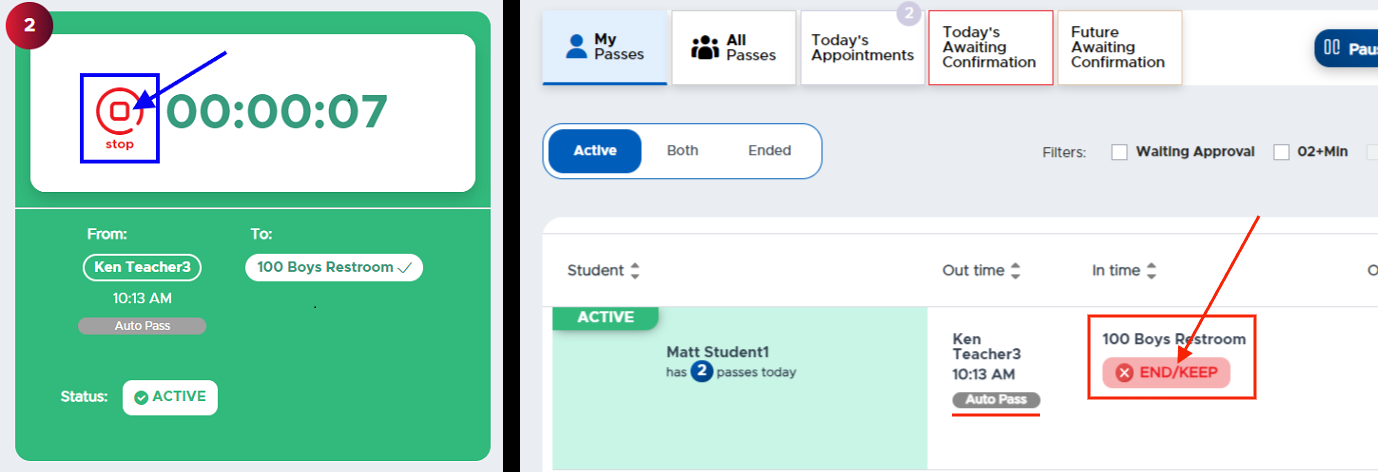
Following the pass protocols that have been set up in each user’s location, students can create passes to those auto pass locations the same way that they create their own passes. Once permission has been given to leave the classroom, the student can then START his own pass from his own device by clicking on the Play button.
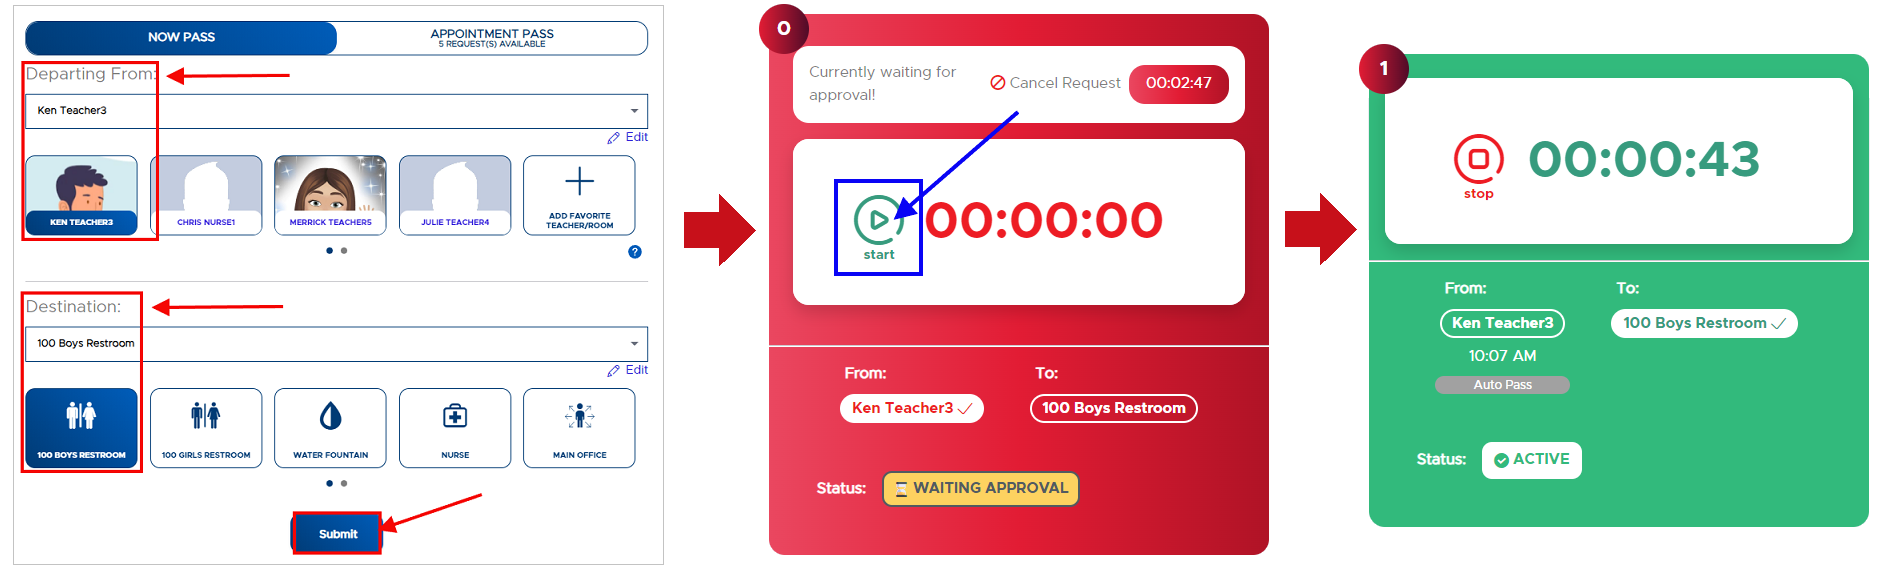
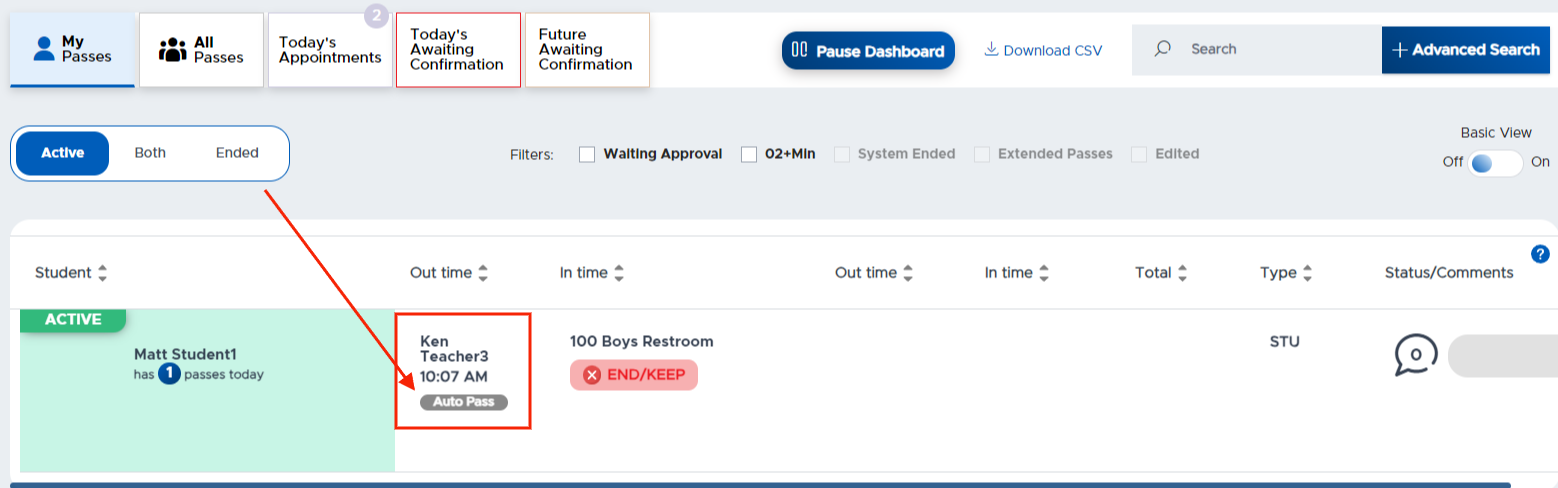
When the student returns to the classroom, the student can end the pass by clicking on the STOP button on his device, or the teacher can end the pass from his Dashboard by clicking END/KEEP.
#### Key Points:
Universal Access for Students:
Once Auto Pass is enabled for a teacher, all students in that class will have the ability to utilize this feature, allowing them to start and stop their own passes independently.
Setting Up Auto Pass Locations:
Admins choose specific locations in the school that can be designated for Auto Pass. This is done through the Control Panel:
- Navigate to System Settings → Auto Pass.
- Select preferred locations.
Teacher Dashboard:
With Auto Pass activated, a tile will appear on the teacher's dashboard where they can manage which locations are available for students to use as Auto Pass locations.
Teachers can also set limits on how many students may be out on an Auto Pass at any one time, adjusting these limits as needed throughout the day.
Student Instructions:
Once permitted to use Auto Pass, students can create passes for designated locations via their devices, clicking the "Start" button to begin their pass and the "Stop" button upon return.
This feature streamlines the process of student movement while maintaining necessary oversight from teachers.
Student Pass Limits
Auto Pass does not override or bypass student pass limits. A student-created Auto Pass counts toward that student’s configured daily, weekly, and monthly limits, including when the student creates it through a Kiosk. Teacher-created passes and appointment passes remain excluded.
For configuration details, see Limit Student Pass.
If a student creates more Auto Passes than their configured limit permits, submit a Zendesk Support ticket for investigation.