Pass › Pass Admin Guide
Locations Overview
System Settings → Locations (rooms)
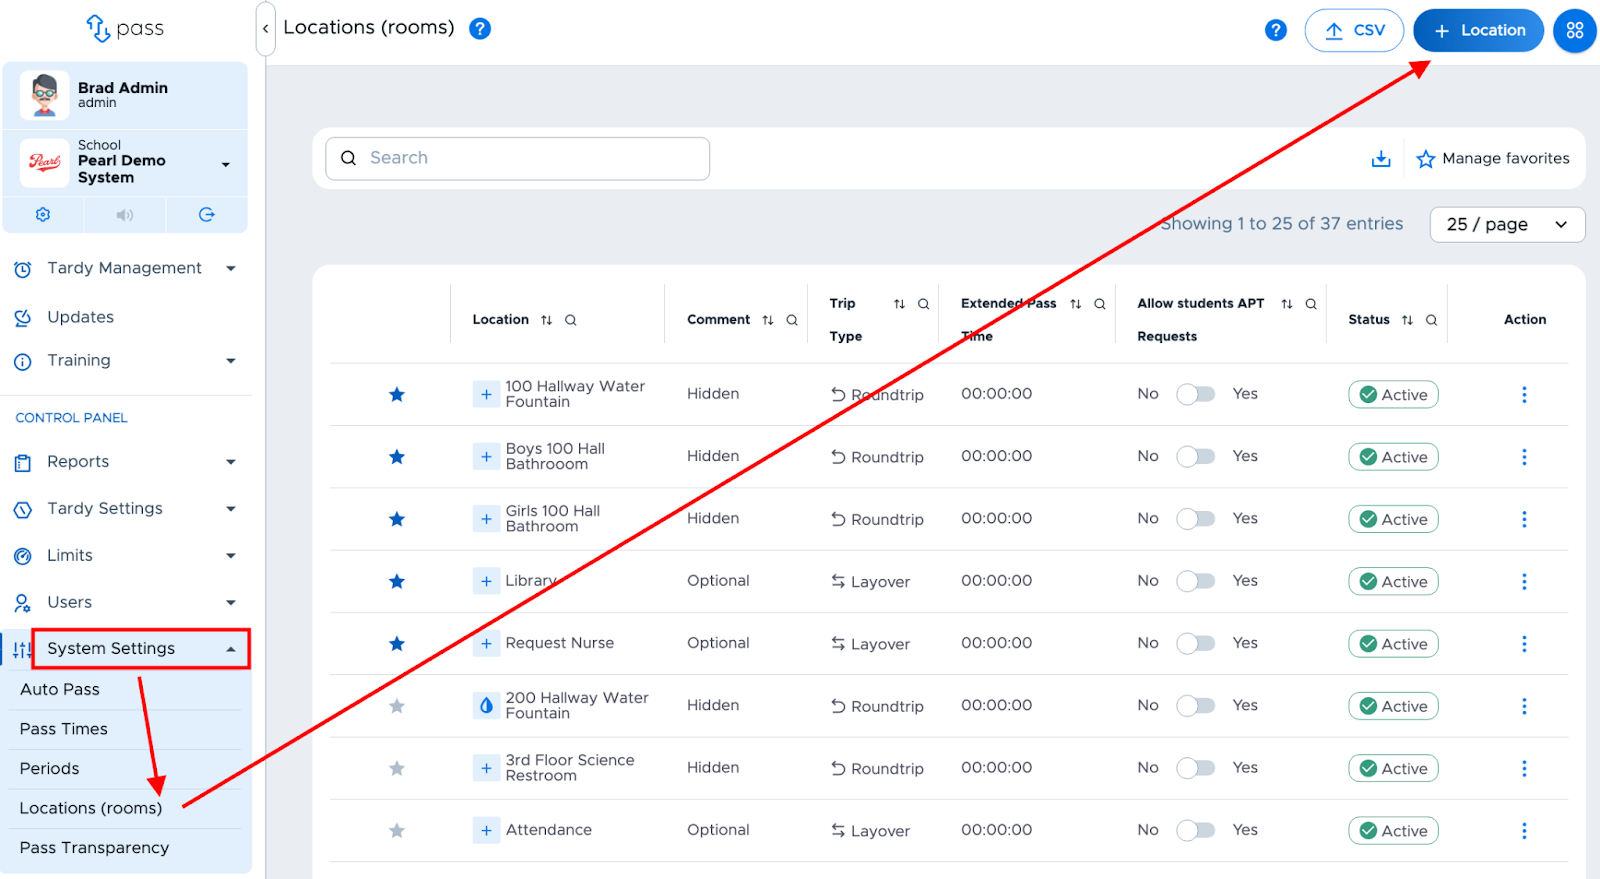
From the Control Panel menu, click on System Settings → Locations (rooms).
To add a location to your system, click the blue + Location button in the top right corner of the screen.
Enter/select the following information on the popup screen and then click Submit:
Location name - Supply a name for the location or room.
Icon - Select an icon that represents that location (Click on the dots below the icons to see more options).
Trip type - Choose from the below types.
Layover - The student leaves point A and goes to point B and then returns to point A and is pinned out/in at each location by different people.
One Way - The student leaves point A and goes to point B and is pinned out/in at each location by different people and does not return to the original destination.
Roundtrip - The student is going to an unattended location and returning to the original destination.
Comment type - Choose from the below types.
Mandatory - Students are required to make a comment on the pass.
Optional - Students are not required to make a comment.
Hidden - Students do not need to make a comment on the pass.
Extended Pass (Optional) - Check the box to select the time frame for this location.
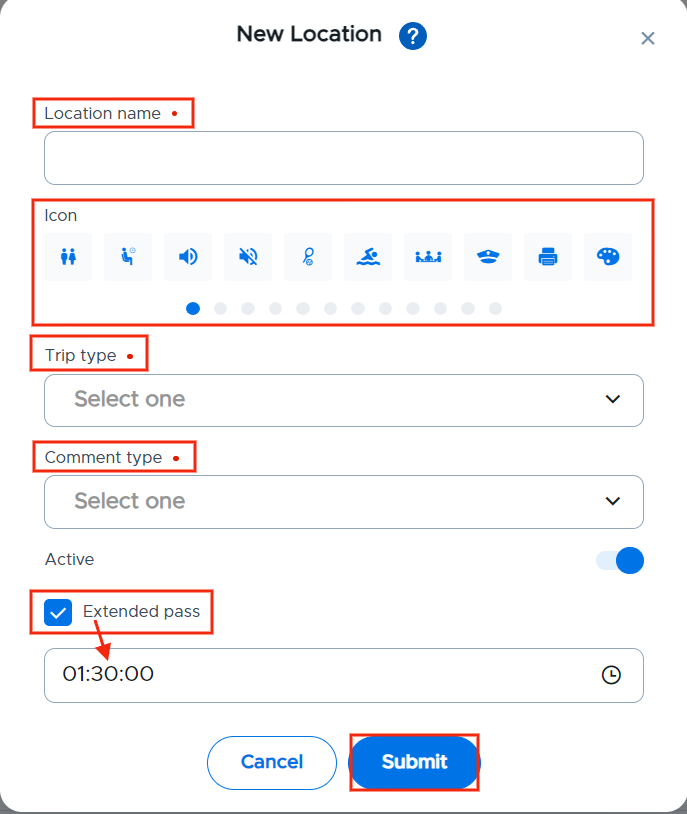
The red dots to the right of the information indicate a required field. Remember to click Submit when finished adding each location.
Additional points to remember
Individual teacher classrooms should NOT be added here. Students will use the teacher’s names to create passes to/from teacher classrooms. If you do add teacher’s rooms here, it may cause confusion for the students when making a pass, because that “teacher’s name/room” will show up twice.
Admin, Staff, and Teachers can “associate” themselves to the rooms/locations in which they work so that they can monitor passes to/from those locations. For example, an admin may associate with the Main Office or Guidance Office.
There is an option to “Import Rooms” from a CSV file.
Click on the CSV button and follow the instructions on the Pass screen.
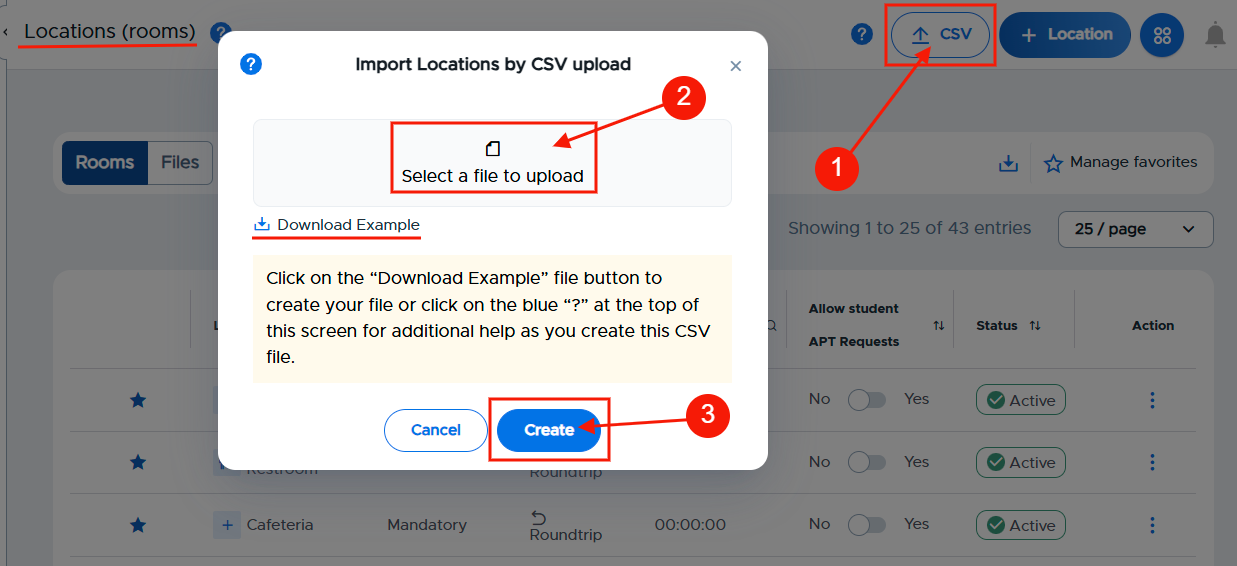
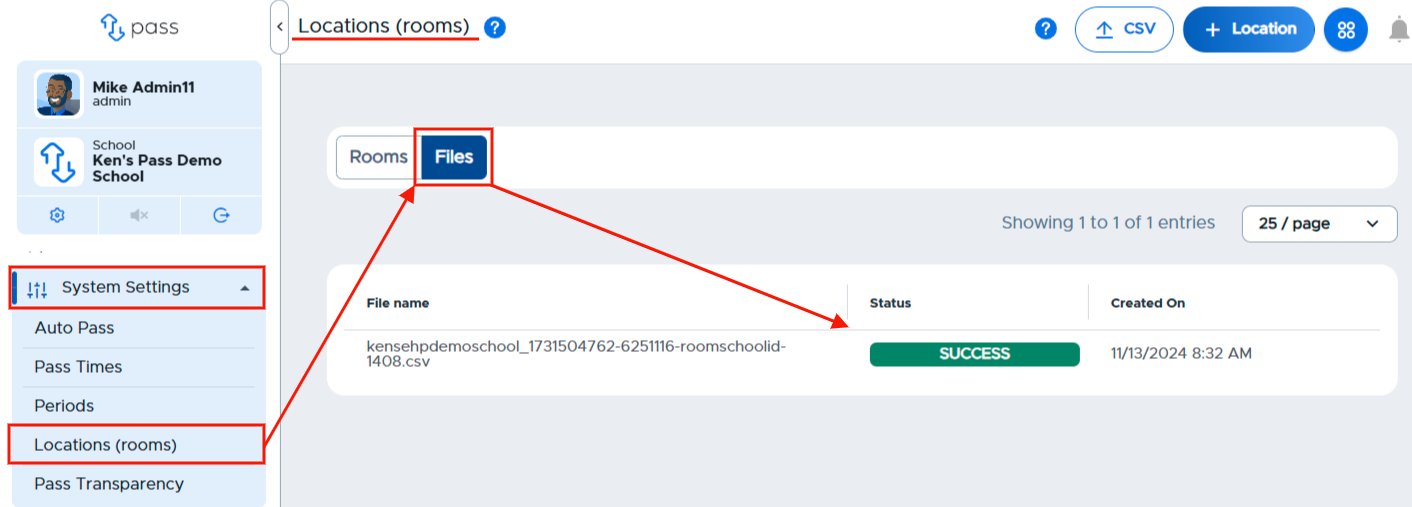
There is a sample file available that shows the column headers and data required. If you upload a Locations file, you can easily track the status on the Locations (rooms) page. In the upper left corner, simply click Files. The name of the file, status, and date created will be displayed on the screen.
Best Practices for Adding Locations
When adding locations to your Pass system, keep the following best practices in mind:
Avoid Individual Classrooms:
Do NOT add individual classrooms to the locations list. This can cause confusion when students create passes, as they may encounter duplicate entries for teacher names or rooms.
Be Specific with Location Names:
Use specific names for locations to enhance the accuracy and impact of your reports. For example, instead of a generic label like "Restroom," opt for more descriptive titles, such as "8th Grade Girls' Restroom" or "Science Wing Boys' Restroom." This specificity aids in better reporting and tracking.
Important Note:
If you upload a locations file that contains a location/room that already exists in your Pass system, the upload will fail.
Deleting Locations
You cannot delete locations in Pass. We instead suggest you mark them inactive.
Access the Control Panel: Log in to your admin account and navigate to the Control Panel.
Find Your Locations: Go to System Settings and then select Locations.
Select the Location: Identify the location you want to make inactive.
Edit the Location: Click on the three dots (⋮) next to the location name and select Edit.
Change the Status: Set the status to inactive.
Save Changes: Don’t forget to click Update to save your changes.
Video Alert
Please watch the "Adding/Editing Locations (rooms)" video.