Pass › Pass Admin Guide
Periods
Periods in Pass are a visual association for appointment times. They are only used for information purposes for Appointment Passes. We are not importing student schedules or tying defined Periods to a bell schedule at this time.
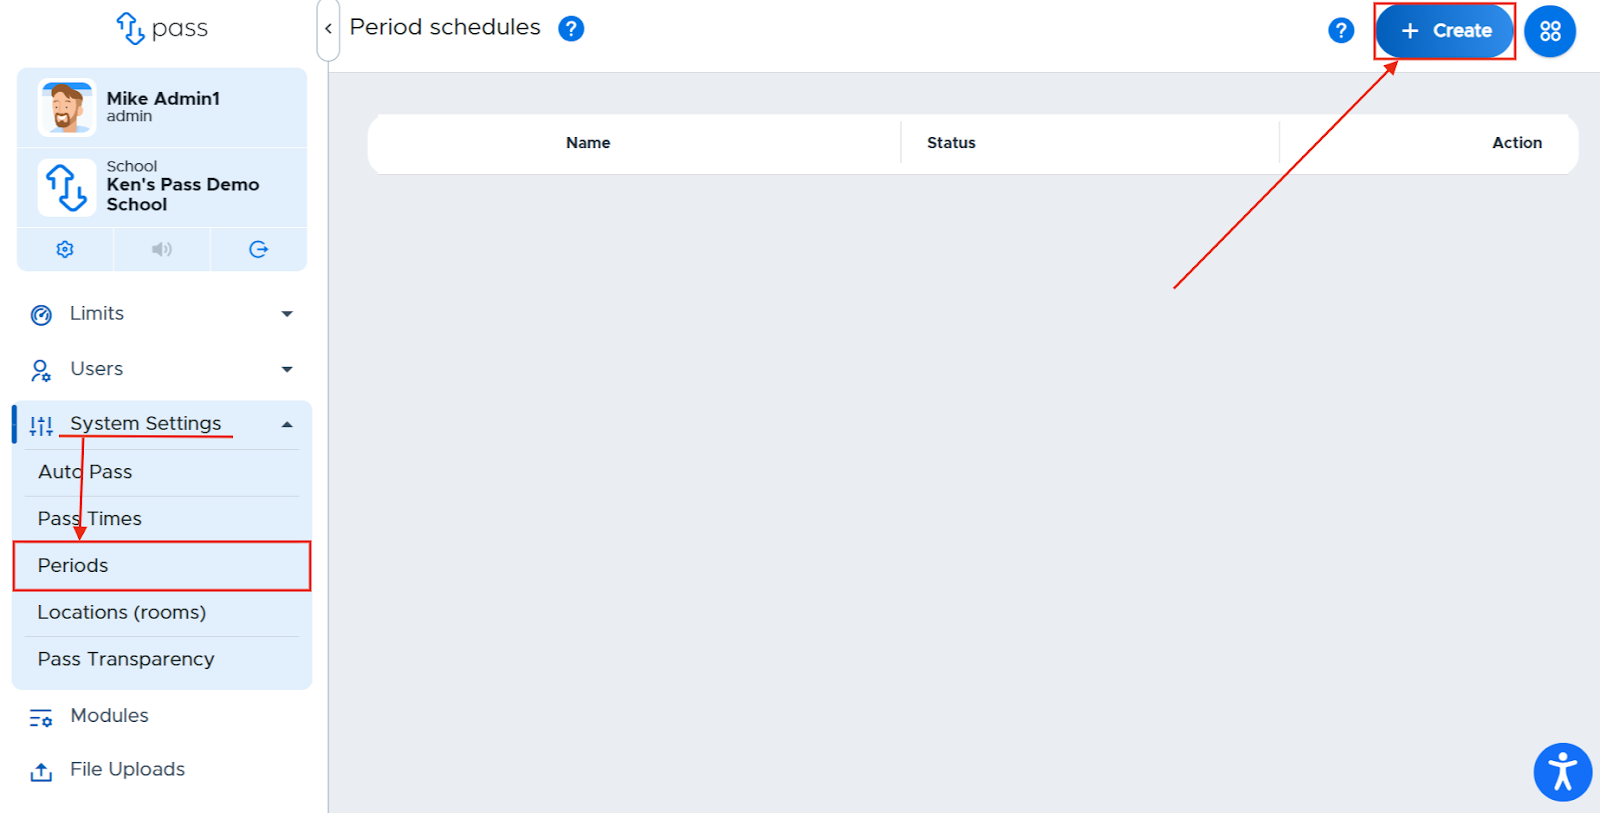
From the Control Panel menu, click on System Settings > Periods.
To add periods/blocks, click the blue + Create button in the top right corner of the screen.
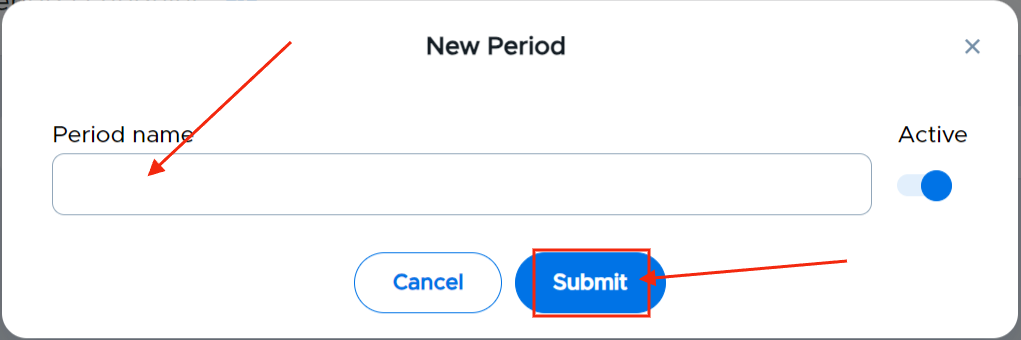
Enter the name of your period/block and click Submit. Repeat this process until you have added all of your periods or blocks.
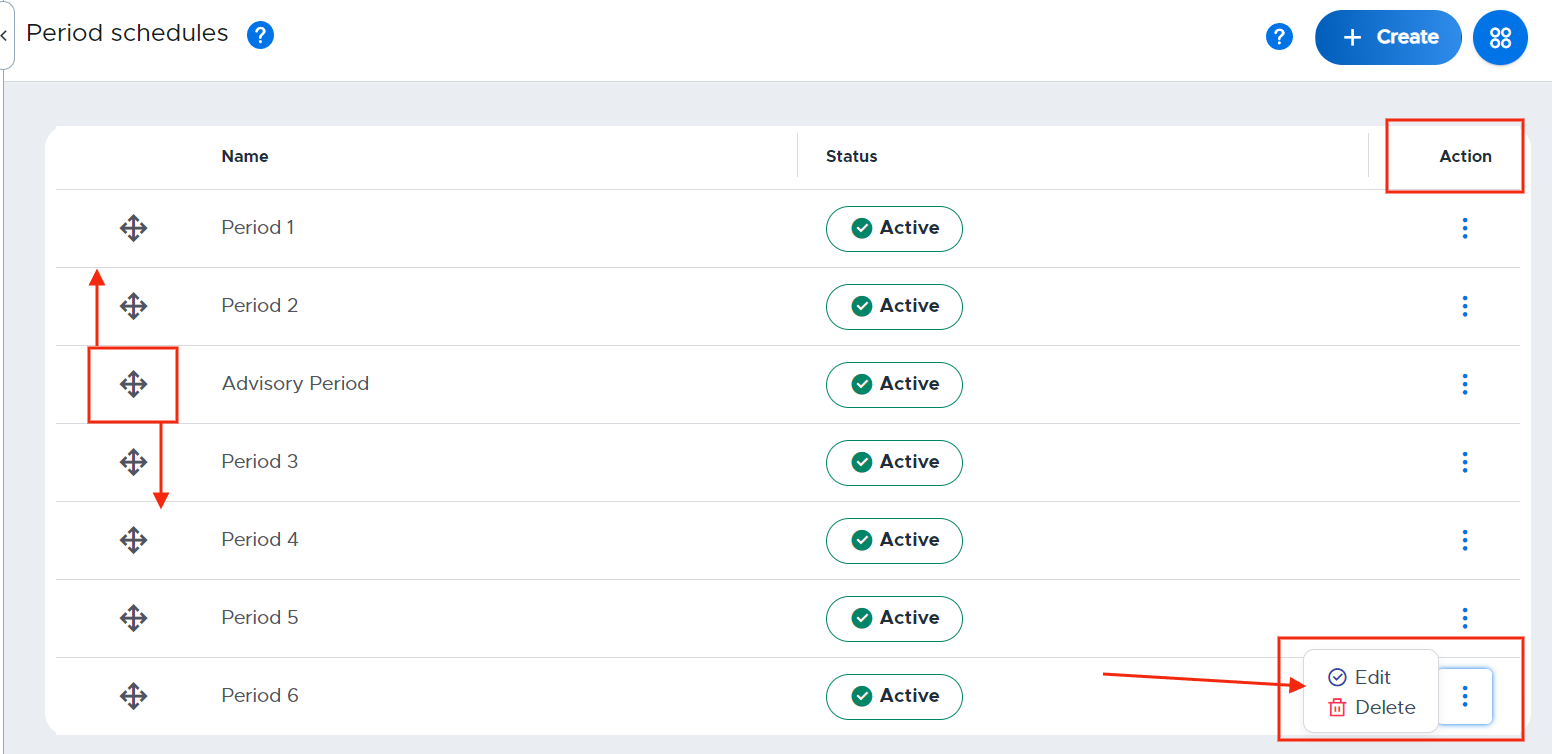
To change the order of any created period, use the directional button to the left of the period/block and drag it to the desired location. To edit or delete an existing period or block, click on the three (3) dots under the Action column and select the desired action.
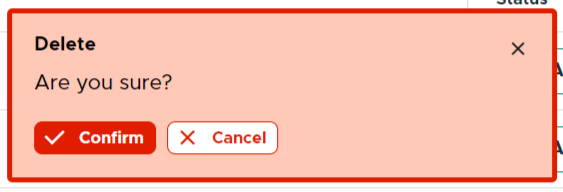
When deleting a period/block, a popup screen will appear. Click Confirm if you are sure you want to continue with this action.
Video Alert:
Please watch the "Adding/Editing Periods" video below.