Pass › Pass Admin Guide
Printing Student Digital ID Cards
The setup for student digital ID cards is automated and requires no additional actions from you.
You can print your students’ digital ID cards from your Pass system.
Under the Control Panel, click Users and then Main Users. On the next screen, click Print Student Digital IDs.
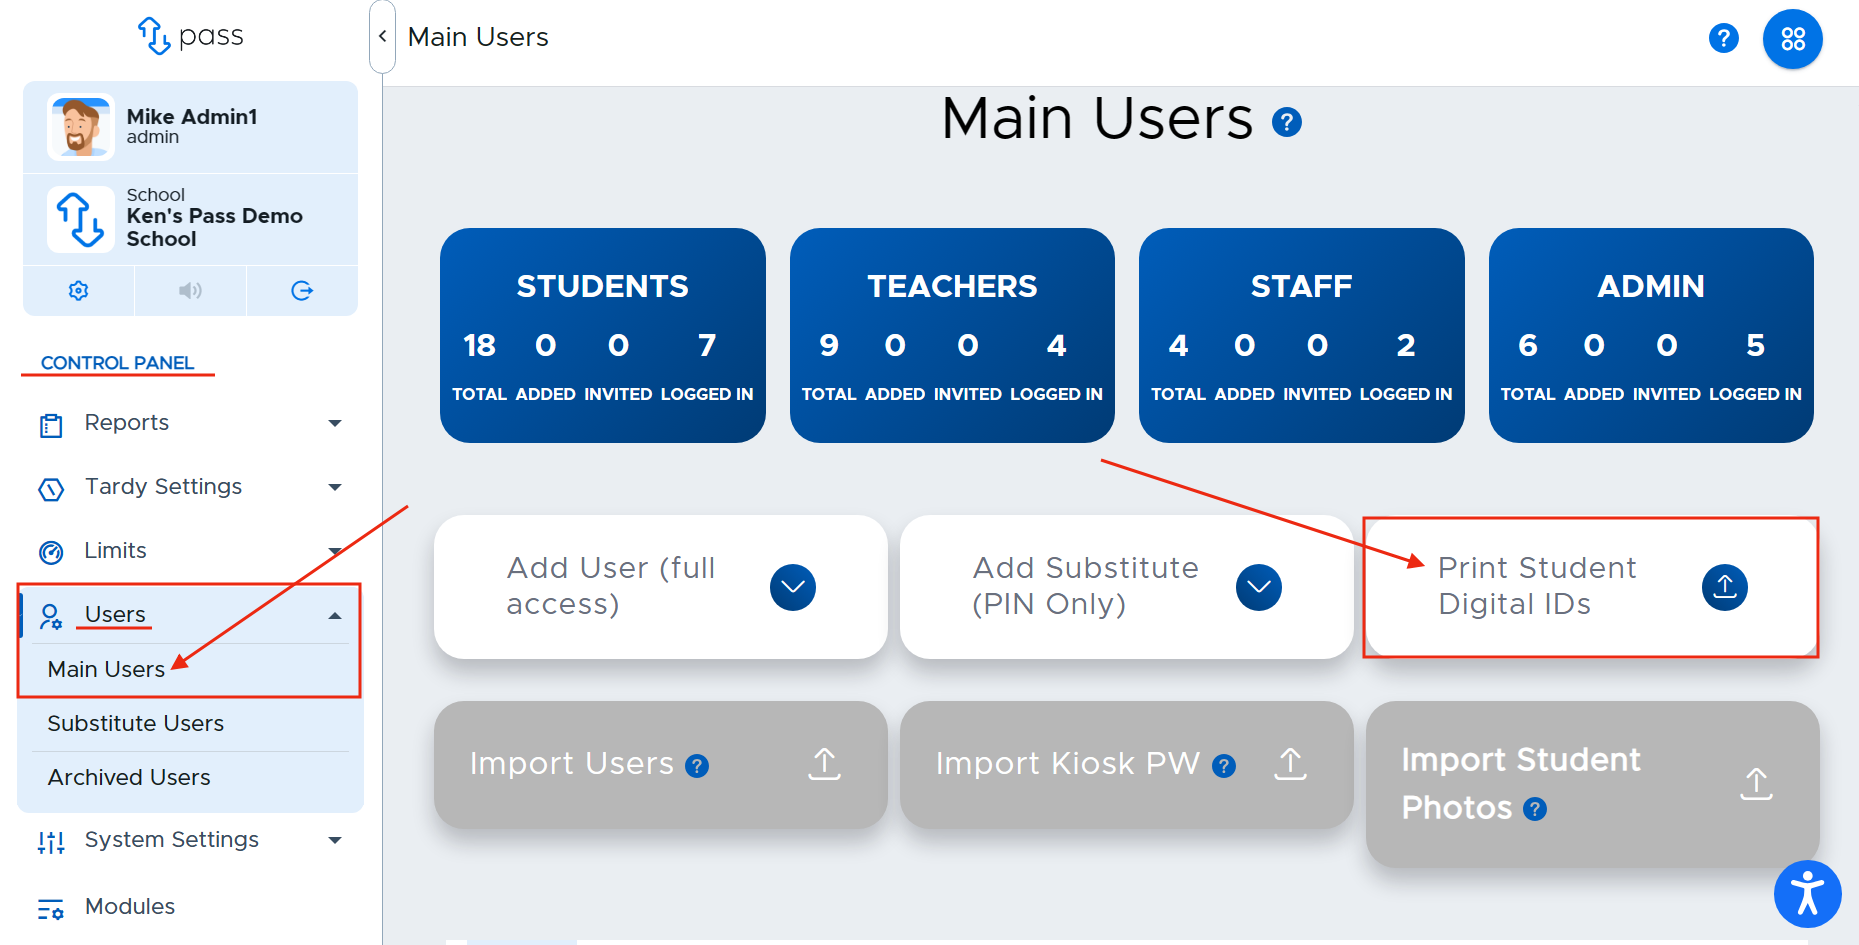
A popup will appear alerting you that your Digital Student ID cards are being prepared. Click Okay. When the file is ready for download, you can find it on your Dashboard.

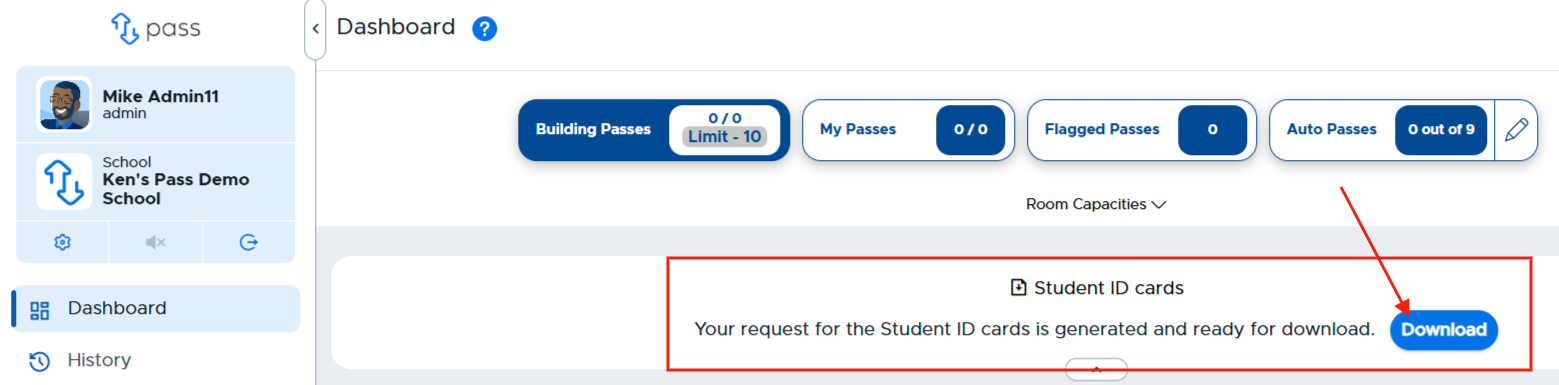
Go to your Dashboard. When the file is ready to be downloaded, you will see the following message toward the top of your screen. Click Download. (The download will be available for 90 minutes. If you don’t click Download in the 90-minute window, you will need to repeat the aforementioned steps.)
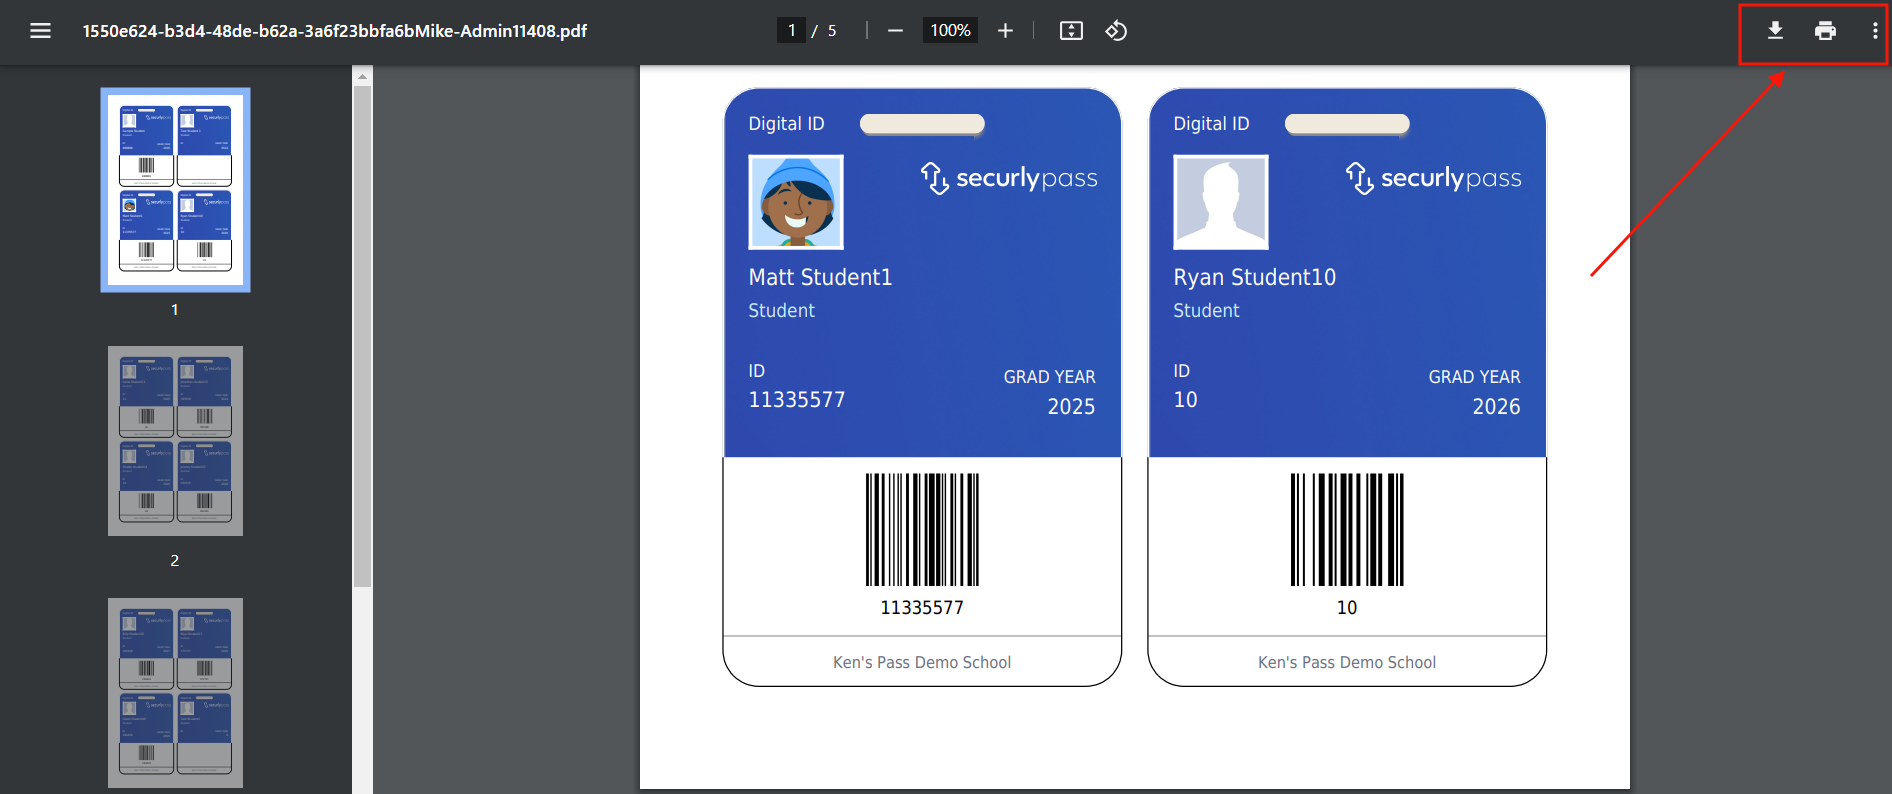
Once downloaded, you can print your students’ digital ID cards.
Note:
You can NOT print a single student ID, and you can NOT manipulate the layout to fit a sheet of badges.)
Customization Options for ID Cards
Admins can choose to customize the information displayed on the digital ID cards, which includes:
Display Student Information: Admins can include the student’s name, photo (if uploaded), ID number, and graduation year on the card.
National Suicide Prevention Hotline (NSPH): Admins have the option to include the NSPH on the ID cards if desired.
Barcode or QR Code: Additionally, admins can select whether to include a barcode or QR code on the card.
These customization options allow for flexibility in how student information is presented on the ID cards, ensuring that it meets the needs of your school.