Filter › Deploying Securly Filter
Deploying SmartDNS on Windows Server
Deploying SmartDNS on a Windows Server
The Securly DNS filtering deployment on your Windows server requires you to forward your DNS to Securly.
Follow the steps below to deploy SmartDNS on all DNS servers for your school:
-
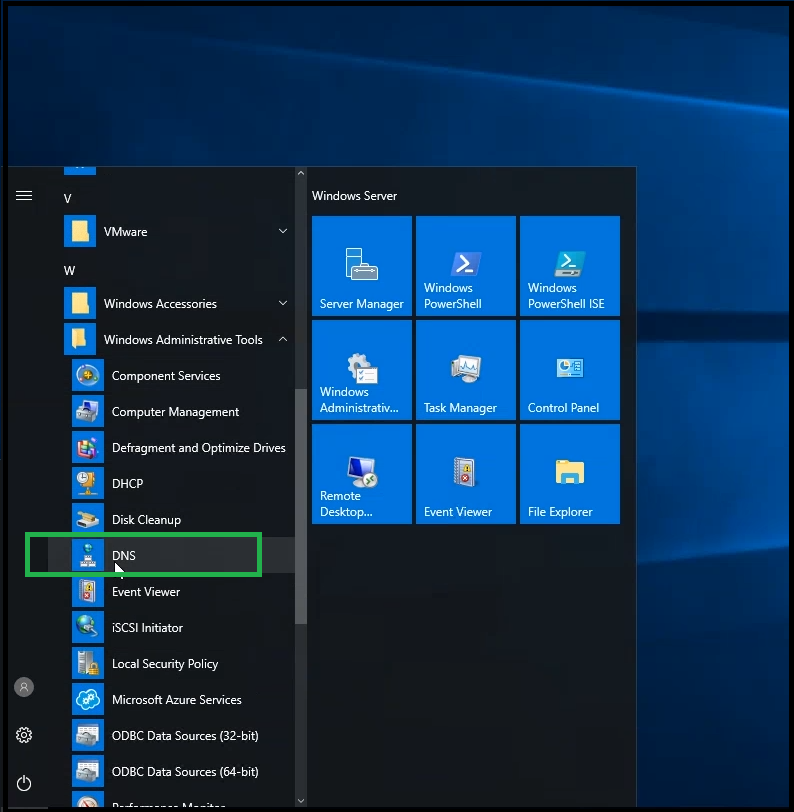
Navigate to Start > DNS Manager.
-
Expand off DNS options.
-
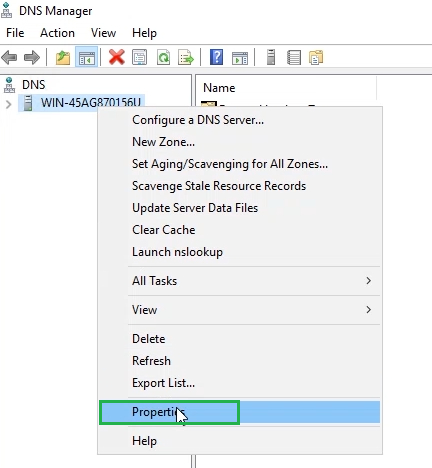
Right-click on the DNS server name and select “Properties”.
-
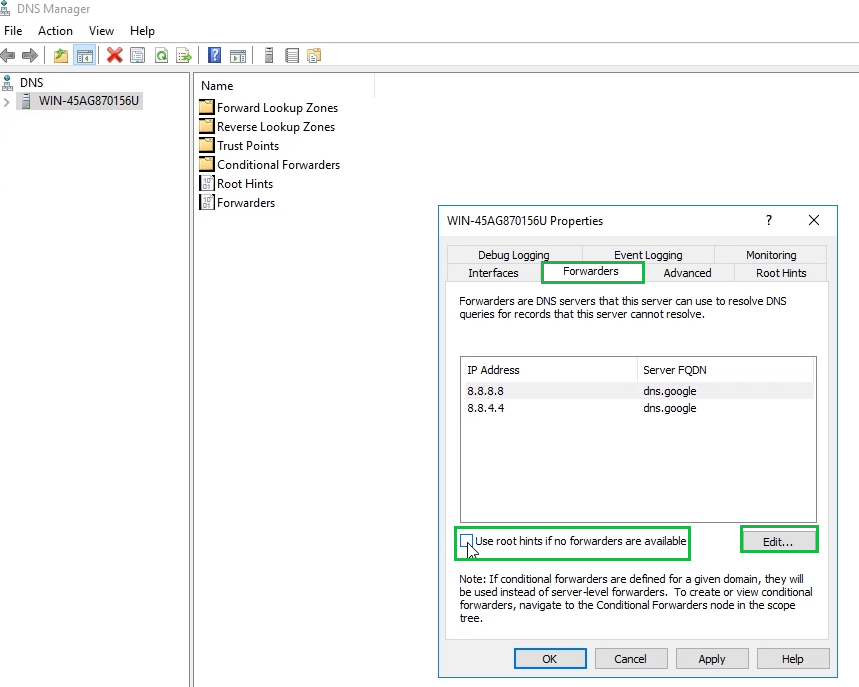
Select 'Forwarders'. Make sure to deselect the checkbox for 'Use root hints if no forwarders are available'. On the off chance that our DNS servers are unreachable, this setting will help you ensure that users get unfiltered internet access.
-
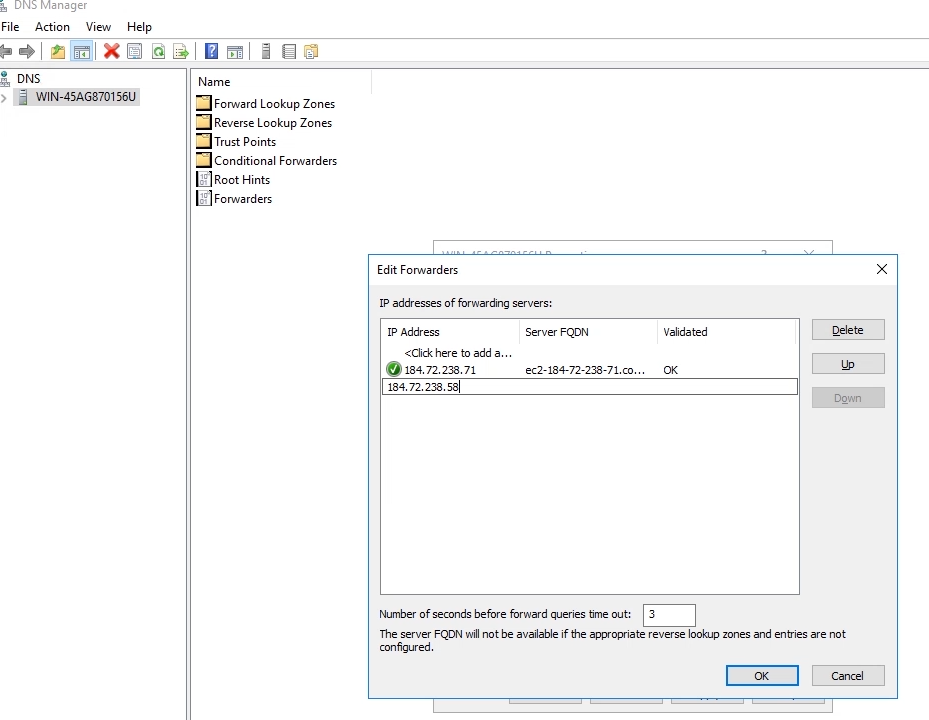
Select “Edit”.
-
You can now enter the applicable DNS server provided to you by your Sales Engineer.
Deploying SmartDNS on a standalone Windows device
To deploy DNS on your standalone Windows machine, follow the steps below:
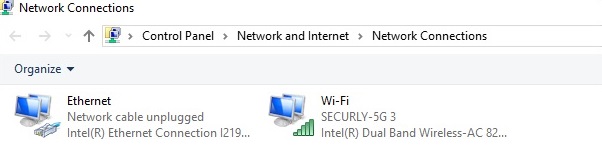
- Navigate to Start > View Network Connections.
- Double-click your current applicable network adapter.
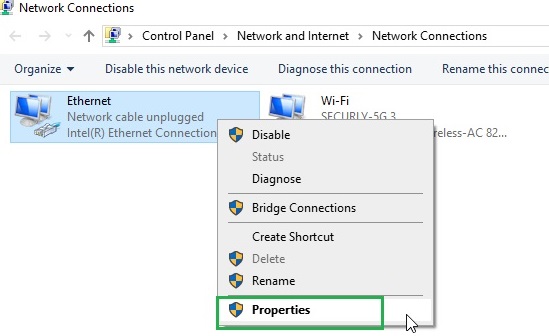
- Click on “Properties.”
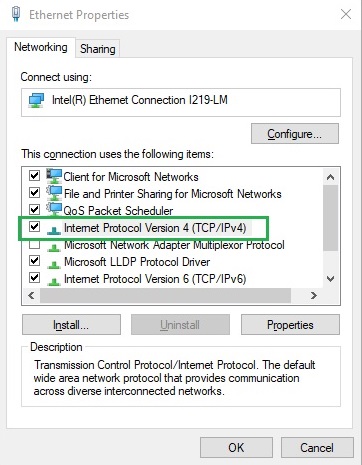
- Double click on “Internet Protocol Version 4 (TCP/IPv4).”
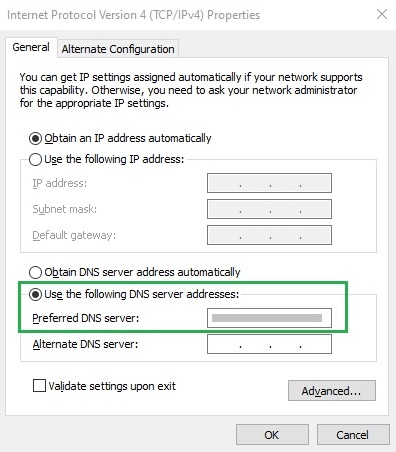
- Select “Use the following DNS server addresses” in place of the default “Obtain DNS servers automatically.”
- You can now enter the applicable DNS server provided to you by your Sales Engineer.