Filter
How To - Disable Google Lens
How to Disable Google Lens (via Google Admin Console)
Google Lens is a native feature of the Chrome browser and ChromeOS. To prevent students from using it to bypass school filters or solve academic problems, administrators must disable it at the source: the Google Admin Console.
Important: This feature cannot be disabled within the Securly Filter dashboard. It must be managed through your Google Workspace policy settings.
Step-by-Step Instructions
Log in to your Google Admin Console.
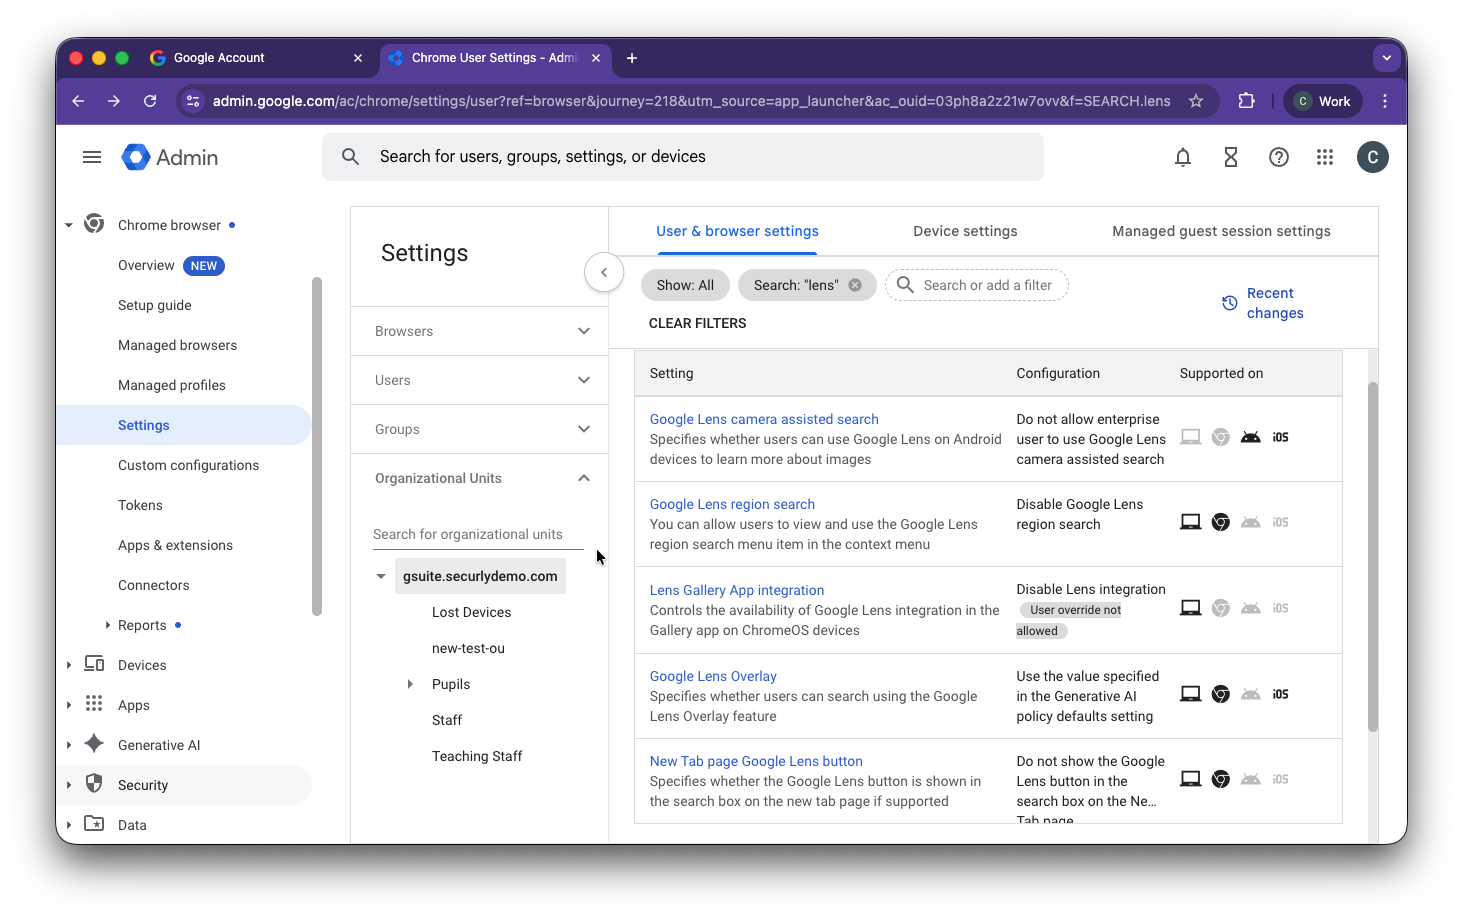
Navigate to Devices > Chrome > Settings.
Select Users & browsers from the settings menu.
Select the Organizational Unit (OU): On the left-hand side, choose the specific student OU where you want to apply this restriction.
Locate the Setting: Use Control+F (or Command+F) to search for "Google Lens".
Note: In some versions of the console, this may still be grouped under Contextual Search.
Change Status: Set the Google Lens toggle to Disabled.
Save: Click Save in the top-right corner to apply the changes.
Why Admin Console Management is Required
Because Google Lens is integrated into the core of the Chrome browser, it operates at a level that third-party extensions (like Securly) generally do not override.
Securly manages web traffic, categories, and safety alerts.
Google Admin Console manages browser-level features, hardware settings, and application permissions.
Verification & Propagation
Timeframe: It can take up to 24 hours for Google policy changes to propagate to every device in your district.
Manual Force: On a student Chromebook, you can navigate to
chrome://policyand click Reload policies to test the change immediately.