Pass › Pass Student Guide
Pass Student Guide

Pass Student Guide
How to Join a Queue (if available)
How to Make a Late Pass (if available)
Where to Look at Your Appointments
Overview of Pass
Pass is an online hall pass system. You’ll use the website or app to request a pass from your teacher. Your teacher will approve your pass, and you can leave class without grabbing a lanyard or signing a clipboard. When you get back to class, you’ll end the pass.
Request the pass
Wait for your teacher to approve it
Once it’s approved, leave it running and go on your pass
When you get back, your pass needs to be ended
Navigating in Pass
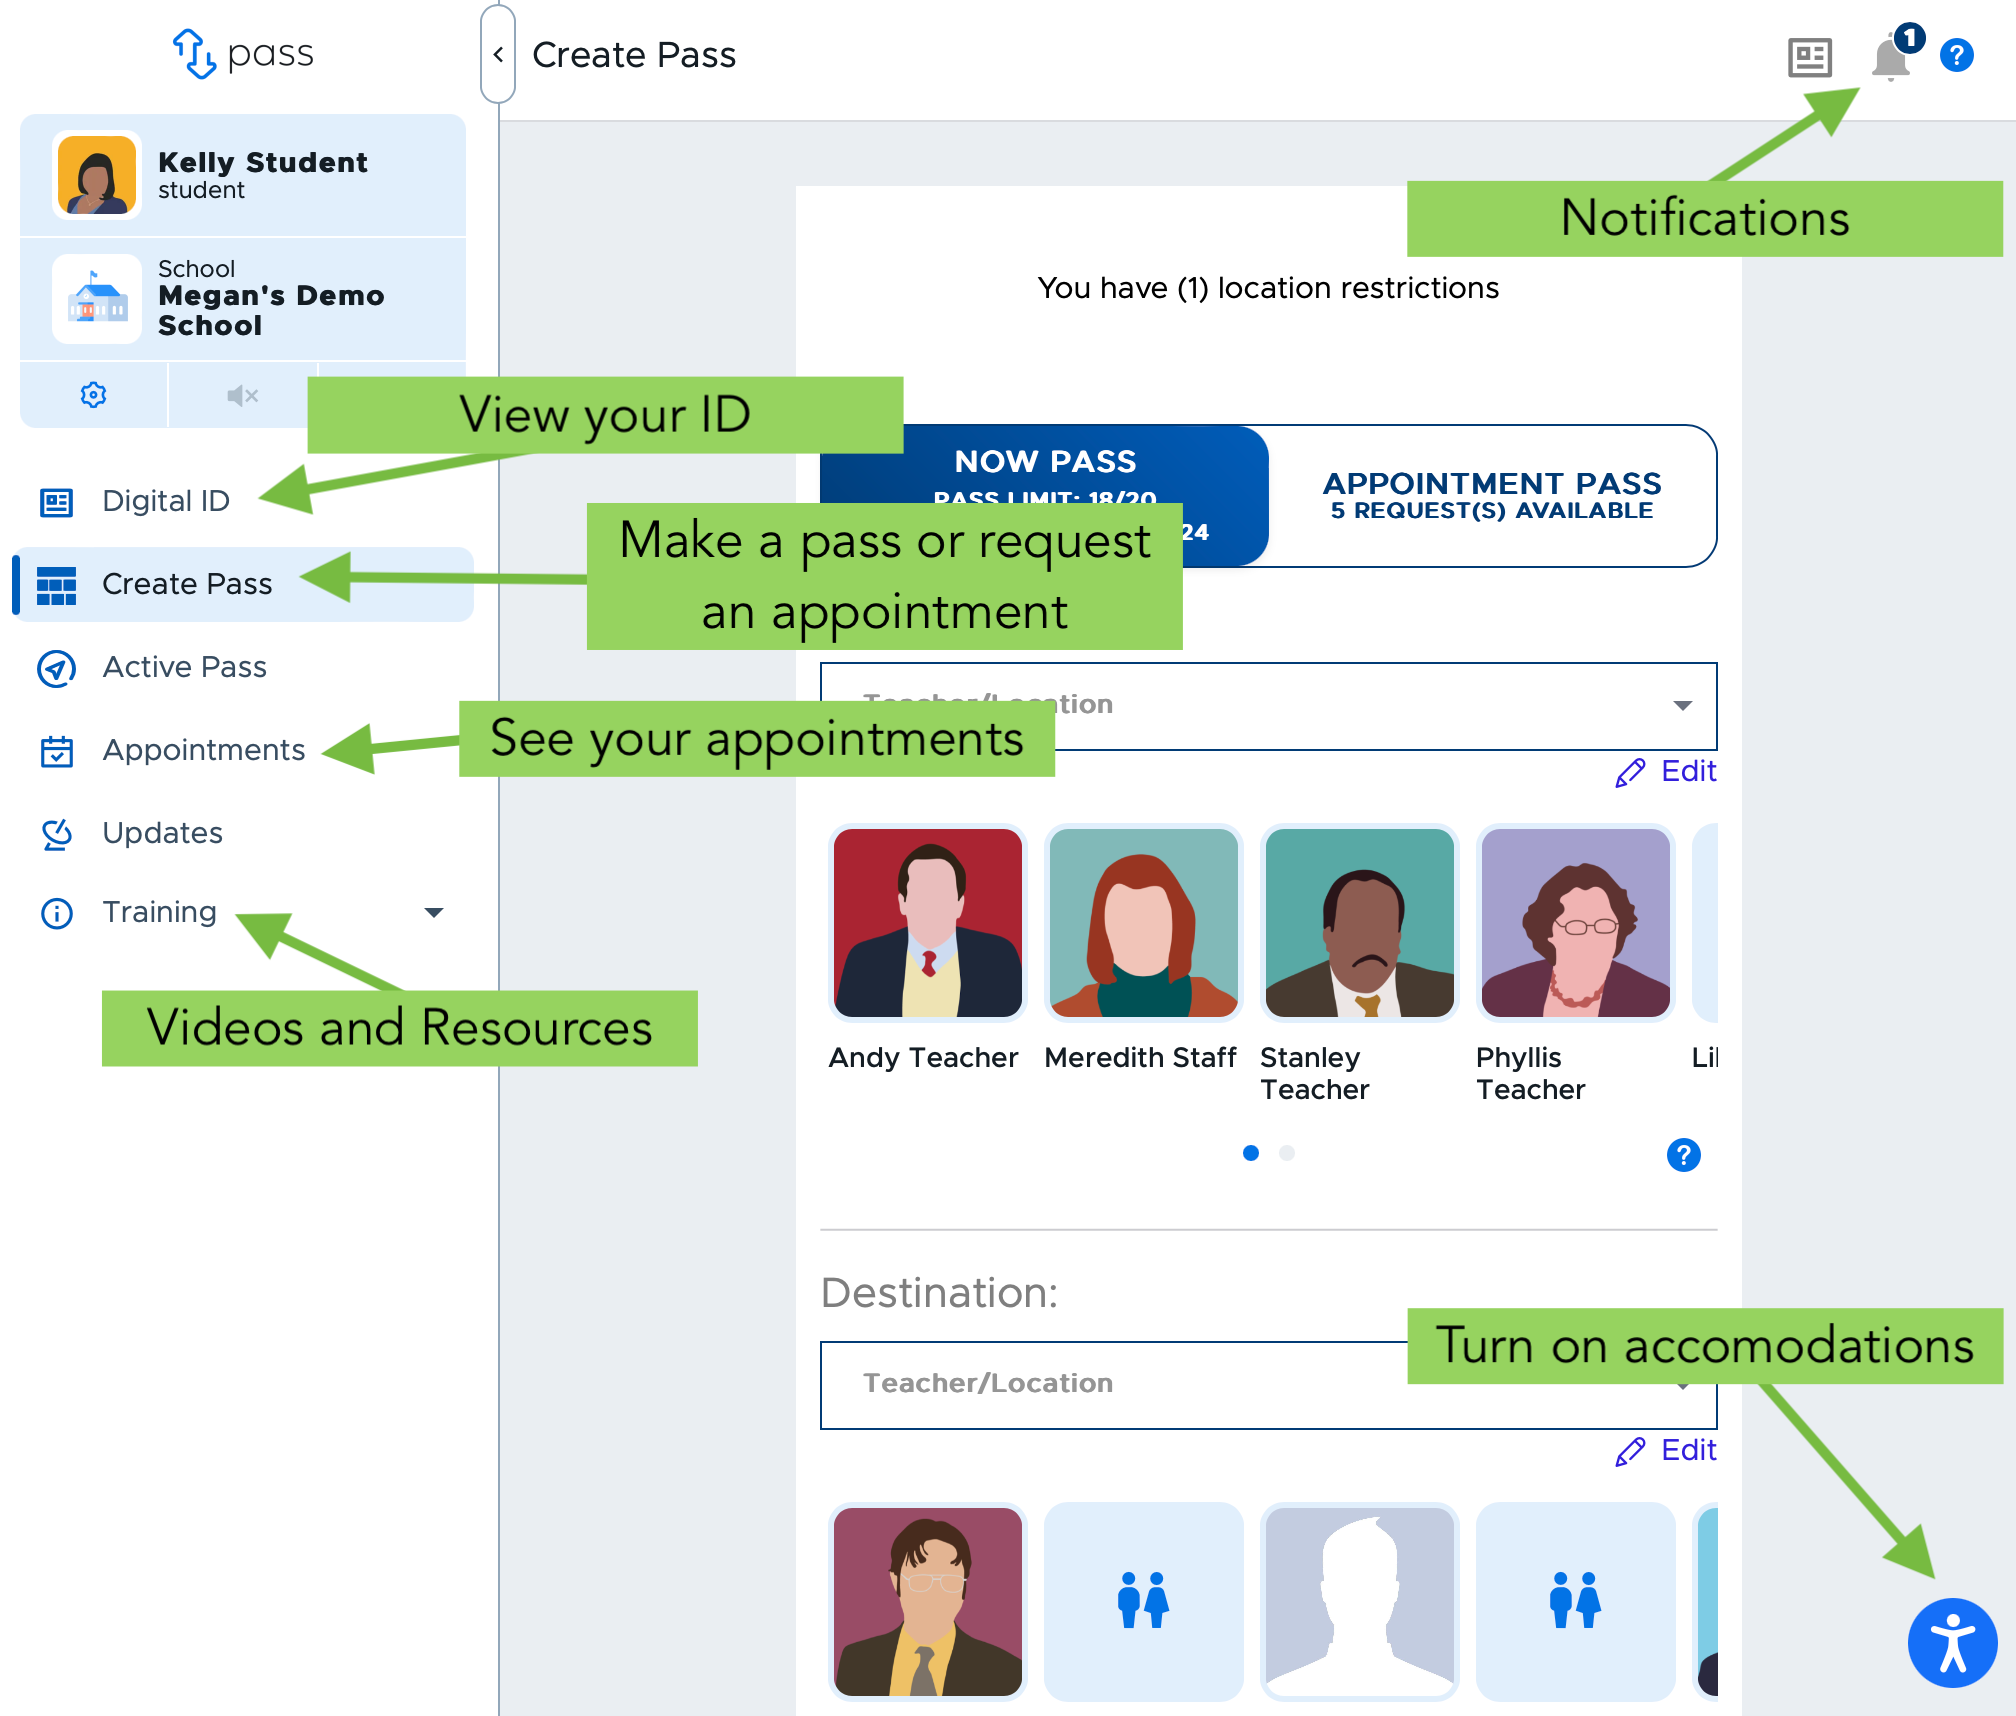
You’ll use the menu on the left side to navigate around Pass. You can collapse or open this menu using the arrow at the top. There is a spot for your notifications in the top right corner, and you can use the blue question marks if you need help.
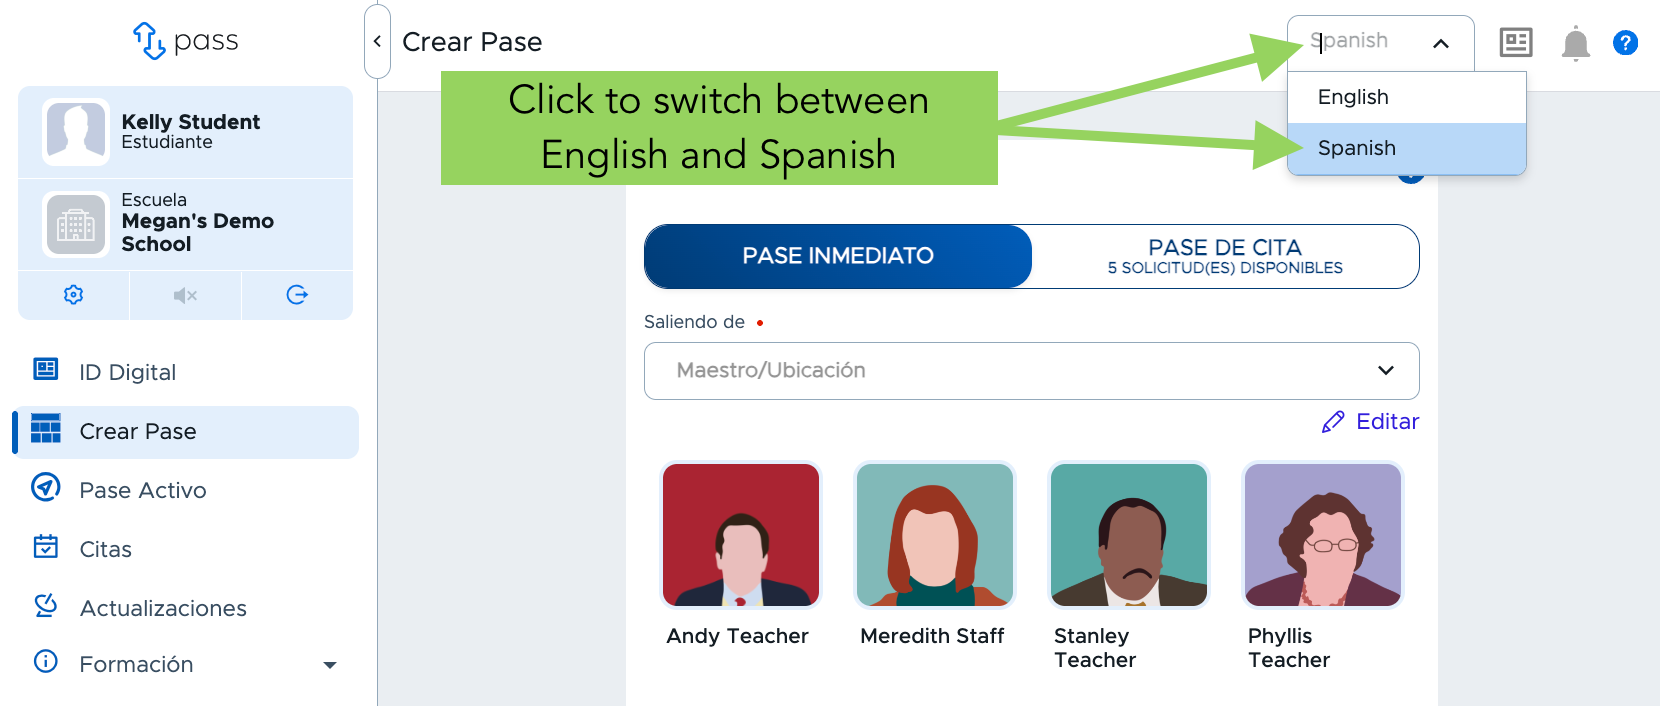
Spanish Translation Option
You can switch your Pass system to Spanish using the language drop-down menu in the top right corner.
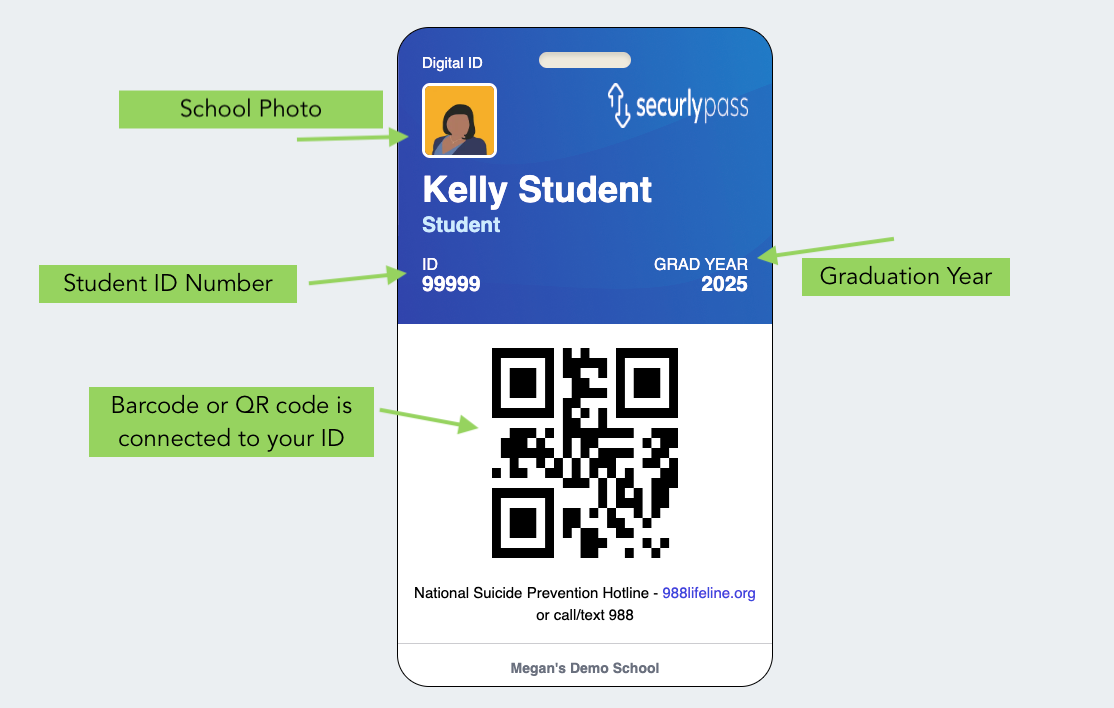
Digital ID
You can access your Digital ID from the left menu. You can scan the barcode/QR the same way you scan a physical ID card. Depending on your school, you may not see all of the fields in the screenshot below.
How to Set your Favorites
Favorites are the people/places that will show up on your Create Pass screen. You can add and remove people from this list, and change the order.
Click “Edit” (below the drop down box) to access your favorites options. Choose what action you would like to do.
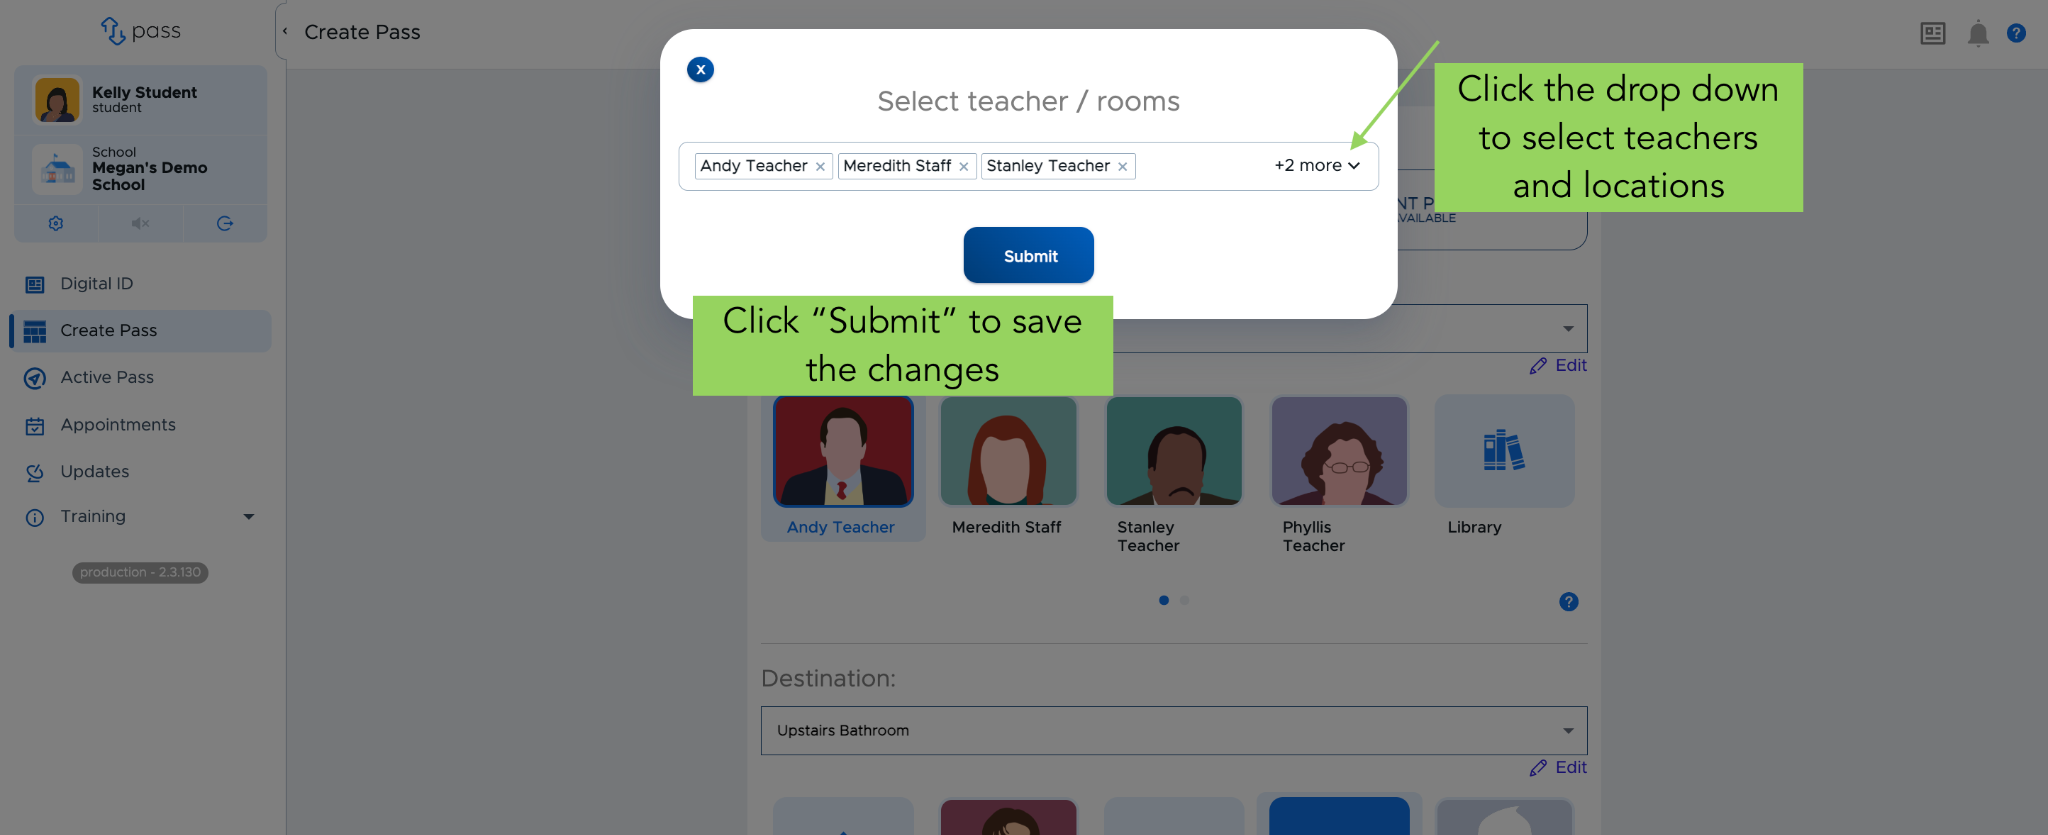
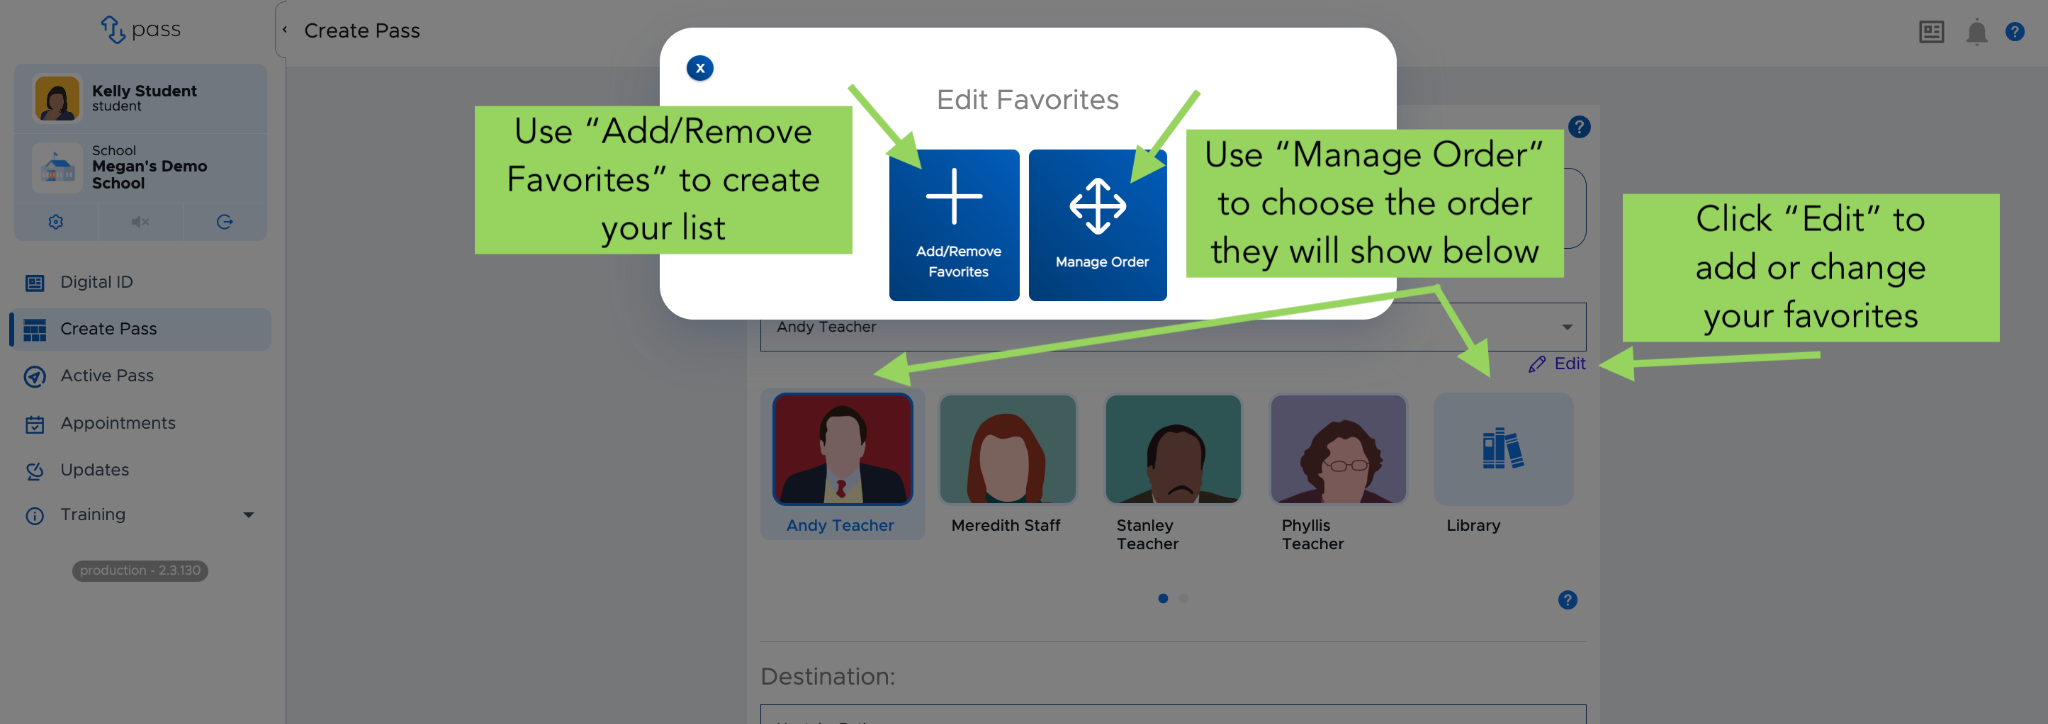
Add/Remove Favorites allows you to add teachers and locations by selecting from the drop down. Or, you can remove teachers and locations by clicking the X next to their name.
Manage Order will let you drag and drop your favorite teachers and locations into the order most helpful to you. Use the arrows on the left to drag and drop, or delete the user using the red “Delete” button.
How to Make a Pass
When you need to leave class, you’ll request a pass from your teacher.
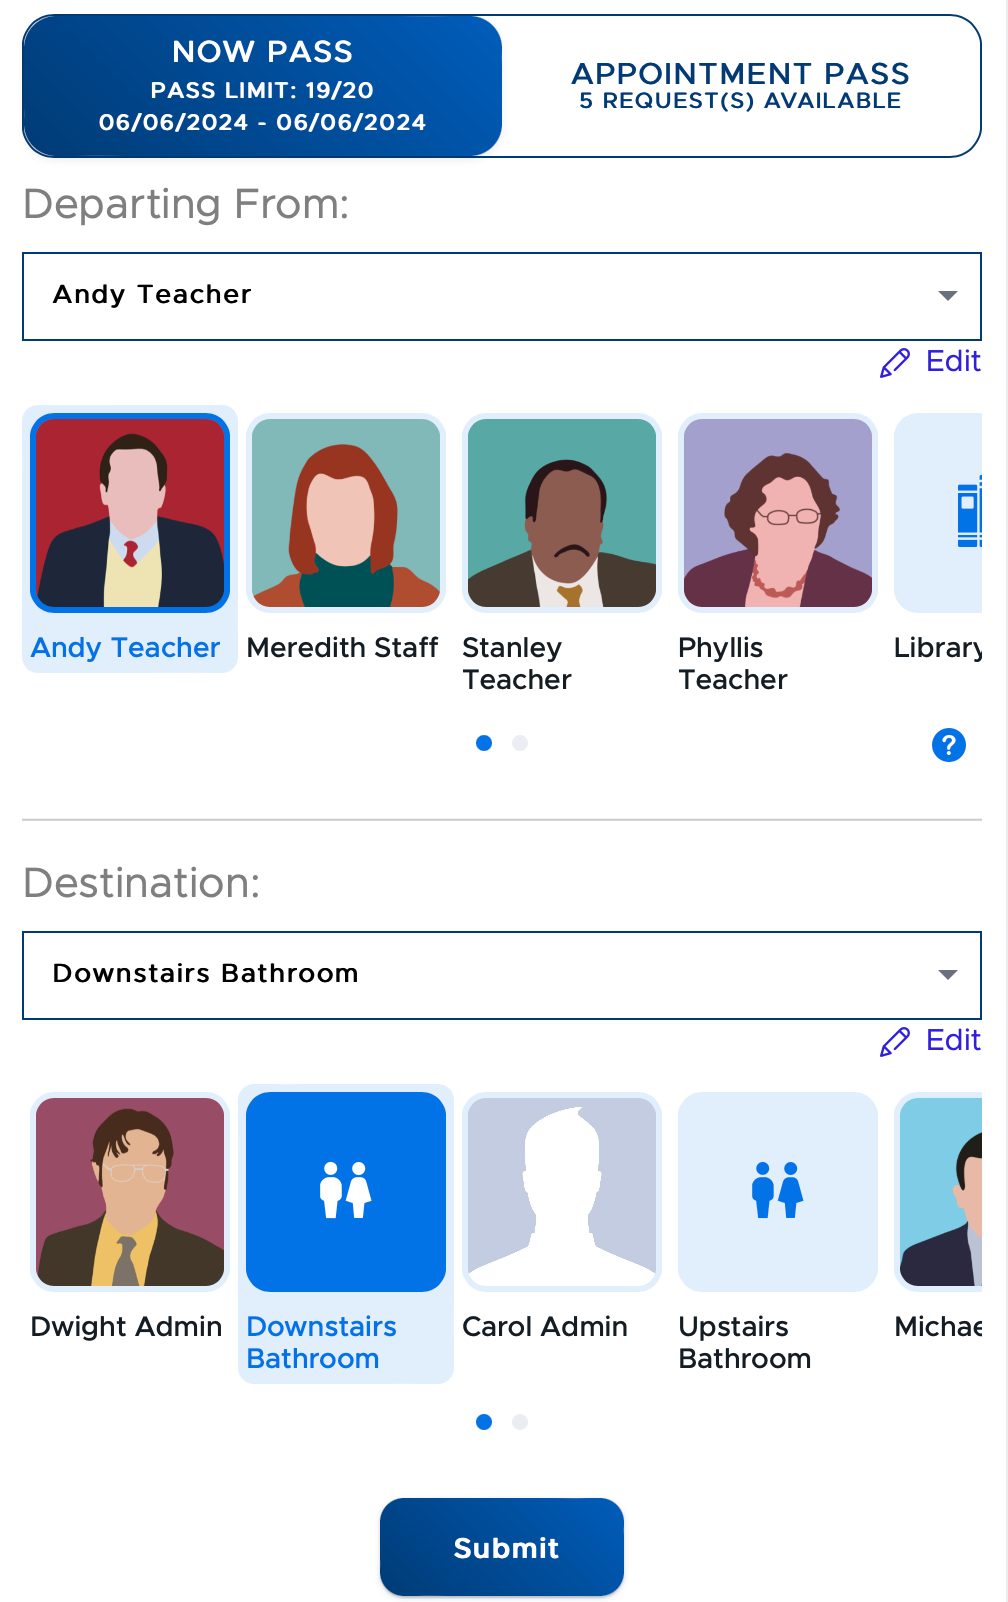
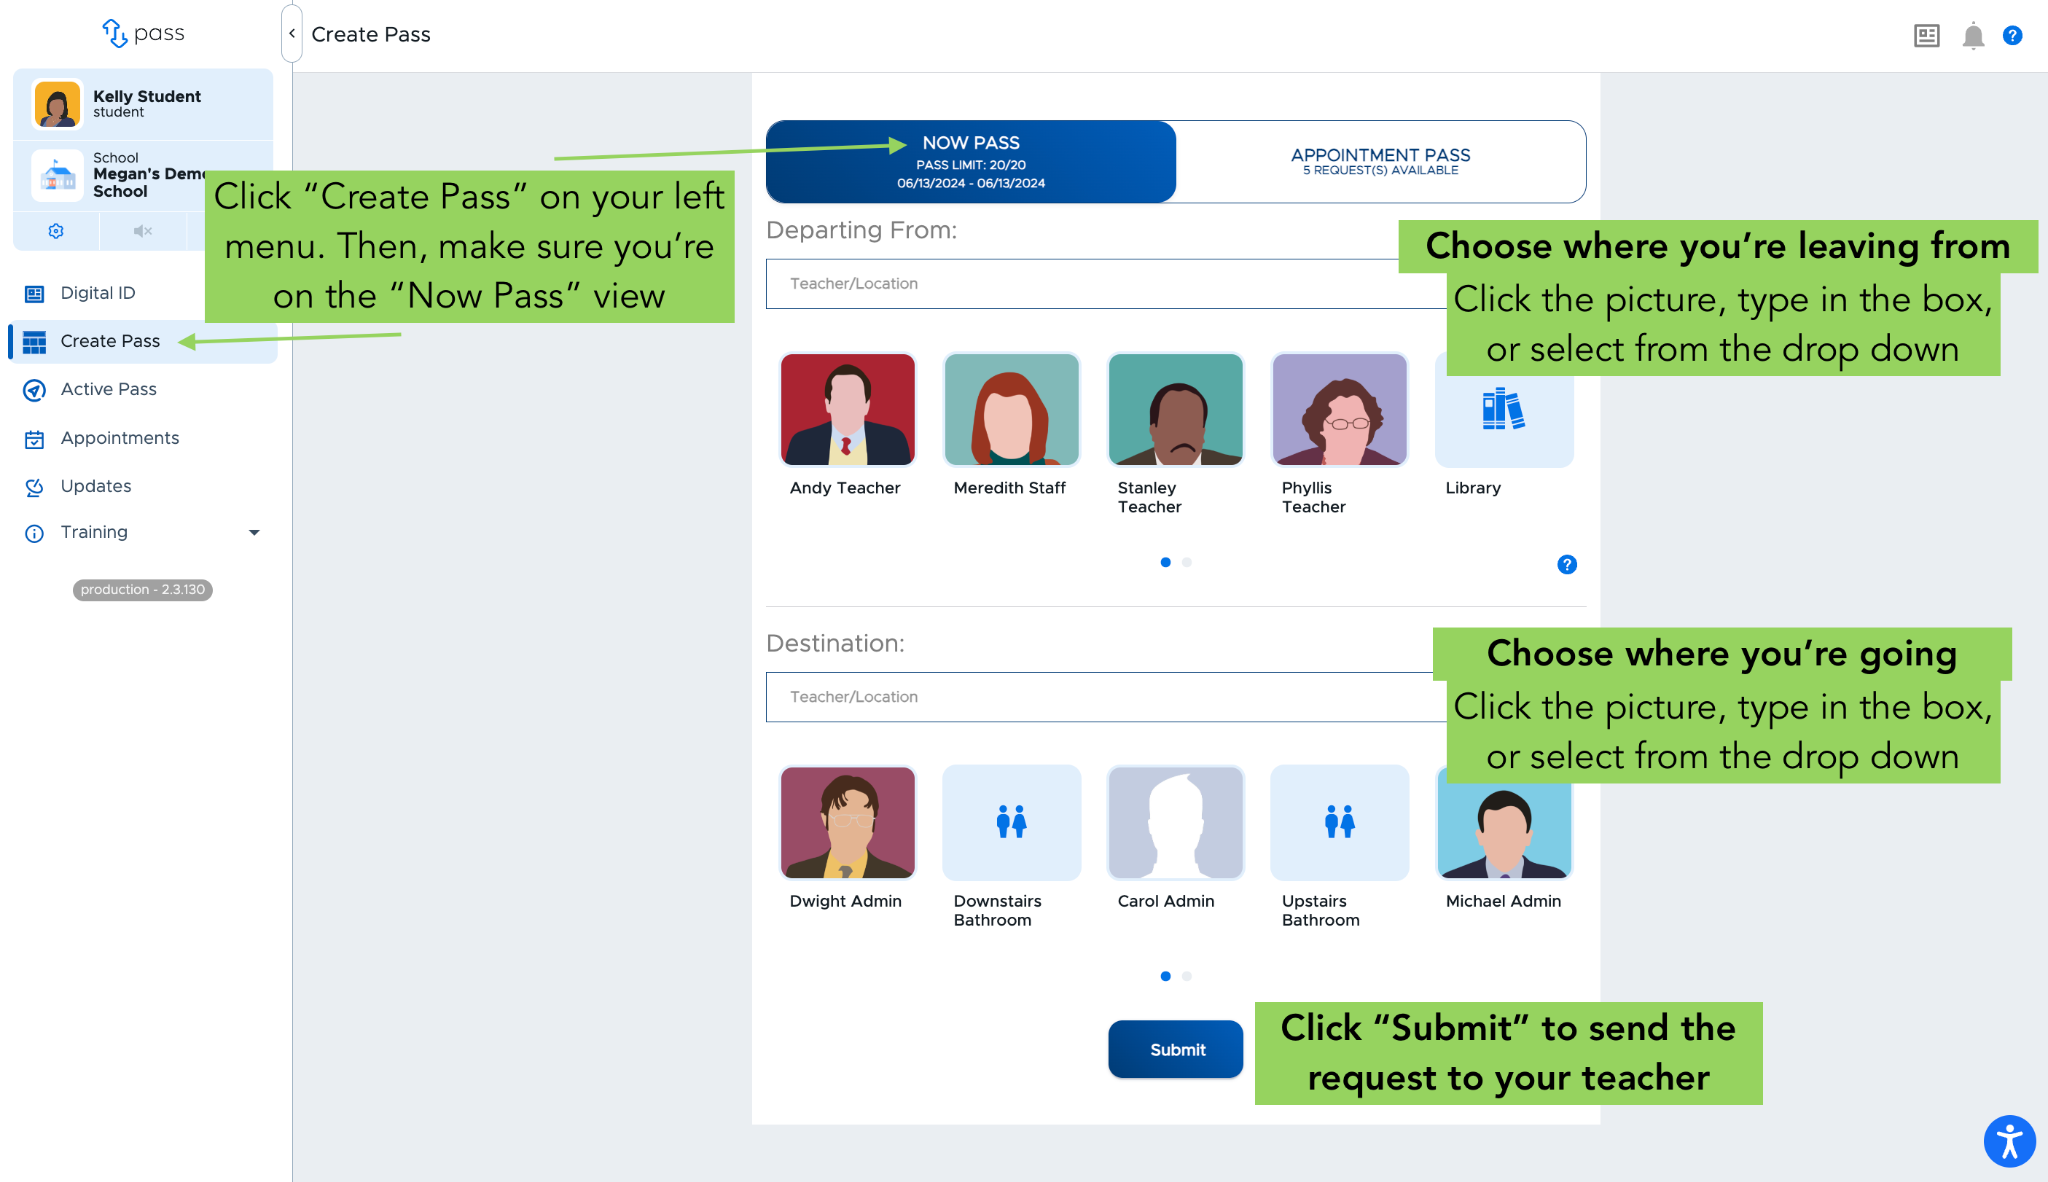
Click “Create Pass” on the left menu
Make sure you’re on the “Now Pass” view
Enter where you are leaving from - click the picture, type in the box, or select from the drop-down
Choose where you’re going using the same options as above
Click “Submit” to send the request to your teacher
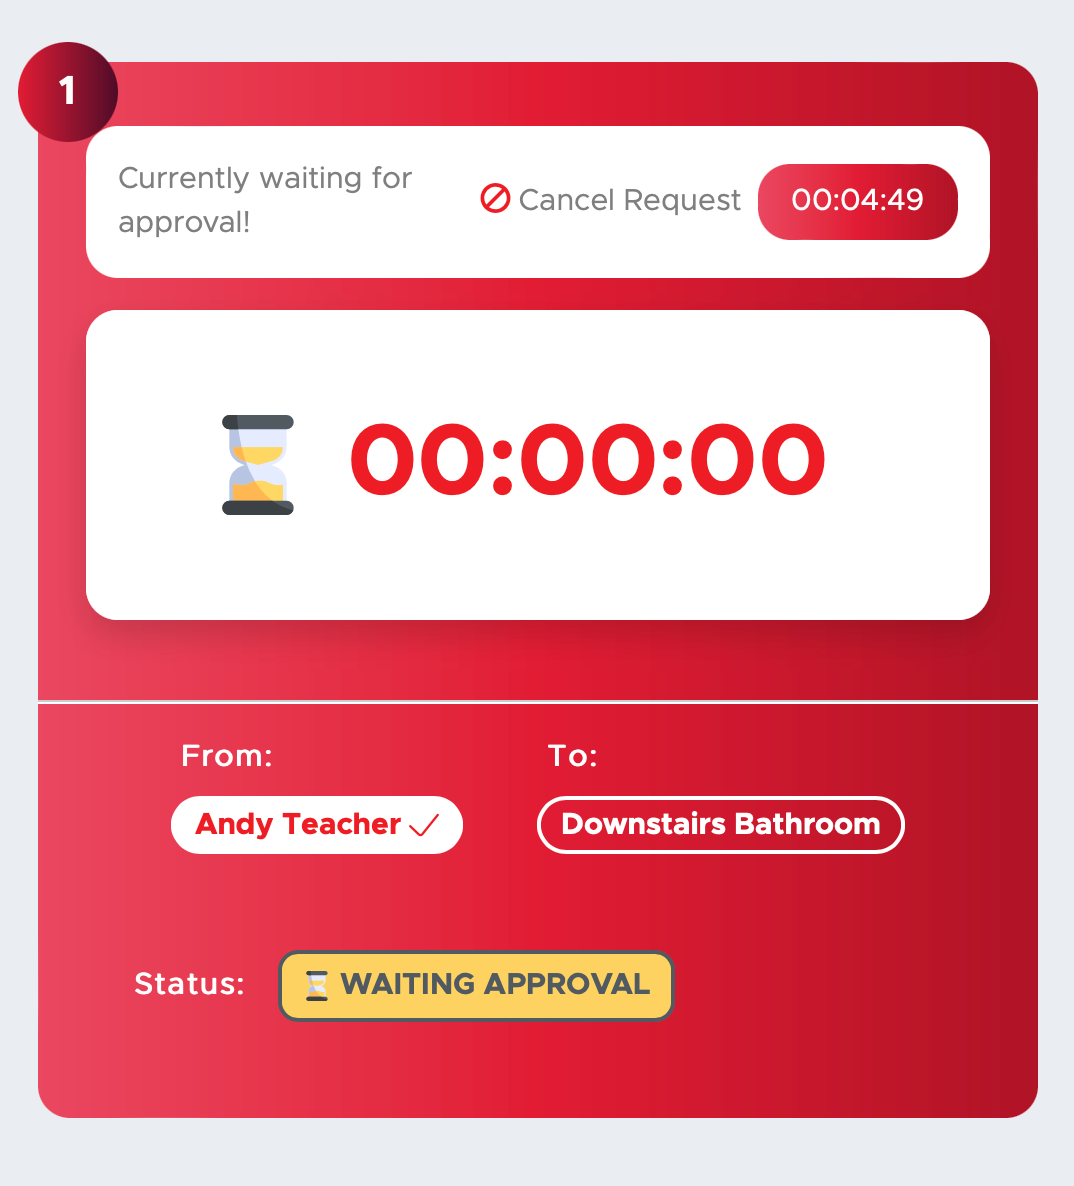
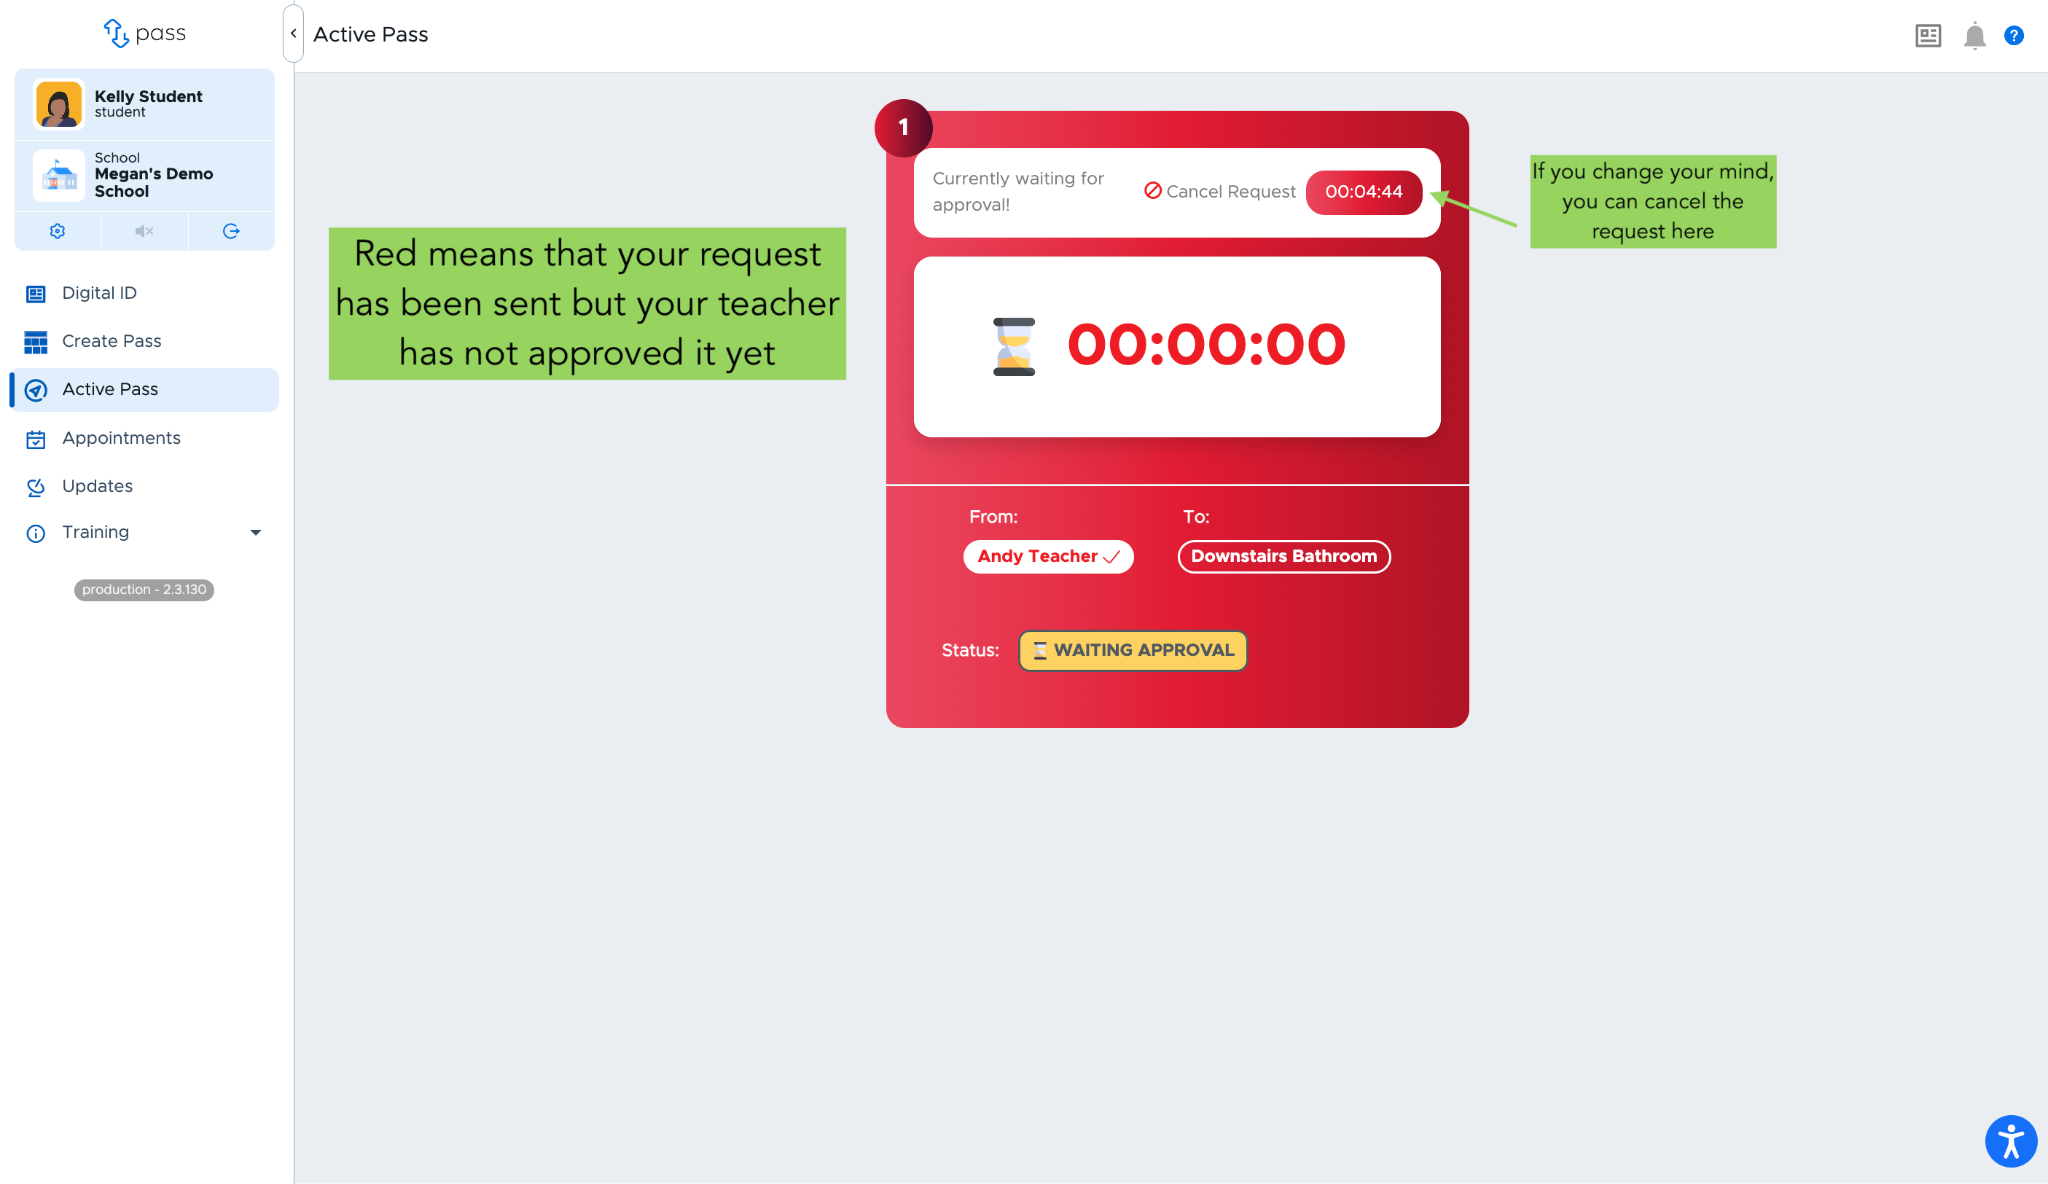
The pass will be red, which means the request has been sent, but your teacher has not approved it yet
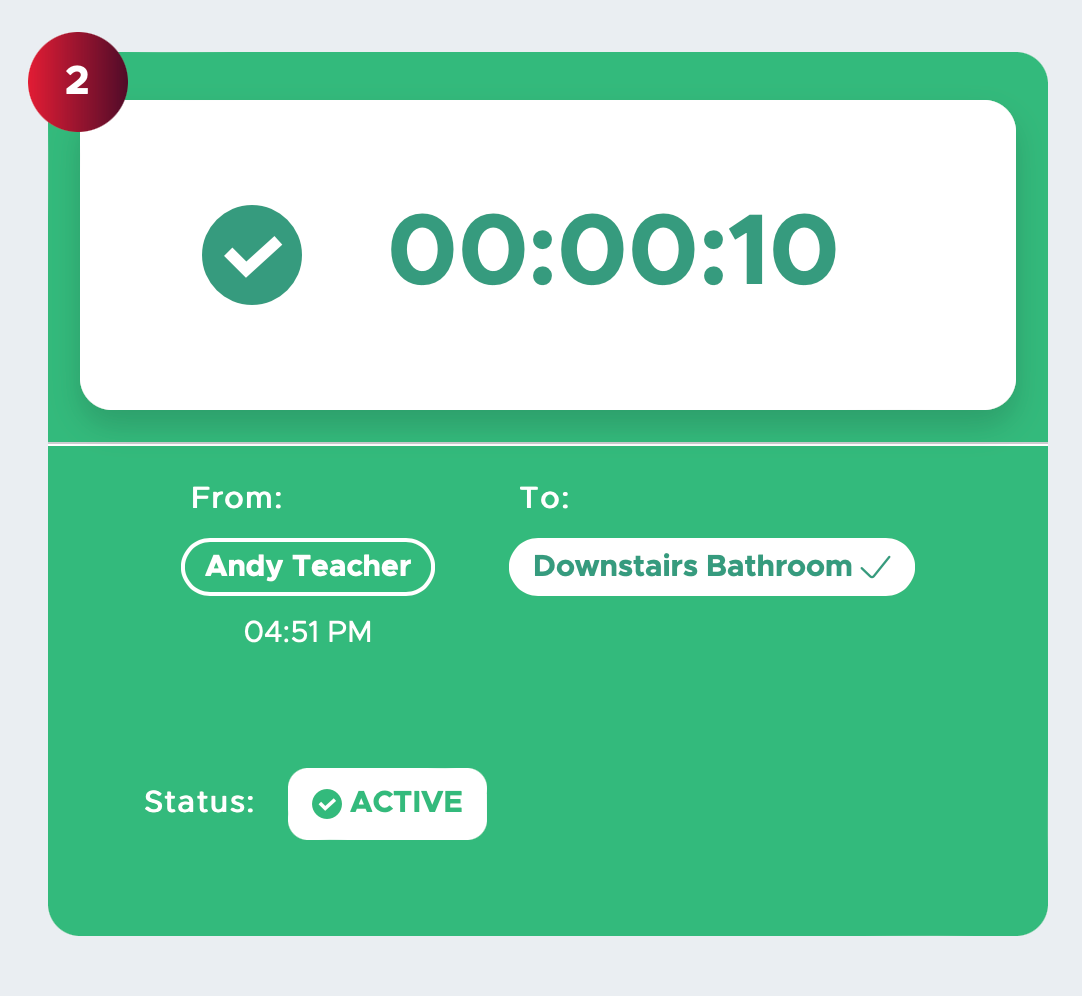
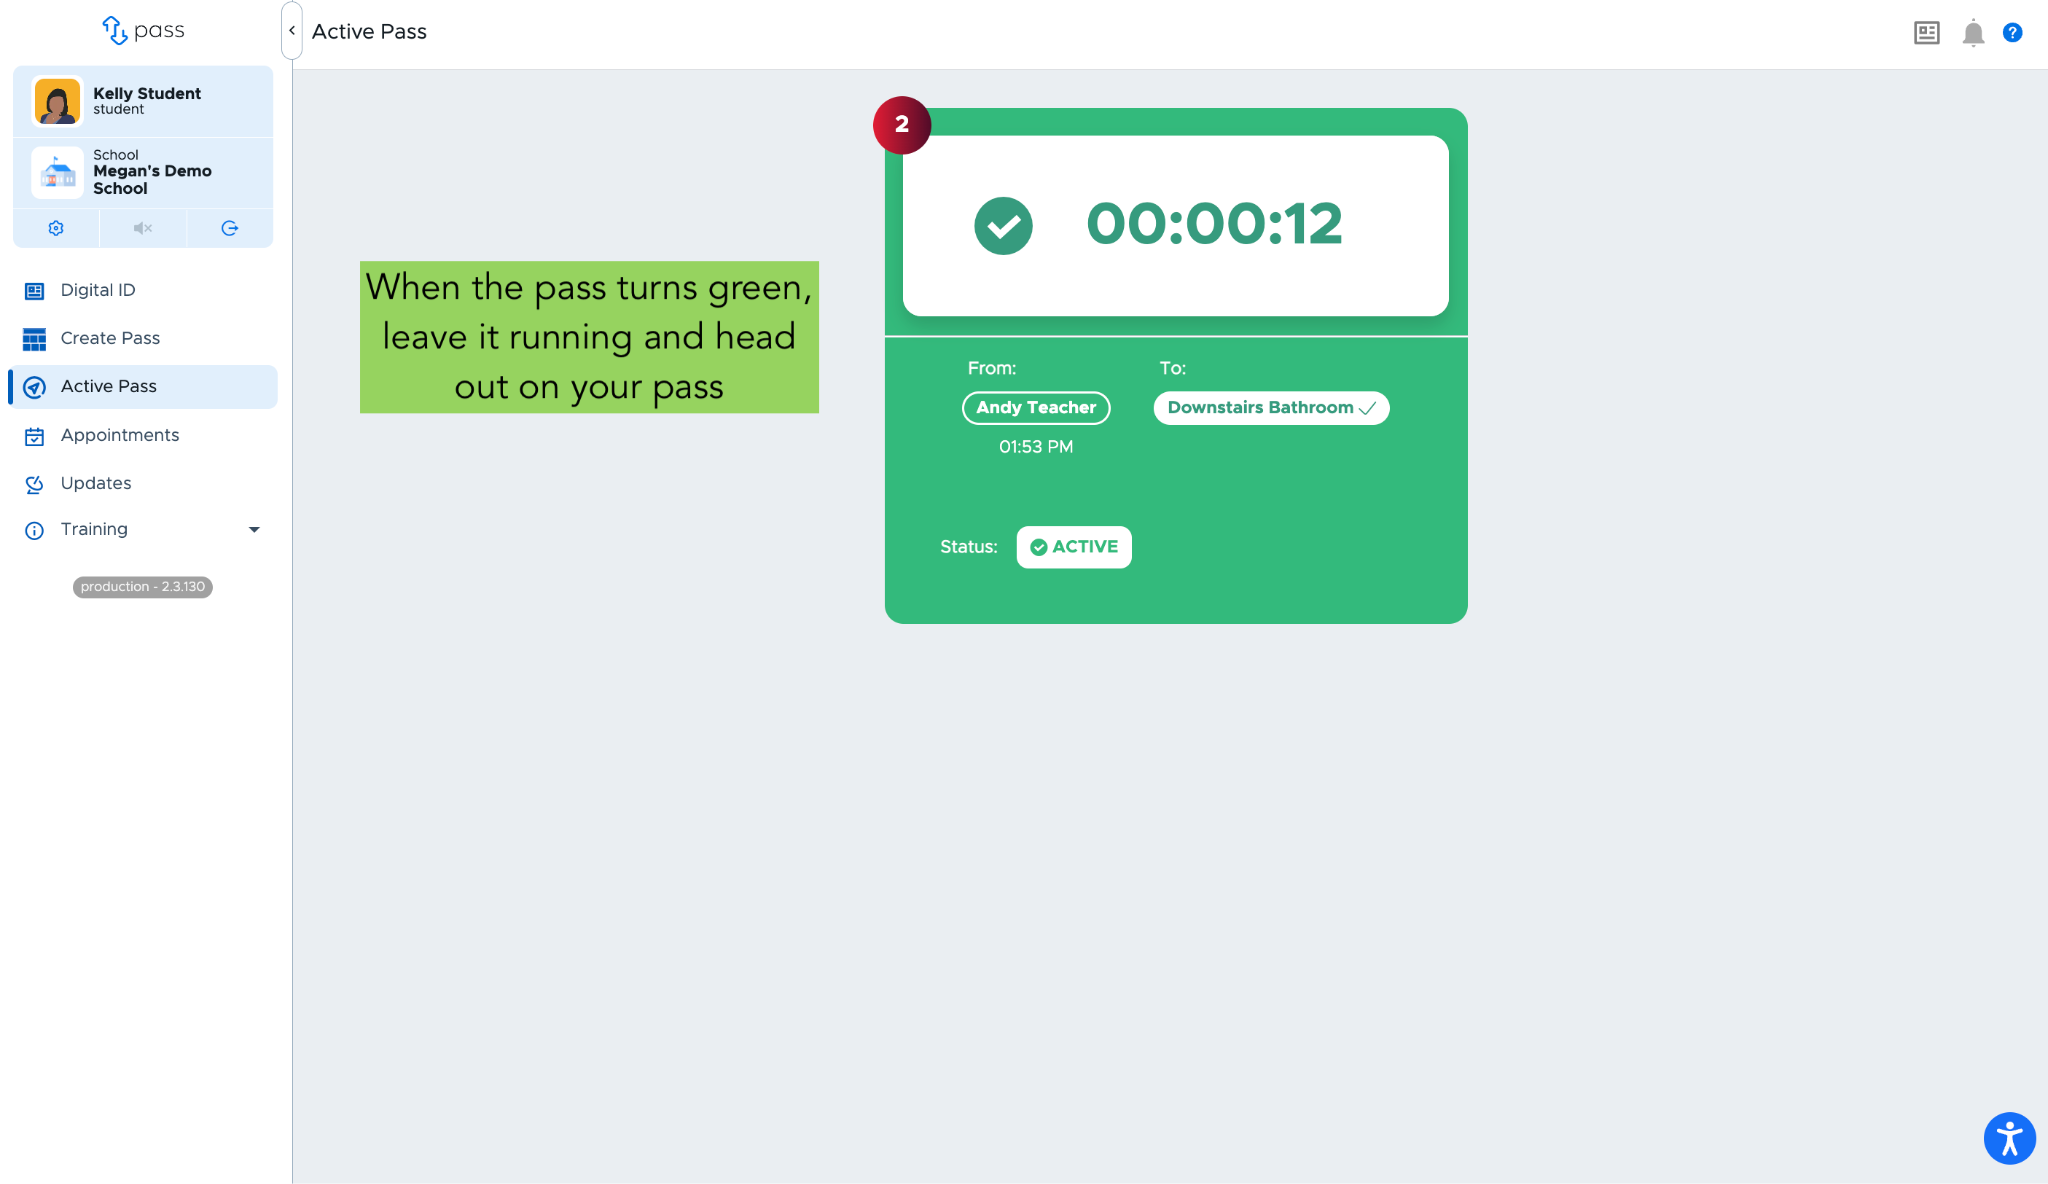
When your teacher approves the request (on their device or on yours), your pass will turn green - this means you have permission to leave and go on your pass
Leave the pass running while you go, you do not need to bring it with you in the hall
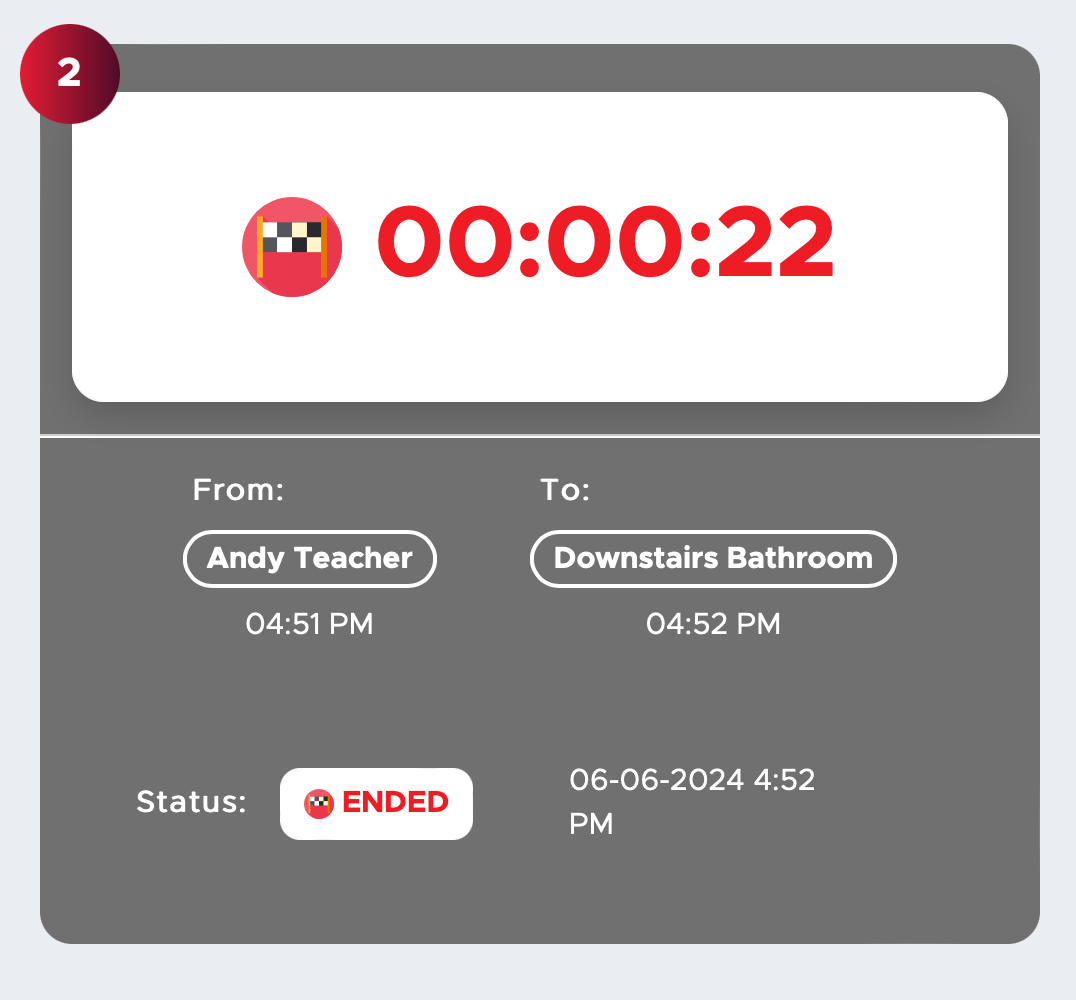
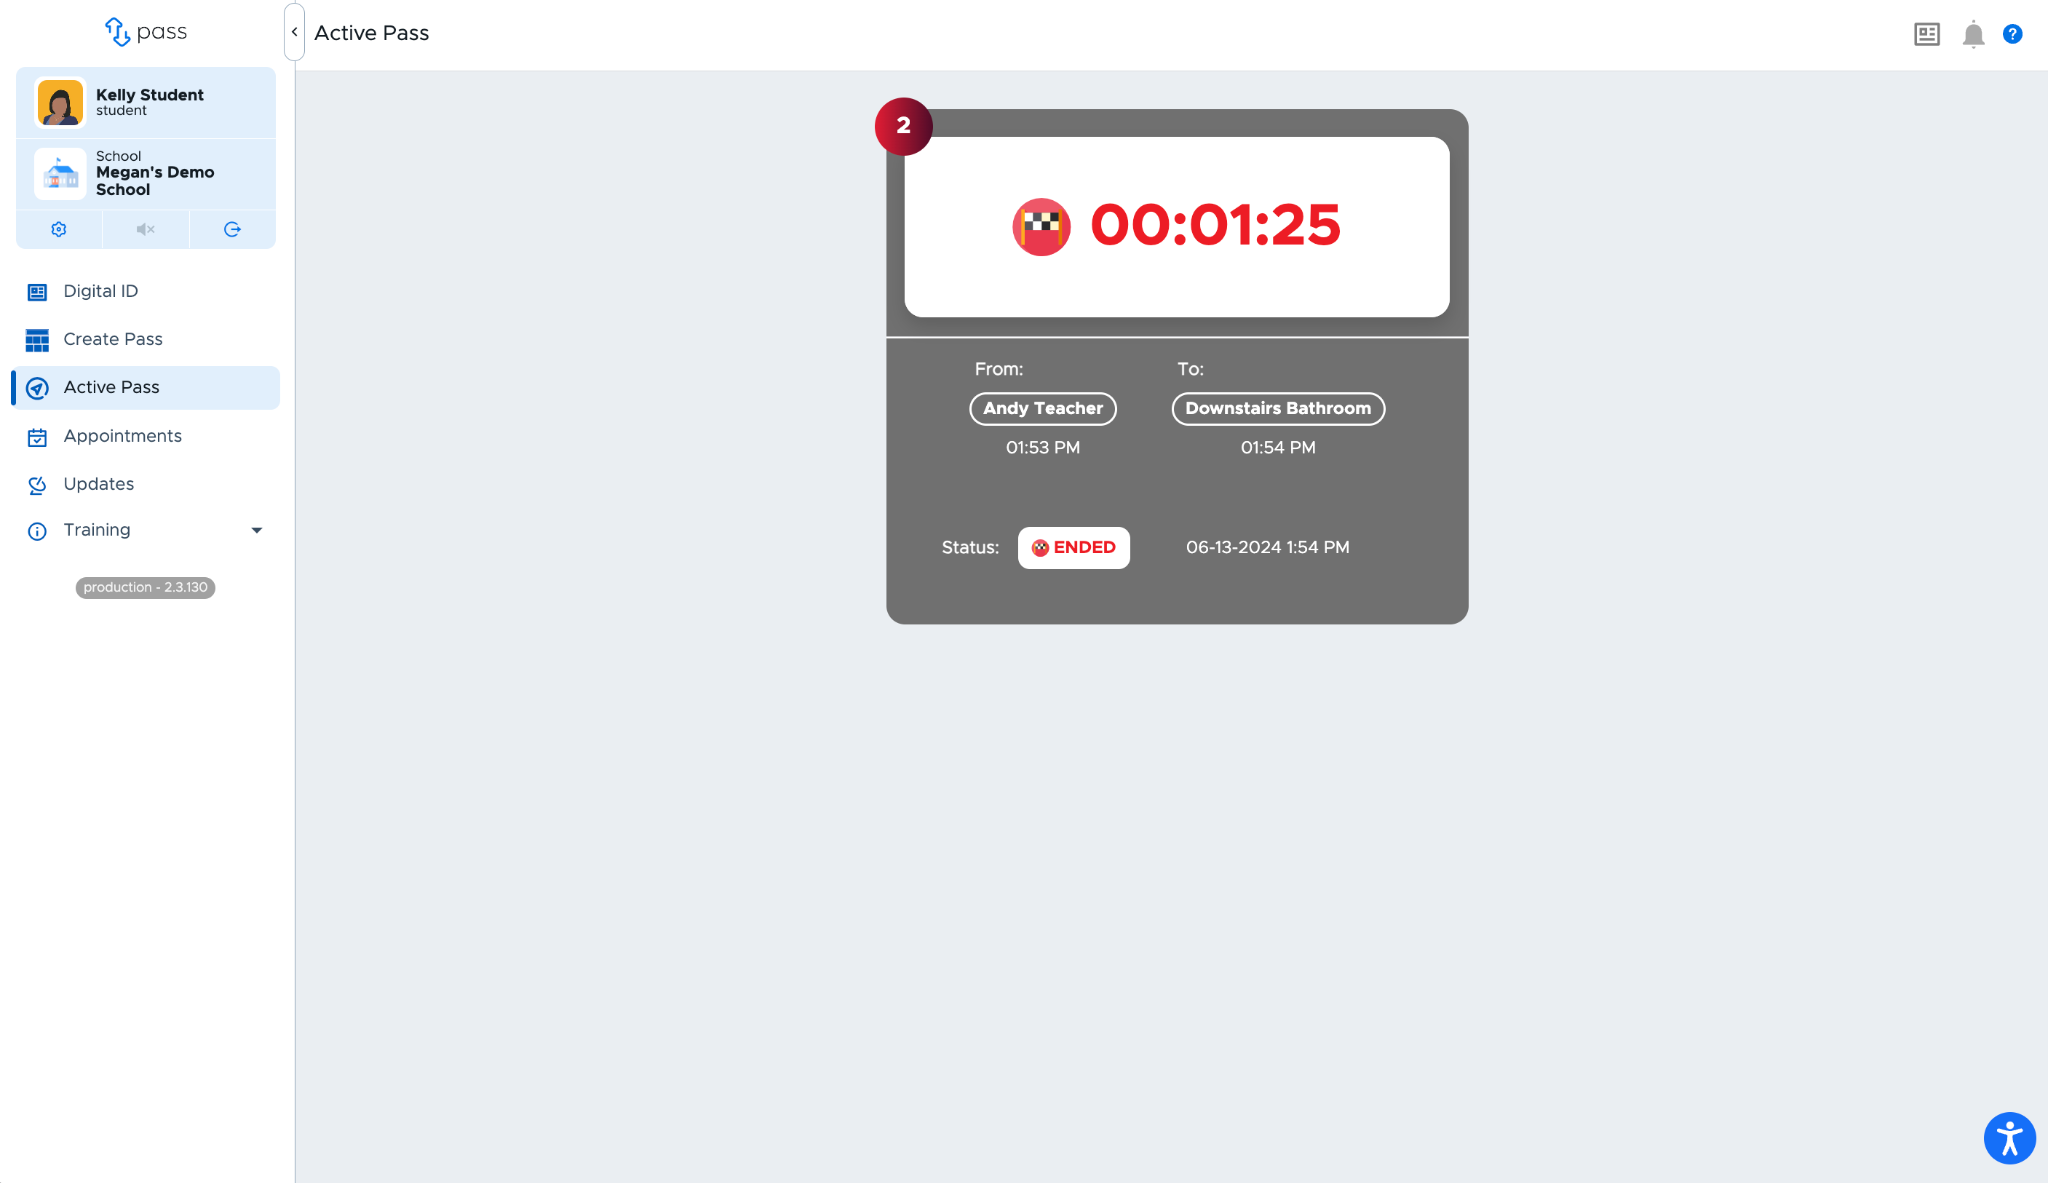
When you return to class, your teacher will end the pass on their device or yours, and the pass will turn grey
How to Join a Queue (if available)
If your school has queues set up, and the location you want to go is full, you can join the queue - or line - to wait your turn.
Create your pass request, as explained above
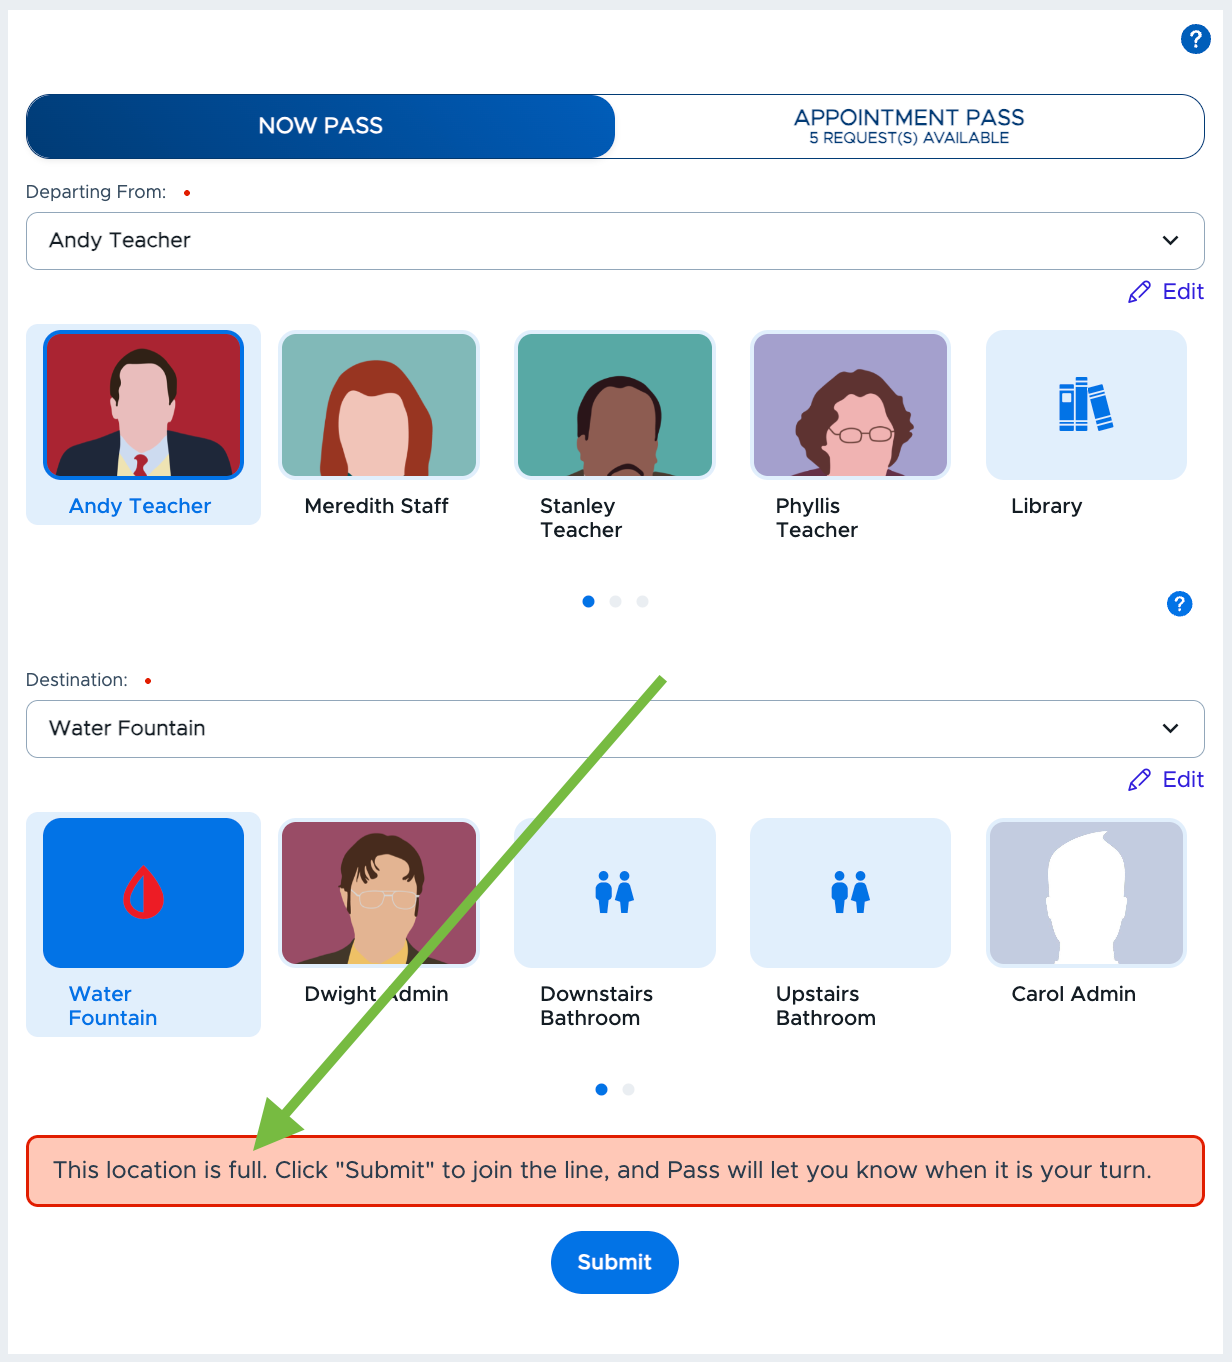
If the location is full, you will see a red message that lets you know you can join the queue - Click Submit to join the line
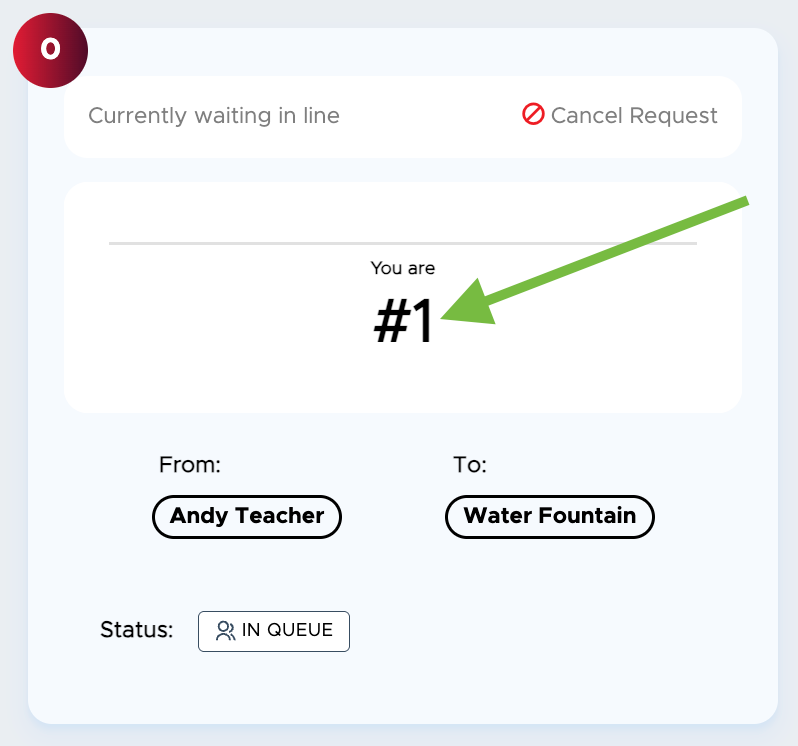
You’ll see where you are in line - this number will update automatically
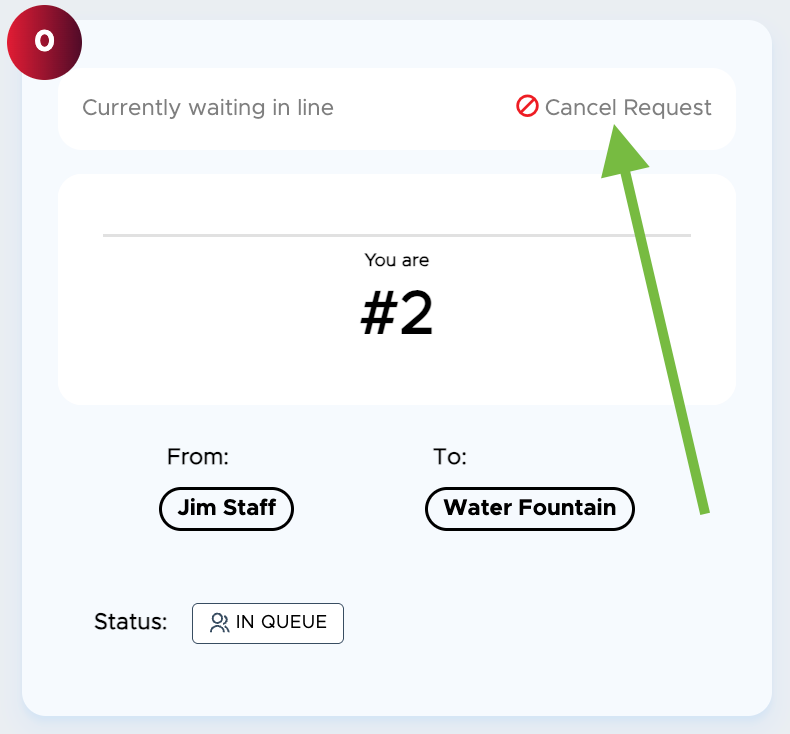
If you change your mind or need a pass to somewhere else, you can click in the top right to cancel your request
When it’s your turn, your screen will show the red “Waiting Approval” screen and your teacher can activate the pass.
How to Make a Late Pass (if available)
If enabled, you have the ability to create a Late Pass if you are late to class or late to school.
Click “Create Pass” on the left-hand menu
Select “Late” at the top of the screen
In the “Teacher/Location” field, start typing the name of the adult for which you are late. When the name appears, click on that adult’s name
Supply the reason for being late
Choose the “Late to Class” or “Late to School” option
Click the blue “Submit” button
If successful, you will receive the message “Successfully created”
The pass will be gray, indicating an “Ended” pass.
* If you are using the Securly Pass mobile app, you can follow the same steps above:
How to Use an Auto Pass
Some locations may be set up for Auto Pass. This means that you can start, end, or start and end your own pass. This is set up differently for each school and teacher, and some schools don’t use this feature.
You’ll create your pass the same way as above.
If you see the green “Start” button, you are allowed to start your own pass. Make sure to start it before leaving class.
Once you’ve started the pass and it’s turned green, leave it running and go on your pass. When you get back to class, click the red “Stop” button to end your pass.
After your pass is ended, you can see the time stamps and other details.
Using a Kiosk
A teacher can launch a kiosk that you’ll use to create passes. Usually, kiosks are used when you won’t have access to your own device.
Go up to the Kiosk and click “New Pass”
Choose your destination from the dropdown or the favorites, and click “Submit”
The next step will depend on your school’s settings - you’ll see one of these four screens
If it’s the Student Number screen, enter your student number into the box and click “Submit”.
If it’s the Code Scan screen, hold the barcode or QR code on your ID card to the device camera or scanning device.
If it’s the Card Scan screen, swipe your card in the attached device.
If it’s the Email screen, enter the first part of your email address (before the @ symbol), and enter your Kiosk Passcode, then click “Submit”. Your Kiosk Passcode may be your student number, or it may be assigned by your school.
Once you’ve entered your info, your pass will be submitted to your teacher. You still need to wait for your teacher to approve the pass before you leave the classroom.
If Auto Pass is set up for your teacher and location, you’ll see a green “Start” button. You can use this to start your own pass.
If a queue is set up for the location you’re trying to go to, the kiosk will add you to the queue and show you your number in line.
Once your pass is approved, you’ll see this screen. You can now leave class and go on your pass.
When you return to class, you can end your own pass on the kiosk. On the first screen, choose “End Pass”
Enter your information (the same way you started the pass) and click “End Pass” to mark that you are back in class.
Why You Might Get an Error
There will be times when you cannot create a pass. There will be an error message that tells you why. Here are a few common errors, but there are others not included here.
If you have a frown face on your Create Pass screen, that means you have no passes left. At the top, under NOW PASS, you can see how many passes you have left, how many you were given, and the time frame. Your passes will reset after the end date - this could be every day, weekly, monthly, or for the semester.
If you try to create a pass and get the error “Hall traffic limit reached. Please try again later.” That means that the maximum number of students in the hall at once has been reached. Wait a few minutes and try again.
If you try to create a pass and get the error “Maximum capacity of the location has been reached. Please try again when a student returns.” This means that the location you want to go is full. Wait a few minutes and try again, or if it makes sense to, create your pass to a different location.
If you get a different error message, it will state what’s going on, and it will usually tell you what to do. Read it closely before asking your teacher.
Where to Look at Your Appointments
Some schools also use Pass to schedule appointments. This can be used for nurse/counselor appointments, make up tests, meetings with admin, etc. To see your appointments, click “Appointments” on your left menu.
On the Appointments page, you’ll be able to see appointments for the next seven days, or beyond seven days. You can see who created the appointment, who the appointment is with, the time/class period of your appointment, and other details.
When an appointment is made for you, you’ll see it on the Appointments tab, and in the bell icon in the top right corner. You will get reminder notifications 20 minutes and 5 minutes before your appointment. And, 5 minutes before, it will appear on your teacher’s dashboard for approval. You do not need to make a pass to go to your appointment.
How to Request an Appointment
You may be able to request appointments from adults at your school. This is not available for everyone. When you click “Create Pass”, look for the “Appointment Pass” tab on the right side. Appointment requests are sent to the adult the appointment is made with. They can edit, cancel, or approve your request. If the teacher approves the request, it will become an appointment - and it will show on your Appointments tab.
To create a request, fill in the information, then click “Submit” to send it to the teacher. Your request needs to be at least 30 minutes from now, and can be for today or up to 30 days from now. You can send up to 5 requests at once. If a teacher cancels your request, you’ll get the request back. If a teacher approves your appointment, you will get the request back after the appointment takes place.
How to Get Help
If you have questions or forget how something works, you can click the Training tab in your left menu. Documents will open the document library with resources. Video Tutorials will open the video library with 2-4 minute long videos. The green section of videos is about Kiosk Mode; if your school uses kiosks, make sure to watch these.
If you log in to Pass and notice anything different, click the Updates tab on your left menu. This page will outline any changes or updates we’ve made to Pass.
If you need accommodations to help you use the system, you can set them up in Pass. Click the little blue and white person logo in the bottom right corner of your screen. Toggle on or off what you need. You can also reset these settings here.
Who can end the pass? (it depends on the pass type and how the student ends it)
Whether the student can end their own pass depends on the type of pass and the method they use:
- Auto Pass — the student can end it themselves with the red Stop button.
- Kiosk pass — the student can end it themselves by choosing End Pass at the kiosk and re-entering their information when they return.
If the pass is neither an Auto Pass nor a Kiosk pass — for example an appointment pass created by a principal, teacher, or other adult — the student cannot end it themselves. In that case an adult ends the pass, either on the student’s device or through the adult’s Pass interface.
It does not have to be the adult who created the pass. Any adult can end it — ending an appointment pass is not limited to the staff member who created the appointment.
Separately, students cannot cancel appointments created by an adult. A student can only cancel an appointment request that the student themselves submitted, and only up to 30 minutes before the appointment time.