Classroom › Classes
Using Student Groups
Quick Facts
- Teachers can create up to 6 groups per class.
- Groups created in a class are saved for future class sessions
- Groups are visible to all co-teachers of a class
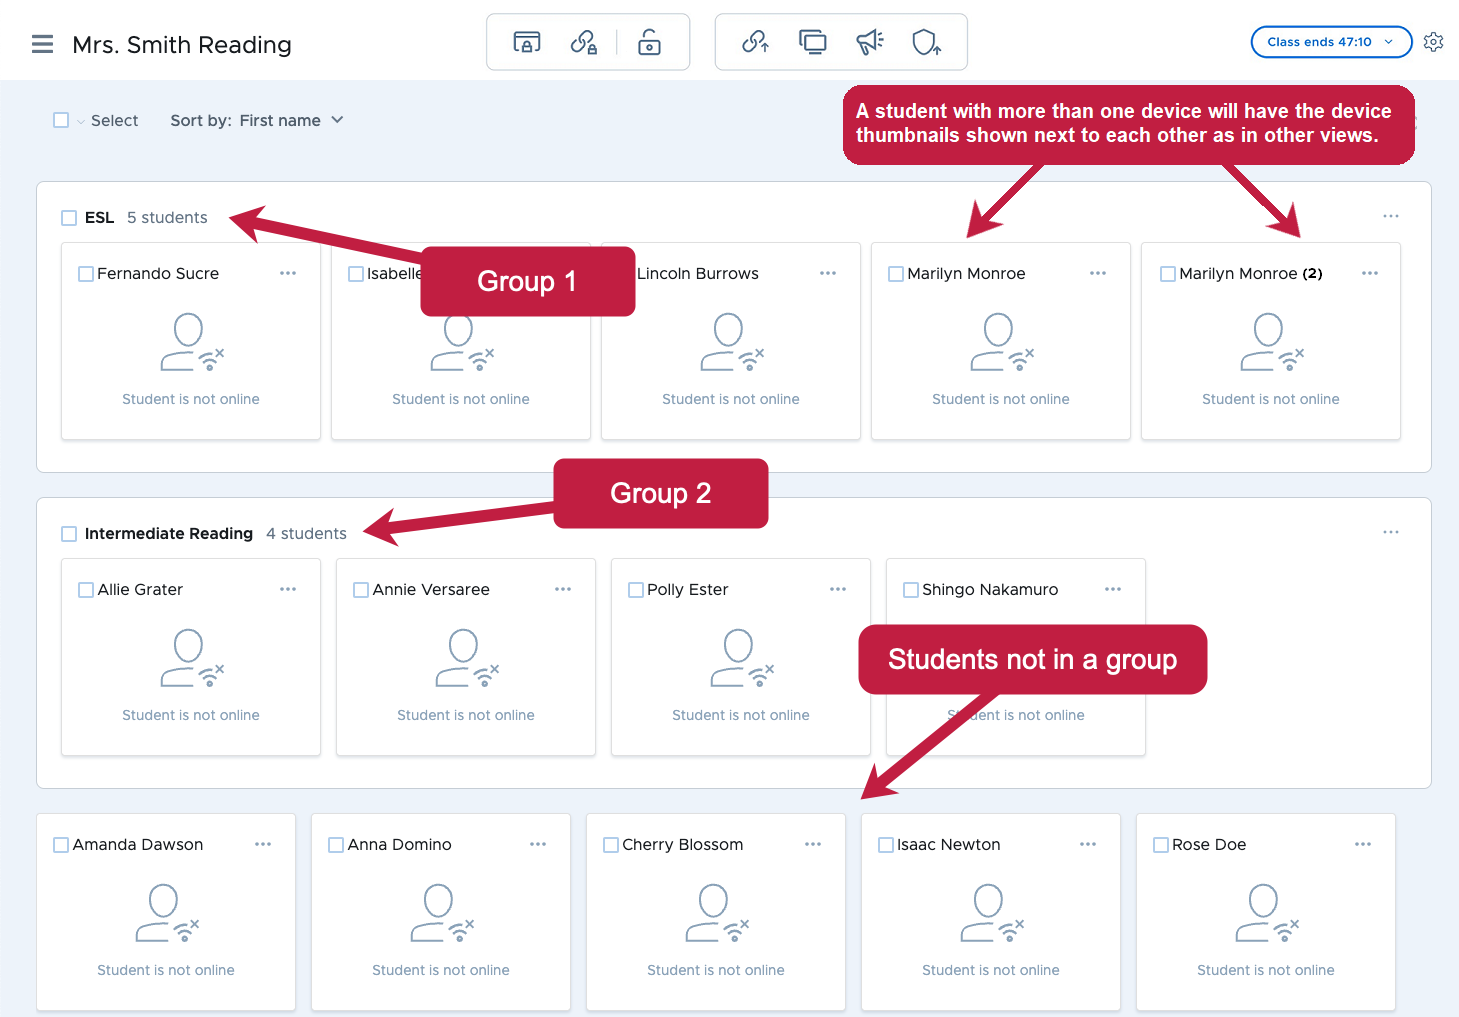
- A student can belong to only one group at a time
- The Groups feature is only available for classes of 48 or fewer students
Create a Group
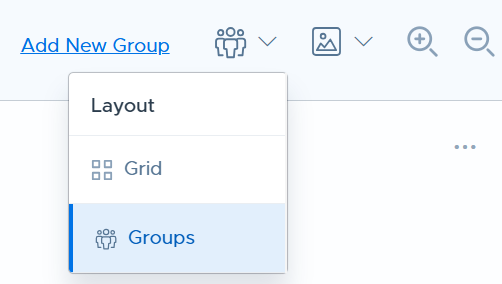
Within an active classroom session, navigate to the layout selector at the top of the class view, select "Groups," and click on Add New Group.
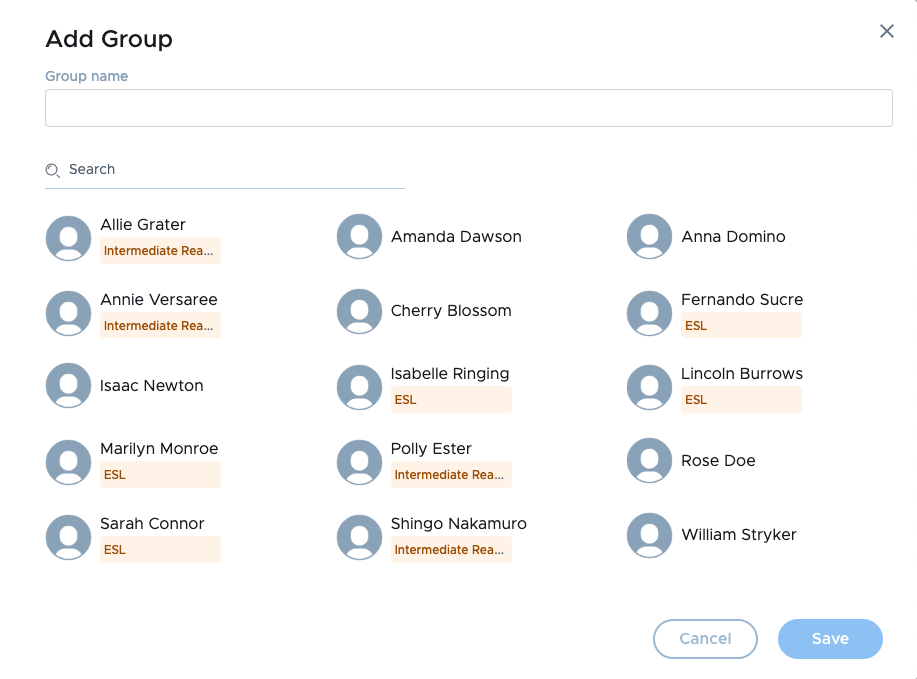
Next, in the box tagged "Group name" type in your chosen group name. Click on students to add them to the group. If a student is already assigned to another group, the group name will be shown in orange. If they are selected, they will be moved to the new group.
Toggle group view
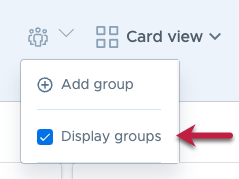
In the Groups menu, click "Display groups" to view all students by group in your class. You can uncheck this box to return to the default view of the whole class.
Groups are sorted in alphabetical order by group name.
Delete a Group
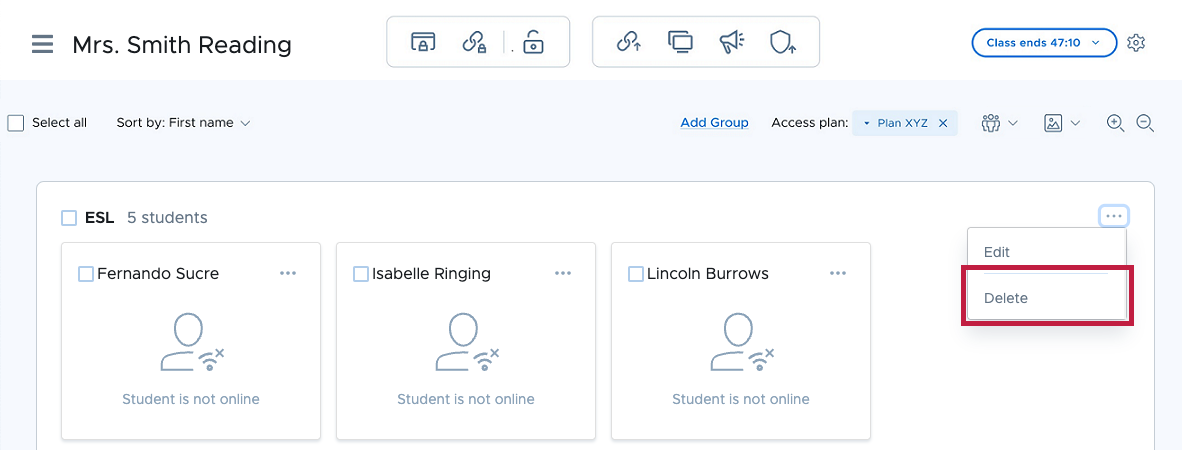
To remove a group, click on the three-dot menu on the top right corner of a group and click "Delete".
Edit a Group
To make changes to a group, click on the three-dot in the top right corner of a group and click "Edit". You can also view and manage a group from the class settings page.
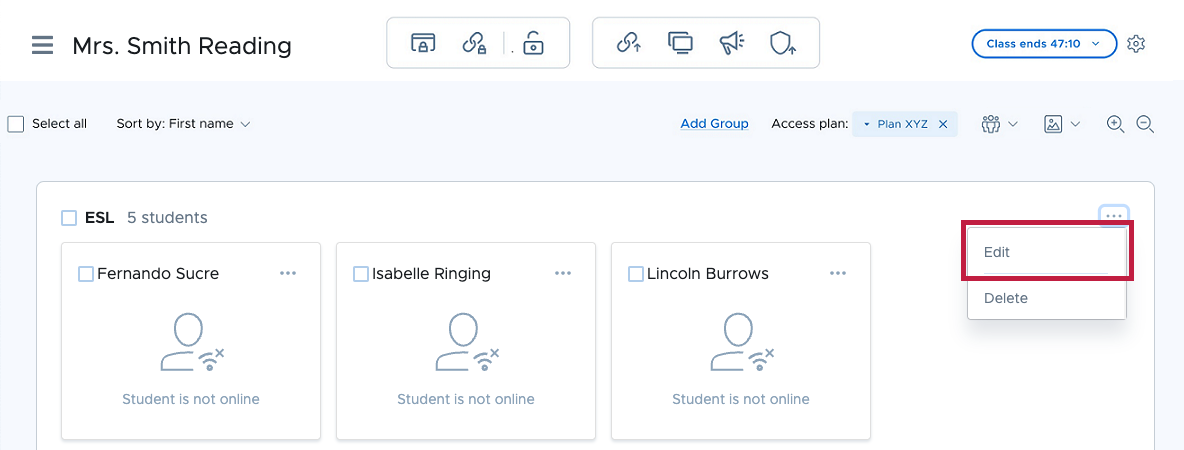
In the sidebar that appears you can change the group’s name or change which students are part of the group. Click on students to add them to the group. If a student is already assigned to another group, the group name will be shown in orange. If they are selected, they will be moved to the new group. You can click on a student that is already in the group to deselect them.
Move Students Between Groups
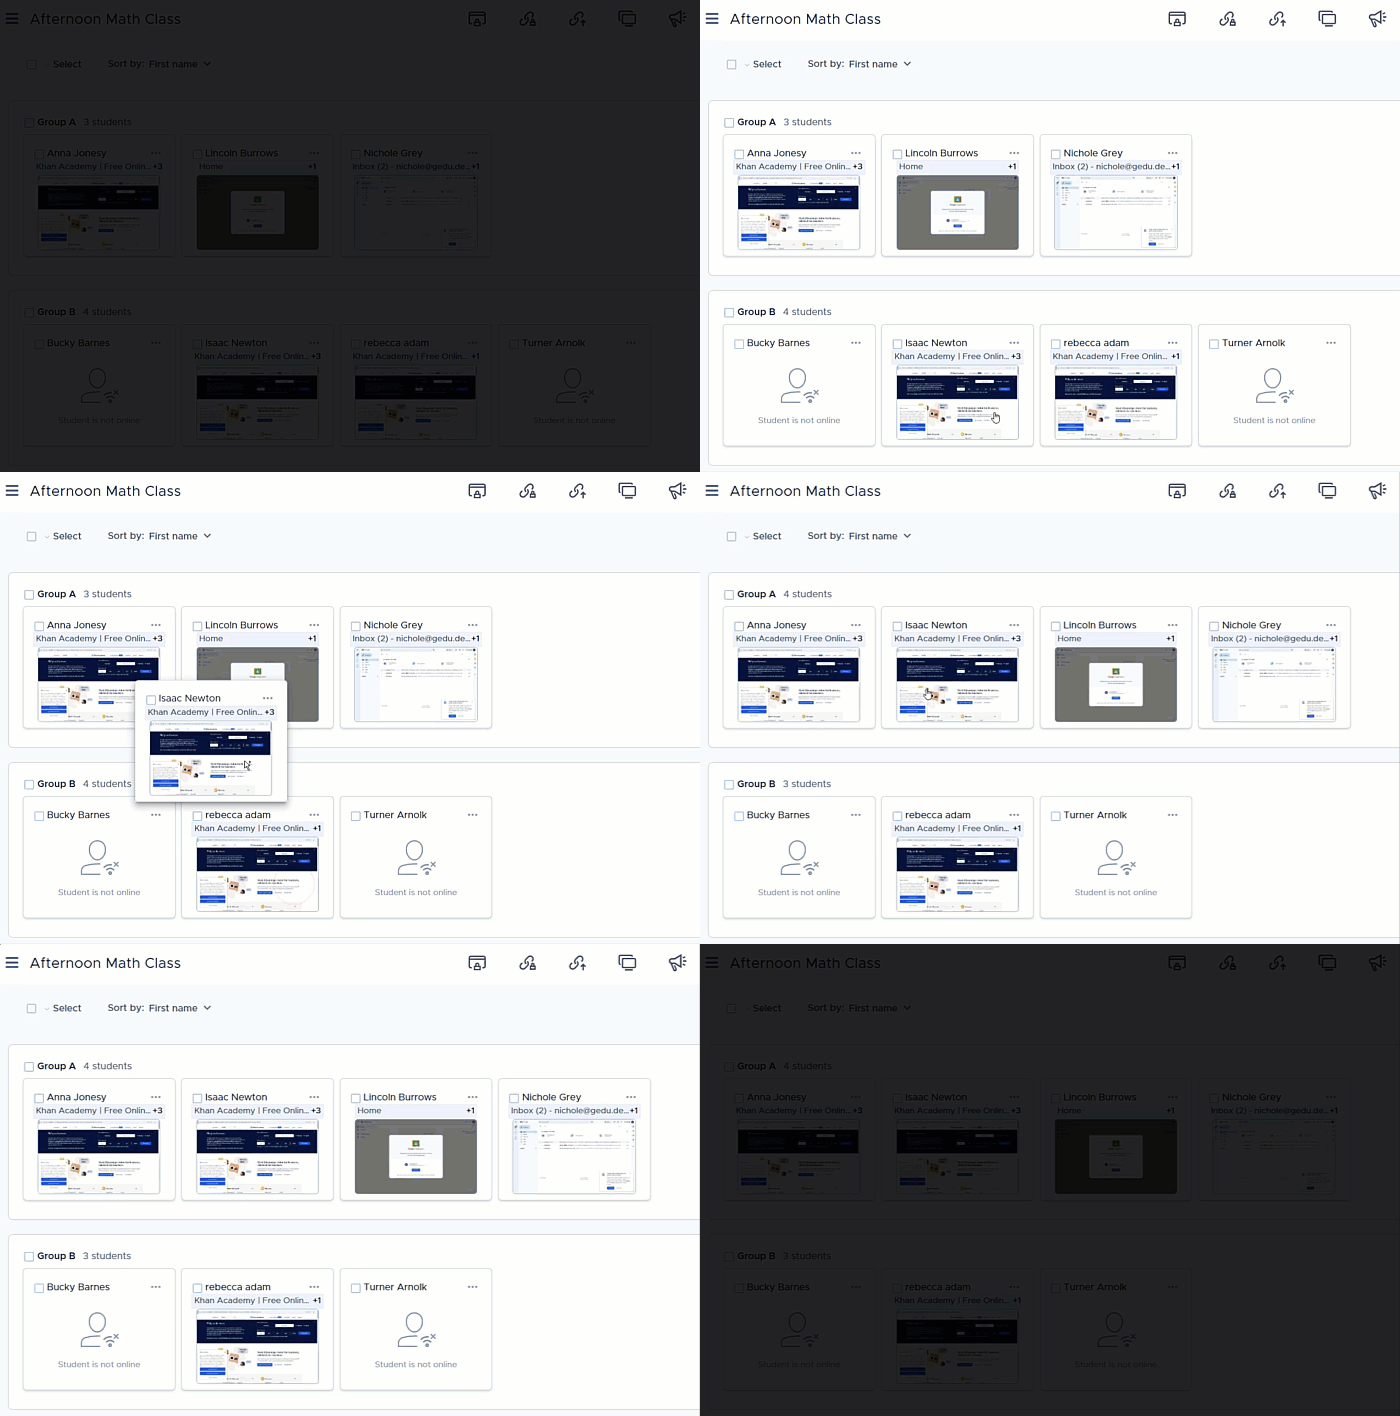
To move students between groups, you can simply drag and drop them. You can also move students by editing any group and selecting or deselecting students.
Use teacher tools with a Group
To use tools like Push URL or Announce with a group, use the checkbox to the left of the group name to select all students in the group.
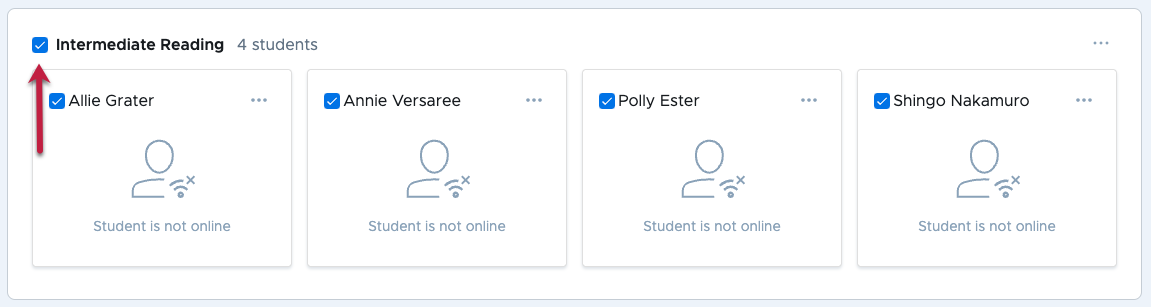
Then, click any of the teacher tools in the top menu bar to use that tool with only students in that group. You can also select multiple groups, or individual students by clicking the select checkbox in the upper left of the group or the student card.
