Classroom › Set up and get started
Setting Defaults for Lost Mode
To set your default Lost Mode settings, select the Settings menu and go to the Google sub-menu.
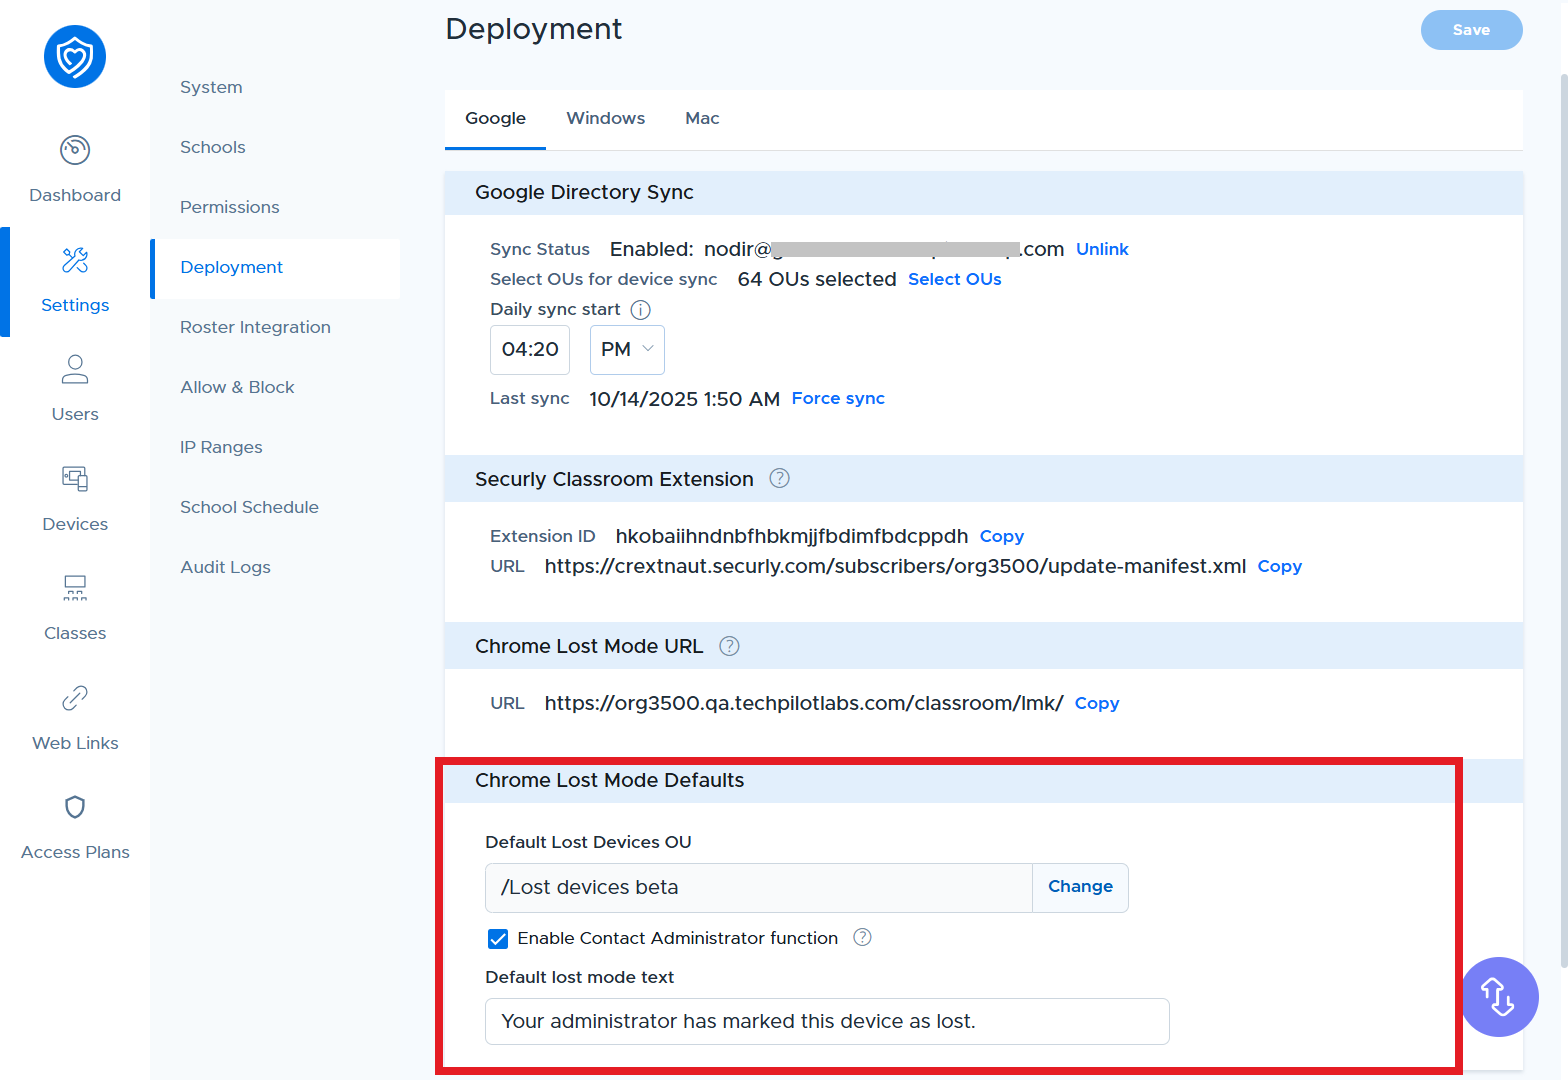
Chrome Lost Mode Kiosk
This section contains the App ID and URL that you'll enter into your Google Admin console when configuring the lost mode OU to run the kiosk app. See the section of this guide: Configure the Lost Device OU for the kiosk app.
Chrome Lost Mode Defaults
| Setting | Description |
|---|---|
| Default Lost Devices OU | Here you can choose the OU from your Google Admin console that you use for lost devices. After the OU is set, you will be able to move devices into the lost devices OU directly from the Devices menu on the Lost Device Details page, without the need to do it from the Google Admin console. |
| Enable Contact Administrator function | When enabled, the Contact Administrator button will be available on the lost mode screen of a lost device. This will allow the user of the device to enter a message that will be sent to the organizational admins who will receive the message as an email and also be able to view it in the Messages section when viewing lost device details. |
| Default lost mode text | This is the text that will appear by default when a device runs the Lost Mode kiosk app. The text can be changed for any individual device later from the Lost Device Details page. |