Classroom › Settings
Schools
The Schools menu allows you to create or edit schools within your organization. A school refers to a site that manages sets of classes and device groups independently.
Note: This menu and concept was referred to as "Locations" in previous versions of Classroom.
New accounts will have a default school called "Default School" already created. If you only have one school, you can use this default name. If you have multiple schools, you should edit the default school to become one of your school locations, then add the others.
To edit a school, click the name from the list.
To add a new school, use the Add School button at the top right corner.
.PNG)
When adding or editing schools, you'll see three tabs for managing your school settings.
-
Details
-
Access Rights
-
School Calendar (Override days)
-
Rotation Days
-
Bell Schedule
School Details
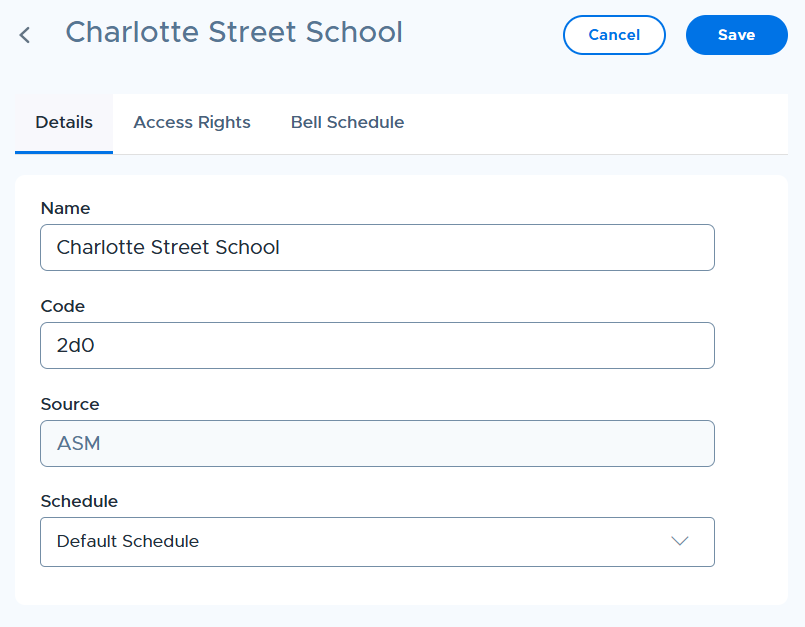
Name: The name of the school
Code: A short code to uniquely identify this school. This might be the school initials or some other code that's already used throughout other systems in the district as the unique identifier for this site. Codes may be shown during data import/export functions such as CSV user import.
Schedule: What schedule the school uses. For more information, see the section on school schedules.
Access Rights
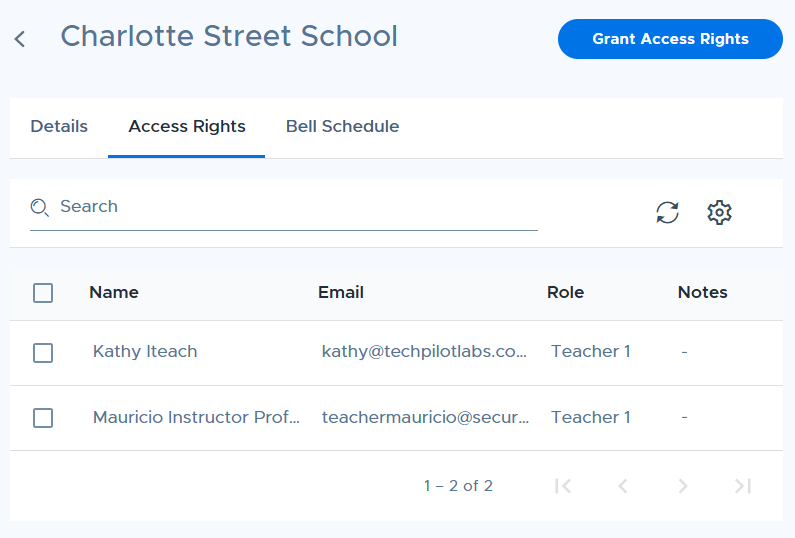
From the Access Rights tab, you can find a list of users who have rights to use this school. By default, when a user is assigned to a school (when they are created or their account is edited) they will automatically be given rights to that school.
You can assign multiple users rights to a single school at once by doing it from this tab and clicking the Grant access rights button. When a user has access to a school, it will appear in their list in the Schools menu.
To revoke access rights, simply select the users by using the checkboxes and use the Revoke Access Rights that appears at the top.
School Calendar
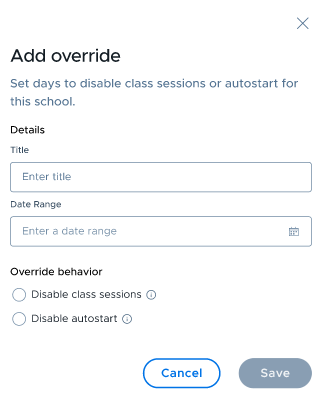
In the School Calendar tab, admins can create override days for events that affect only that school, such as a school-specific holiday, closure, testing day, late start, early dismissal, assembly, or modified schedule.
Disable class sessions: Prevents class sessions from running during the selected date range.
Disable autostart: Prevents scheduled classes from starting automatically while still allowing teachers to start sessions manually.
To add an override, select Add, enter a title, select the date range, choose the appropriate option, and select Save.
Use the Organization Calendar instead when the same override should apply to every school in the district. Schools inherit organization-wide overrides and cannot edit them.
Rotation Days
The Rotation Days tab allows schools with A/B days, rotating drops, or multi-day cycles to easily map their calendar. Teachers can then link their classes to this schedule, ensuring each class automatically starts at the correct time on the correct day.
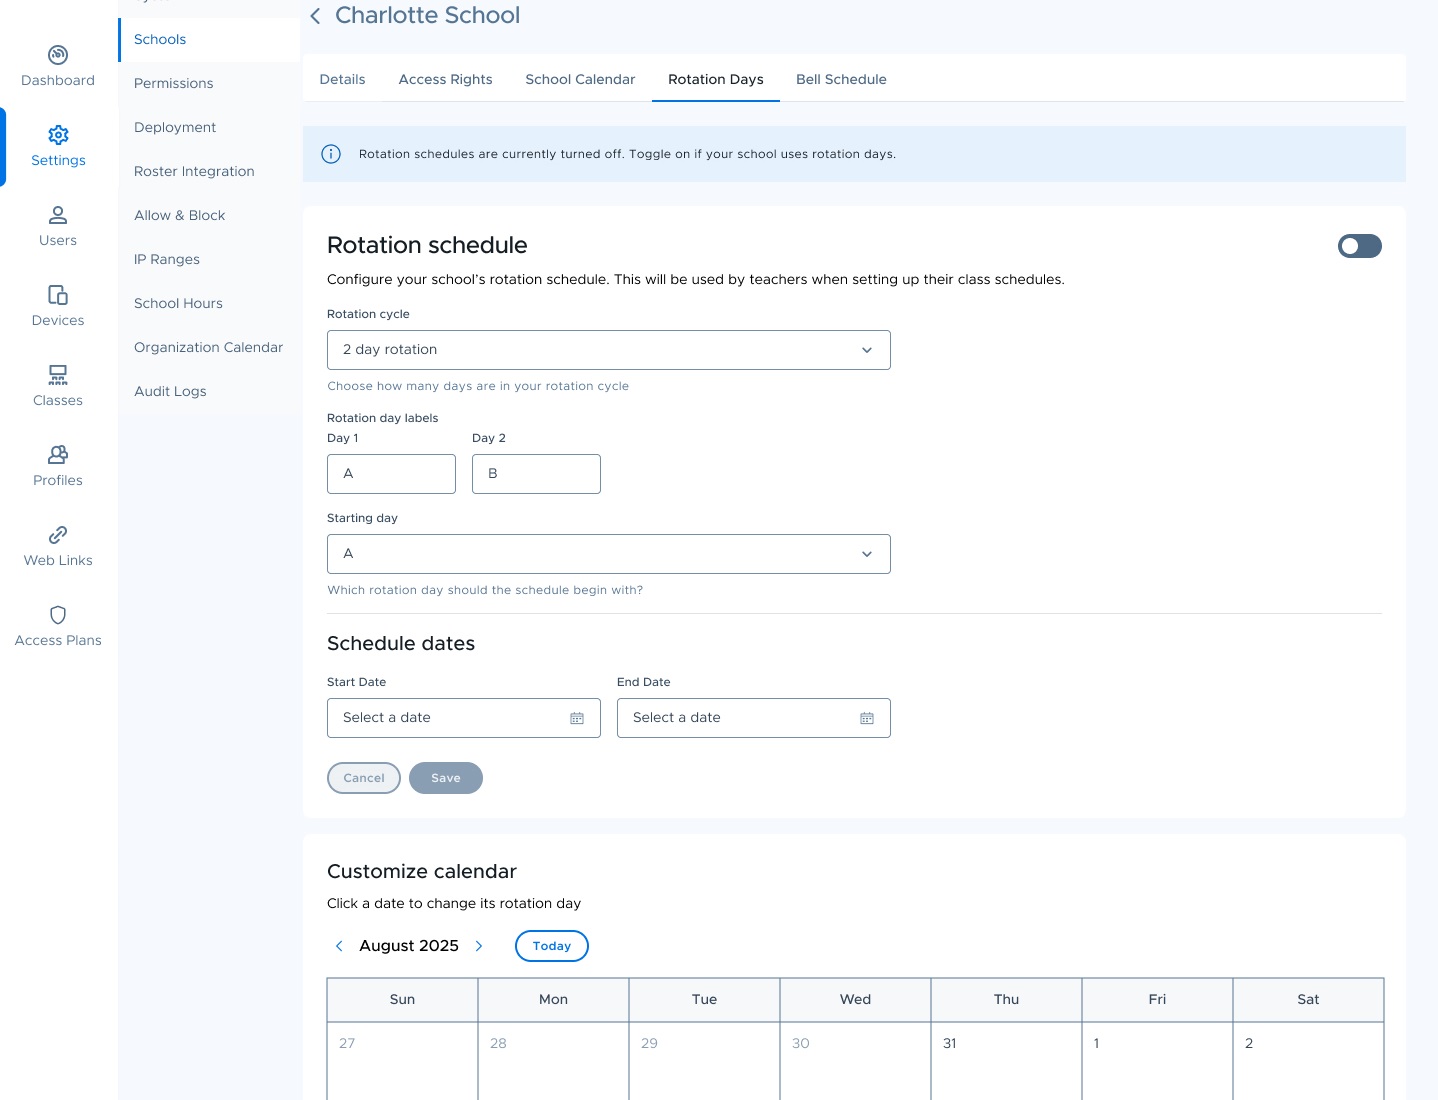
Fill in the below fields to get started.
Rotation cycle: You can set it anywhere from a simple A/B rotation (2 day rotation) to a more complex 8 day rotation.
Rotation day labels: By default, they're pre-filled starting with A, B, C, and so on, but you can rename them to anything else, like a Blue day and Silver day.
Starting day: Select which day in the rotation should be first. If your first day of school is a B Day, just choose B here and the system will sequence everything from there.
Schedule dates: Set the start date and end date for this rotation to align with your school year.
Once you are done, hit Save. Your rotations will now be mapped to the calendar, as shown below.
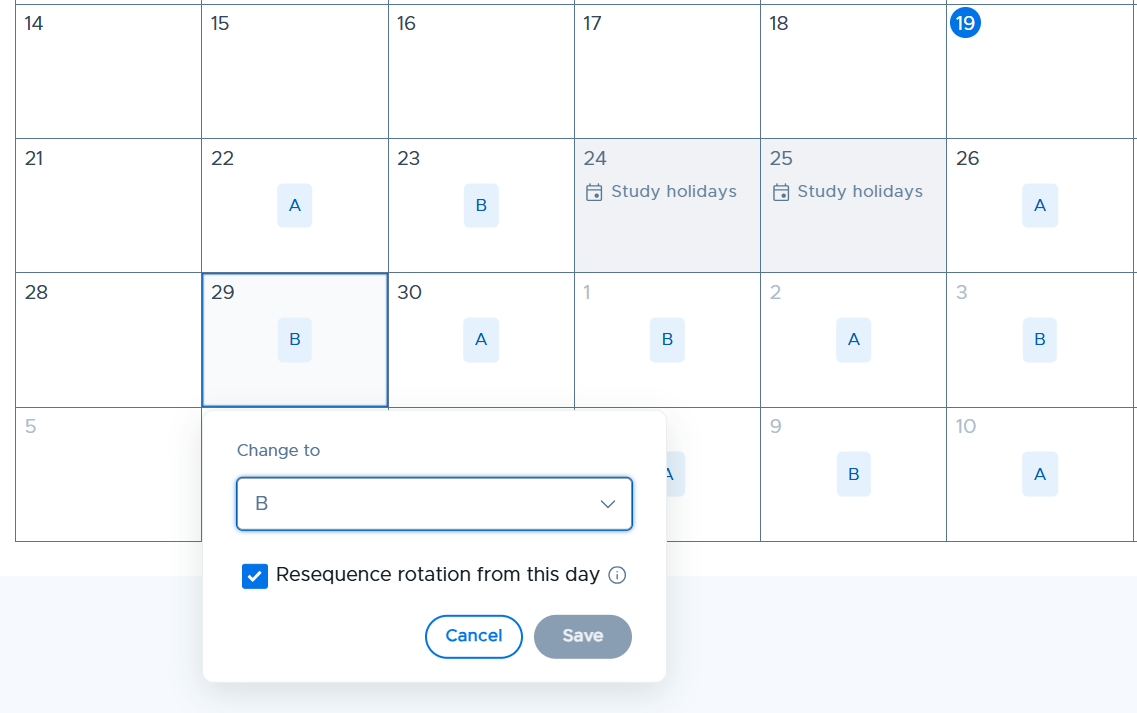
You click on a date and change the rotation day as required. You also have the checkbox to resequence rotation from this day. When unchecked, only this day will change. If you choose to restart the sequence, all future days will recalculate accordingly.
Classroom automatically skips days where sessions are disabled, like your configured override days or holidays, and picks up with the next day in the rotation afterwards.
Note: For schools using bell schedules, once a rotation is configured, the bell schedule automatically switches from weekday-based to rotation-day-based. Instead of configuring periods for Monday, Tuesday, and Wednesday, you'll be configuring them for Day A, Day B, and so on.
For details about how teachers can schedule their classes based on rotation days, refer to the Scheduling Classes section of this guide.
Bell Schedule
From the Bell Schedules tab, admins can provide teachers with a faster, intuitive way to autostart classes. By selecting pre-defined periods or blocks, teachers don't have to manually enter start and stop times for every session. Learn more about auto-start scheduling from Class Settings.
By default, district admins can configure the schedule for any school, or delegate this responsibility to school admins to manage their own specific locations.
.png)
Fill in the below fields to get started.
-
Terminology: You can choose between Periods or Blocks. This selection only changes the UI label and does not affect the underlying functionality.
-
Period Names: Enter the names of your sessions here. Use the + Add Period button to add new period rows or the bin icon to delete them.
-
Schedule Type: You can choose whether the schedule is the same for the whole week or different for each day. For more information, continue reading below.
Managing Bell Schedules
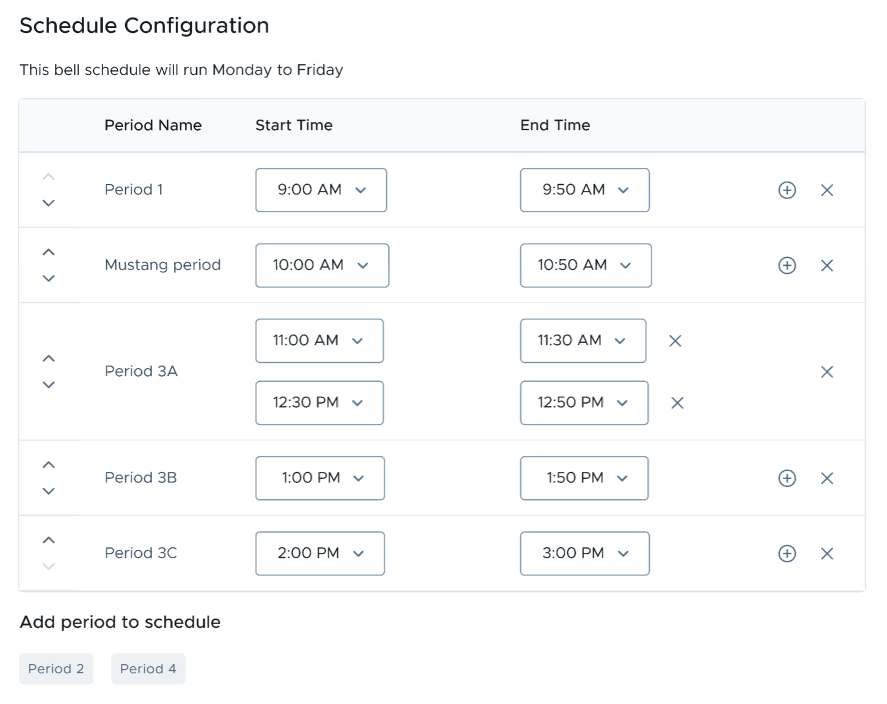
Once you confirm the Schedule Type (same schedule Monday to Friday or different schedule each day), you will find a blank schedule where you can add the periods or blocks you created by clicking on the chips at the bottom.
From this view, you can configure the start and end times. If a session requires a break or split time, you can set two sets of times by clicking the + icon.
Selecting the Different schedule each day option allows you to configure days individually using the day tabs. You can select multiple days to share the same schedule by using the checkboxes at the top.
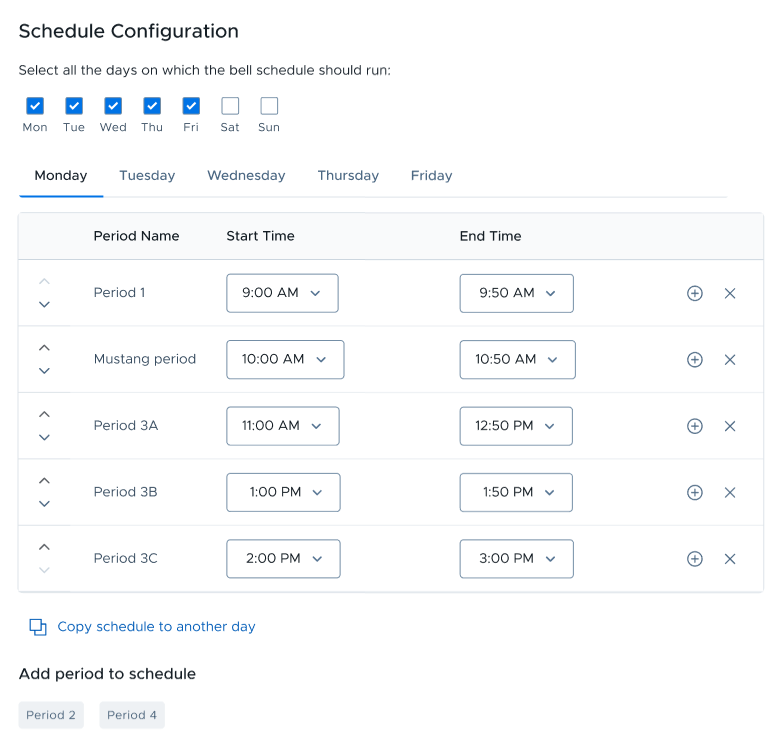
Clicking the Copy schedule to another day option copies the current day’s timing to your selected days. Once copied, each day remains independent and can be edited further